Pumpkin Patch Veggie Tray for Halloween
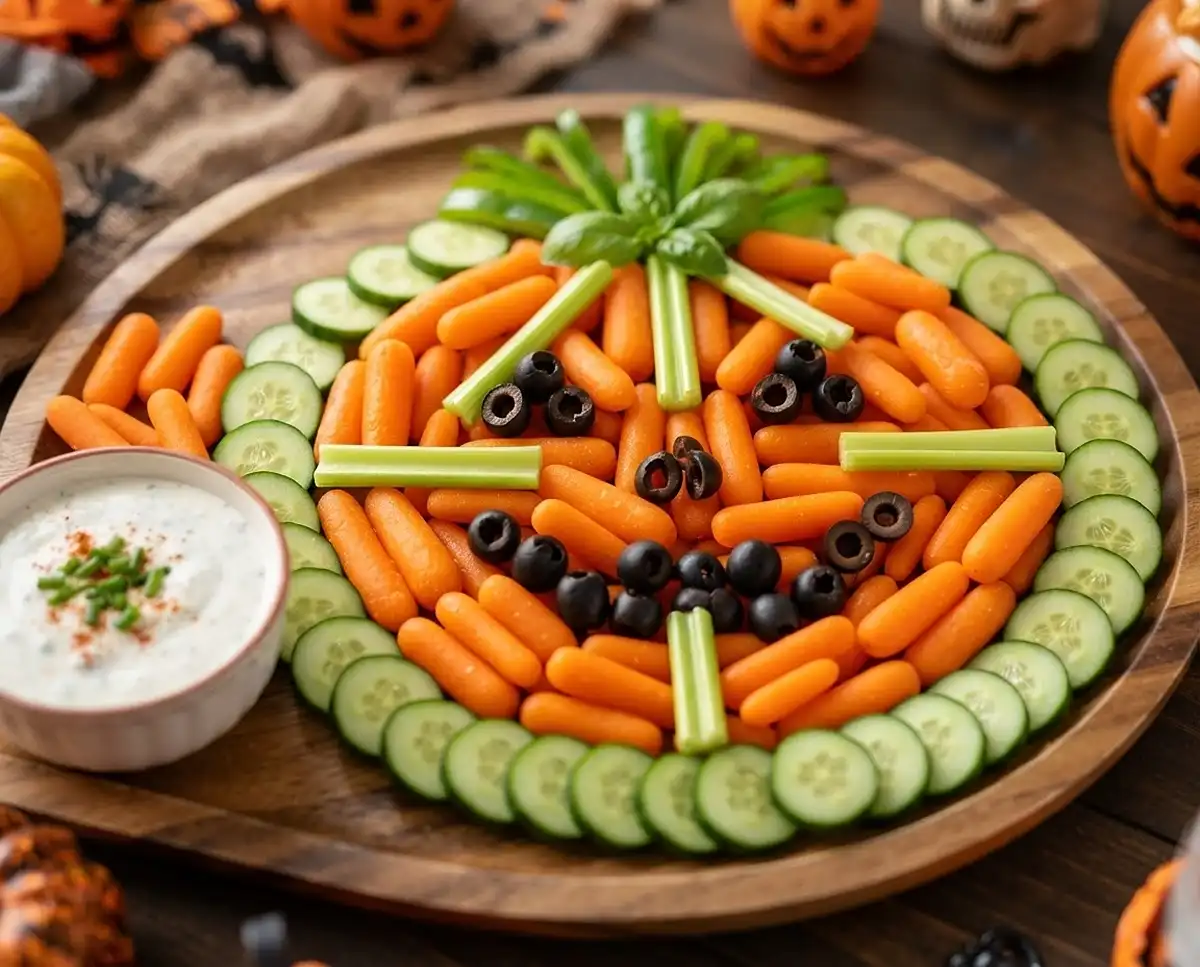
This Pumpkin Patch Veggie Tray turns basic veggies into a Halloween showstopper in fifteen minutes flat. Even picky kids eat their vegetables at this one.
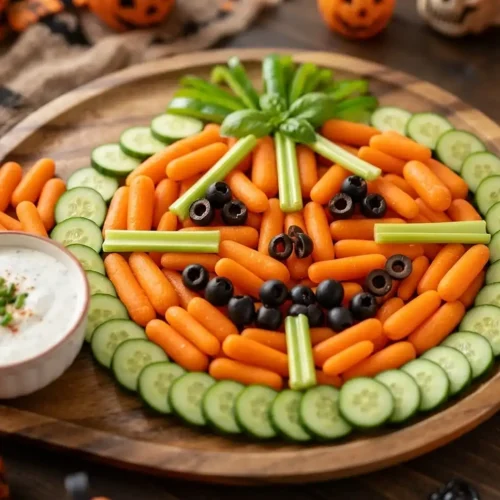
A Pumpkin Patch Veggie Tray is a no-cook Halloween appetizer where fresh vegetables are arranged into the shape of a jack-o’-lantern. This recipe serves 6 to 8 people as a party appetizer, delivers a crunchy, colorful snack platter that works as tablescape decor too, and is perfect for Halloween parties, fall gatherings, or a classroom treat that isn’t candy.
Here’s everything you need to make it perfectly.
I made my first Pumpkin Patch Veggie Tray for my daughter’s third grade Halloween party, and it was gone before anyone touched the cupcakes. Turns out kids will eat a mountain of carrots if you tell them it’s a pumpkin’s face. I’ve built this tray probably twenty times since then, and I still somehow forget the olives until the very last step.
Table of Contents
Why You’ll Love This Pumpkin Patch Veggie Tray
This tray takes about fifteen minutes, uses six ingredients from any grocery store, and looks like it belongs on a magazine cover. It’s naturally vegetarian, easy to make gluten-free just by checking your dip, and forgiving enough that a slightly wobbly pumpkin shape still reads as “pumpkin” to a five-year-old. Nobody has to turn on the oven, and cleanup is basically a cutting board and a knife.
What Ingredients Do You Need for a Pumpkin Patch Veggie Tray?
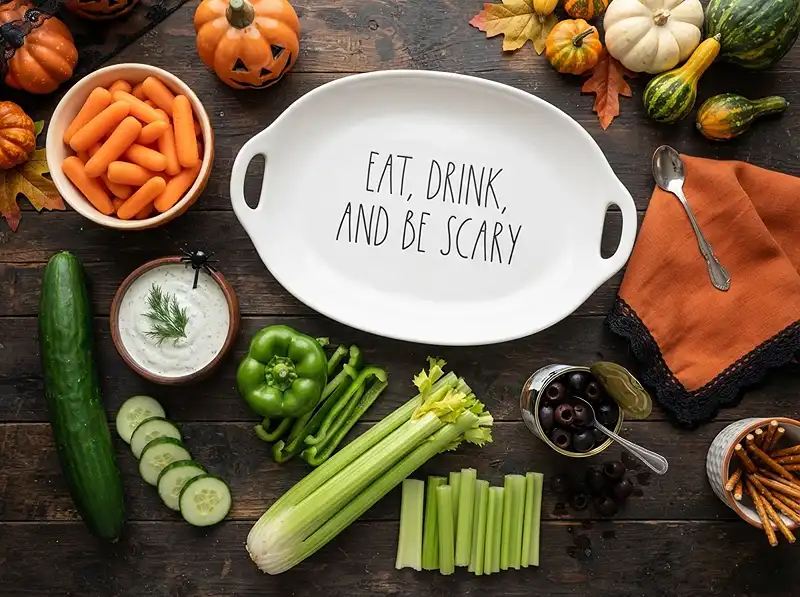
| Ingredient Group | Ingredient | Amount | Notes |
|---|---|---|---|
| Main Ingredients | Baby carrots | 2 cups | Forms the pumpkin body |
| Main Ingredients | Cucumber, sliced | 1 whole | Outlines the outer edge |
| Main Ingredients | Celery stalk, cut into sticks | 1 stalk | Creates inner segments |
| Main Ingredients | Black olives | ½ cup | Forms the eyes and mouth |
| Main Ingredients | Green pepper strips | 2 strips | Forms the stem |
| For Dipping | Ranch or hummus | 1 small bowl | Center or side placement |
Baby carrots are doing the heavy lifting here since they’re already the right shape and color for a pumpkin body, which is exactly why this healthy pumpkin snack comes together so fast. The black olives are non-negotiable for the face — nothing else gives you that same graphic, cartoonish eye shape. If you’re serving a crowd that leans health-conscious, hummus turns this into more of a Mediterranean-style vegetable tray with dip instead of a ranch situation.
How to Make a Pumpkin Patch Veggie Tray Step by Step
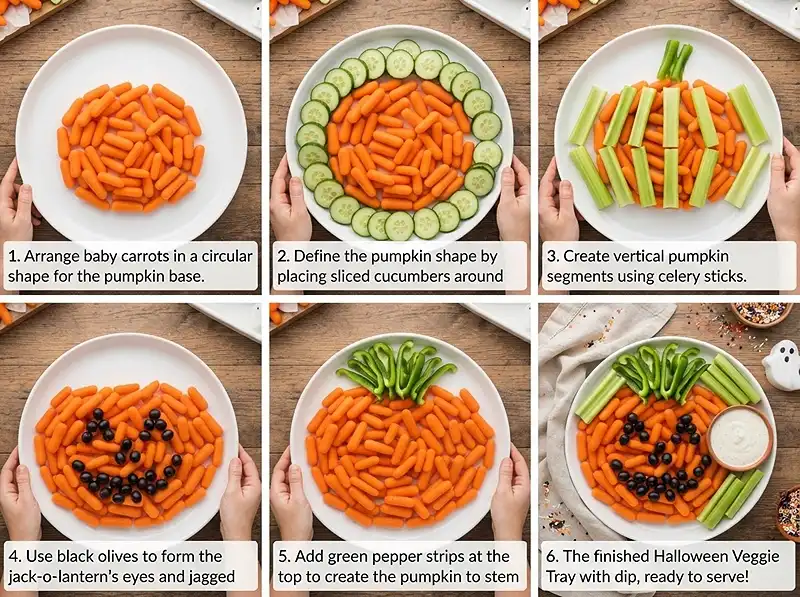
- Arrange the baby carrots on a large platter in the shape of a pumpkin.
💡 Sketch the outline with the carrots first before filling anything in — it’s way easier to adjust the shape now than after you’ve added other vegetables.
- Use the sliced cucumber to form the outer edge of the pumpkin.
- Place the celery sticks to create segments within the pumpkin shape.
Pro Tip: Running the celery sticks vertically from the center out mimics real pumpkin ridges and makes the shape read instantly.
- Use the black olives to form the “eyes” and “mouth” of the pumpkin.
💡 Cut the olives in half lengthwise if you want a more triangular, jack-o’-lantern look instead of round dots.
- Use the green pepper strips to create a “stem” at the top of the pumpkin.
- Place a small bowl of ranch or hummus in the center or to the side for dipping.
Pro Tip: Setting the dip bowl slightly off-center keeps the pumpkin face fully visible, which matters if you’re taking a photo before the party.
Expert Tips for Perfect Pumpkin Patch Veggie Tray
Pro Tips for Success
The key to a clean pumpkin outline is working from the outside in — place your cucumber border first, then fill the interior with carrots so you’re not constantly readjusting the edge. For best results, cut your vegetables the morning of the party and keep them in an airtight container until you’re ready to assemble, since pre-cut veggies sitting out too long start to look tired.
The most common mistake is placing the olive face too close to the top of the shape — instead, center it slightly below the midpoint so it actually looks like a face and not a hat. This Halloween veggie platter works best when your platter has a slight lip or rim, which keeps loose carrots from rolling off the edge as guests dig in.
One thing I wish someone had told me the first time: pat your cucumber slices dry with a paper towel before placing them. Wet cucumber slides around on the platter and ruins your outline within the first ten minutes of the party.
Delicious Variations
Healthy Version: Swap the ranch for hummus or a Greek yogurt-based dip to cut the fat and add protein, which keeps this closer to a genuinely healthy pumpkin snack instead of a dip delivery vehicle.
Alternative Ingredients: No black olives on hand? Sliced grape tomatoes or small broccoli florets work for the face if you don’t mind a less traditional look.
Vegan Version: This tray is already vegan as long as you choose hummus instead of ranch for the dip, since most bottled ranch contains dairy.
Troubleshooting Common Problems
Problem: The pumpkin shape keeps collapsing or looking messy. Solution: Use a platter at least 14 inches wide so you have room to work, and build the cucumber outline first as a fixed border before adding anything else.
Problem: The vegetables dry out before the party starts. Solution: Assemble everything except the olive face up to a few hours ahead, cover loosely with plastic wrap, and add the olives and dip right before serving.
How to Store and Reheat Pumpkin Patch Veggie Tray
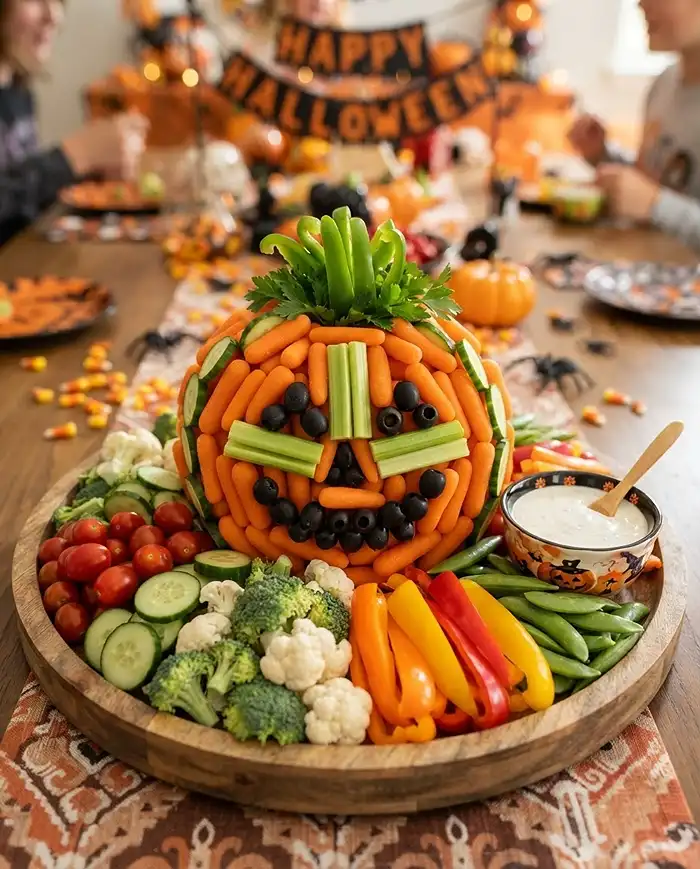
| Storage Method | Duration | Best Practice |
|---|---|---|
| Room Temperature | Up to 2 hours | Fine for active party serving, then refrigerate |
| Refrigerator | 3 to 4 days | Store veggies and dip in separate containers |
| Freezer | Not recommended | Fresh vegetables lose crunch and turn watery |
There’s no actual reheating here since this is a cold platter, but leftover carrots, cucumber, and celery keep their crunch best when stored dry and separate from any liquid dip. If you’ve got scraps left over, toss them into a quick stir-fry, chop them into a chicken salad, or blend them into a vegetable soup instead of letting them go soft in the crisper drawer. Leftover hummus or ranch also works fine as a sandwich spread for the next couple of days.
FAQs About Pumpkin Patch Veggie Tray
How far in advance can I make a Pumpkin Patch Veggie Tray?
You can cut all the vegetables up to a day ahead and store them separately in airtight containers. Assemble the actual pumpkin shape within a few hours of serving so the cucumber and olives don’t dry out or shift around.
What vegetables can I substitute in this recipe?
Grape tomatoes or broccoli florets work in place of black olives for the face, and bell pepper strips can substitute for celery if you prefer a softer crunch. Stick to firm, easy-to-cut vegetables so the shape holds together on the platter.
Is this Pumpkin Patch Veggie Tray gluten-free?
Yes, as long as your ranch or hummus dip is labeled gluten-free, since some bottled ranch dressings contain gluten-based thickeners. Hummus is naturally gluten-free in almost every case, making it the safer default.
How do I keep the vegetables fresh during a party?
Keep the platter refrigerated until right before guests arrive, and if the party runs long, nest the platter over a bowl of ice to slow wilting. Two hours at room temperature is the general cutoff before texture starts to suffer.
Can I make this vegan or dairy-free?
Yes, simply use hummus instead of ranch dressing since most ranch contains buttermilk or other dairy. Every vegetable in this recipe is naturally vegan on its own.
Honestly, this is one of those recipes that looks way harder than it is — seriously, you’re just arranging vegetables on a plate. If you make this Pumpkin Patch Veggie Tray for your own Halloween party, save the pin so you can find it again next October, and I mean it when I say I want to know how your olive face turns out in the comments.
For more no-cook party ideas, check out this Greek yogurt ranch veggie board, and if you need a sweeter follow-up for the dessert table, these honey whipped goat cheese bites pair surprisingly well with a fall spread.
This Pumpkin Patch Veggie Tray turns carrots, cucumber, and olives into a crunchy jack-o-lantern face perfect for Halloween parties. Save this one for snack season.
Pumpkin Patch Veggie Tray
Equipment
- Large Platter
- Cutting board
- Knife
Ingredients
Main Ingredients
- 2 cups Baby carrots Forms the pumpkin body
- 1 whole Cucumber, sliced Outlines the outer edge
- 1 stalk Celery stalk, cut into sticks Creates inner segments
- ½ cup Black olives Forms the eyes and mouth
- 2 strips Green pepper strips Forms the stem
For Dipping
- 1 small bowl Ranch or hummus Center or side placement
Instructions
- Arrange the baby carrots on a large platter in the shape of a pumpkin.
- Use the sliced cucumber to form the outer edge of the pumpkin.
- Place the celery sticks to create segments within the pumpkin shape.
- Use the black olives to form the “eyes” and “mouth” of the pumpkin.
- Use the green pepper strips to create a “stem” at the top of the pumpkin.
- Place a small bowl of ranch or hummus in the center or to the side for dipping.