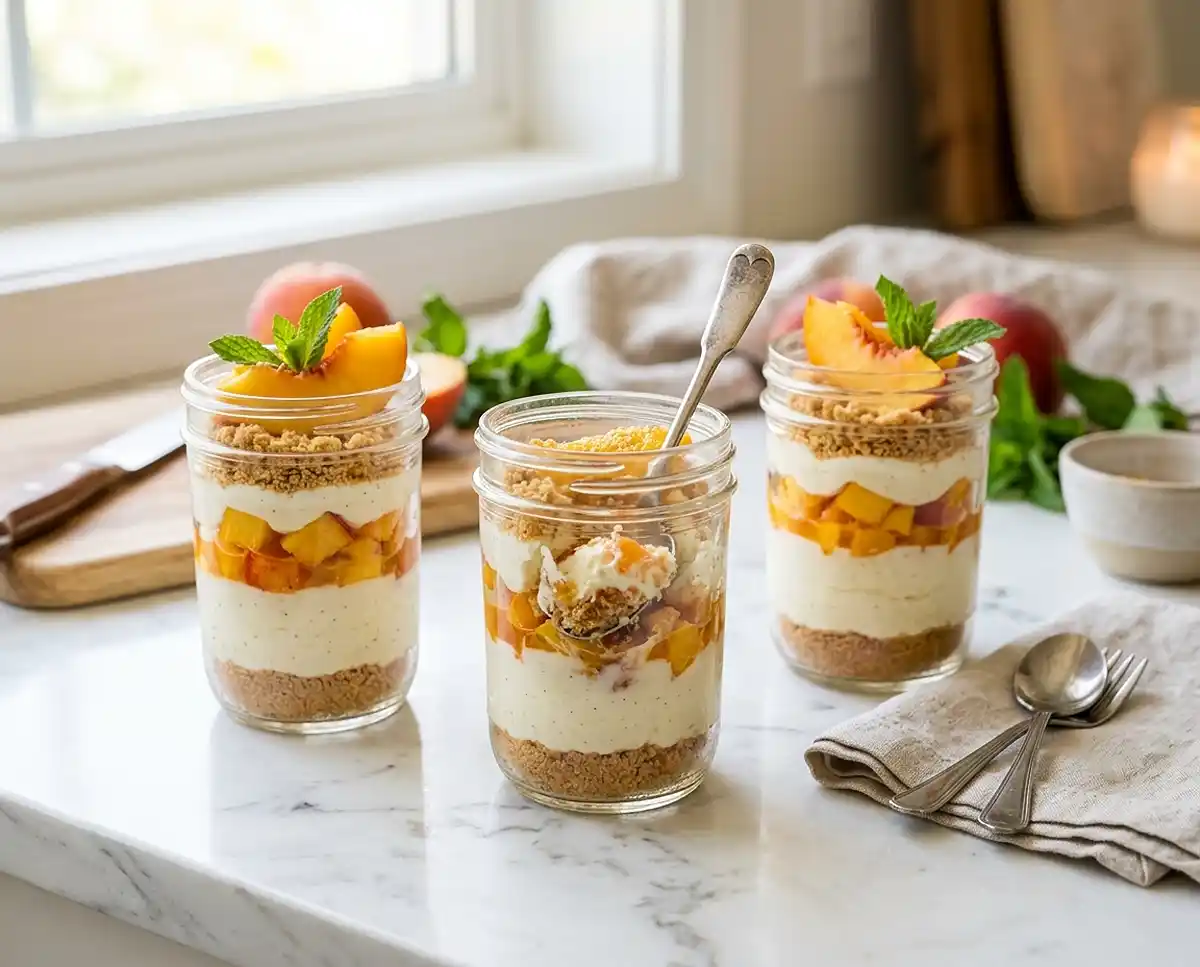
No-Bake Peach Cheesecake Jars
These no-bake peach cheesecake jars are the easiest individual dessert you’ll make all summer. Creamy, fruity, and no oven required. Save this recipe now.
No-Bake Peach Cheesecake Jars are individual layered desserts made with a buttery graham cracker crust, silky cream cheese filling, and sweet diced peaches, assembled in small jars and chilled until set. This recipe makes 6 to 8 jars, delivers a creamy, lightly tangy cheesecake layer with soft, juicy peach on every spoonful, and is perfect for summer gatherings, make-ahead entertaining, or a no-fuss weeknight treat.
These peach cheesecake jars feel like the kind of dessert summer disappears too quickly for—cool, creamy, and almost guaranteed to be the first thing gone. If this one’s tempting you, don’t miss more chilled no-bake summer desserts.
Table of Contents
Why You’ll Love These No-Bake Peach Cheesecake Jars
They taste like a proper cheesecake — rich, creamy, lightly tangy — but come together in about 20 minutes with zero oven time. That alone makes them worth keeping in your rotation.
The individual jar format means no slicing, no serving fuss, and built-in portion control. You can make them ahead and pull them straight from the fridge when it’s time to serve.
And because everything is layered visually in clear jars, they look impressive with almost no effort. Great for guests who don’t need to know how easy this actually was.
What Ingredients Do You Need for Peach Cheesecake Jars?

| Ingredient Group | Ingredient | Amount | Notes |
|---|---|---|---|
| Crust | Graham cracker crumbs | 1 1/2 cups | Fine crumbs hold together best |
| Crust | Granulated sugar | 1/4 cup | For the crust layer only |
| Crust | Unsalted butter, melted | 1/3 cup | Binds the crumb mixture |
| Cheesecake Filling | Cream cheese, softened | 8 oz (1 package) | Must be fully softened |
| Cheesecake Filling | Granulated sugar | 1/2 cup | For the filling only |
| Cheesecake Filling | Vanilla extract | 1 teaspoon | Pure vanilla preferred |
| Cheesecake Filling | Whipped topping (Cool Whip), thawed | 8 oz (1 container) | Fold in gently |
| Fruit Layer | Canned sliced peaches in light syrup, drained and diced | 15 oz (1 can) | Drain thoroughly before dicing |
| Garnish | Fresh mint | To taste | Optional, add just before serving |
Canned peaches in light syrup are the move for this easy peach dessert — they’re consistently sweet, already soft, and available year-round, which means you’re not locked into a narrow summer window when fresh peaches are actually good. Drain them well and dice them small so each layer holds together cleanly in the jar.
The cream cheese is the backbone of the filling, so it genuinely needs to be at full room temperature before you beat it. Cold cream cheese creates lumps that won’t blend out no matter how long you run the mixer. Leave it on the counter for at least an hour — 90 minutes is better — and the filling will be perfectly smooth.
How to Make Peach Cheesecake Jars Step by Step
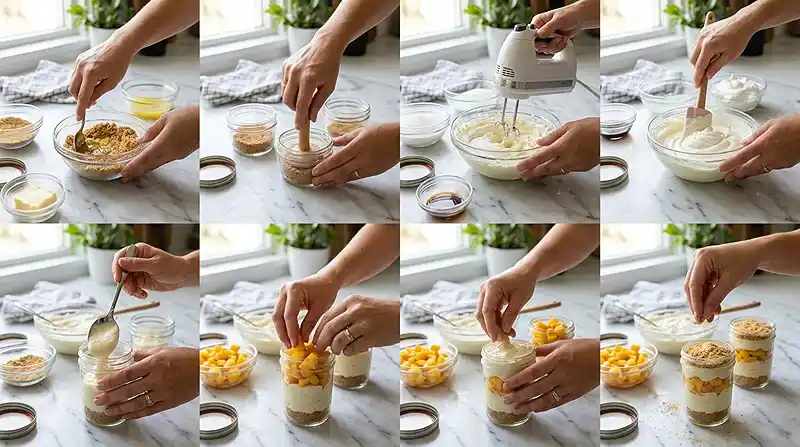
Make the Graham Cracker Crust
- Combine the graham cracker crumbs, 1/4 cup granulated sugar, and melted butter in a medium bowl.
- Mix until all the crumbs are evenly coated and the mixture holds together when pressed.
- Divide approximately half of the graham cracker mixture among 6 to 8 small jars or glasses, pressing gently into the bottom to form the crust layer.
Pro Tip: Use the bottom of a small spoon or the end of a rolling pin to press the crust firmly into each jar. A loose crust crumbles when you scoop through the layers.
Make the Cheesecake Filling
- Beat the softened cream cheese, 1/2 cup granulated sugar, and vanilla extract together in a large bowl until completely smooth and creamy.
- Gently fold in the thawed whipped topping until no white streaks remain.
Pro Tip: The key to a silky cheesecake filling is beating the cream cheese until it’s completely lump-free before folding in the whipped topping. Once the whipped topping goes in, switch to folding — aggressive stirring deflates it and makes the filling dense.
Assemble the Jars
- Spoon approximately half of the cream cheese mixture over the graham cracker crust in each jar.
- Add a layer of diced peaches over the cream cheese layer.
- Repeat with the remaining cream cheese mixture, adding a second layer on top of the peaches.
- Top with a second layer of diced peaches.
- Sprinkle the remaining graham cracker crumbs over the top of each jar.
Pro Tip: For best results when layering individual peach cheesecakes, use a piping bag or a zip-top bag with the corner snipped to add the cream cheese filling cleanly. It keeps the jar walls tidy and the layers visually distinct.
Chill and Serve
- Cover the jars and refrigerate for at least 2 to 4 hours, or preferably overnight, to allow the cheesecake filling to set fully.
- Garnish with fresh mint just before serving, if desired.
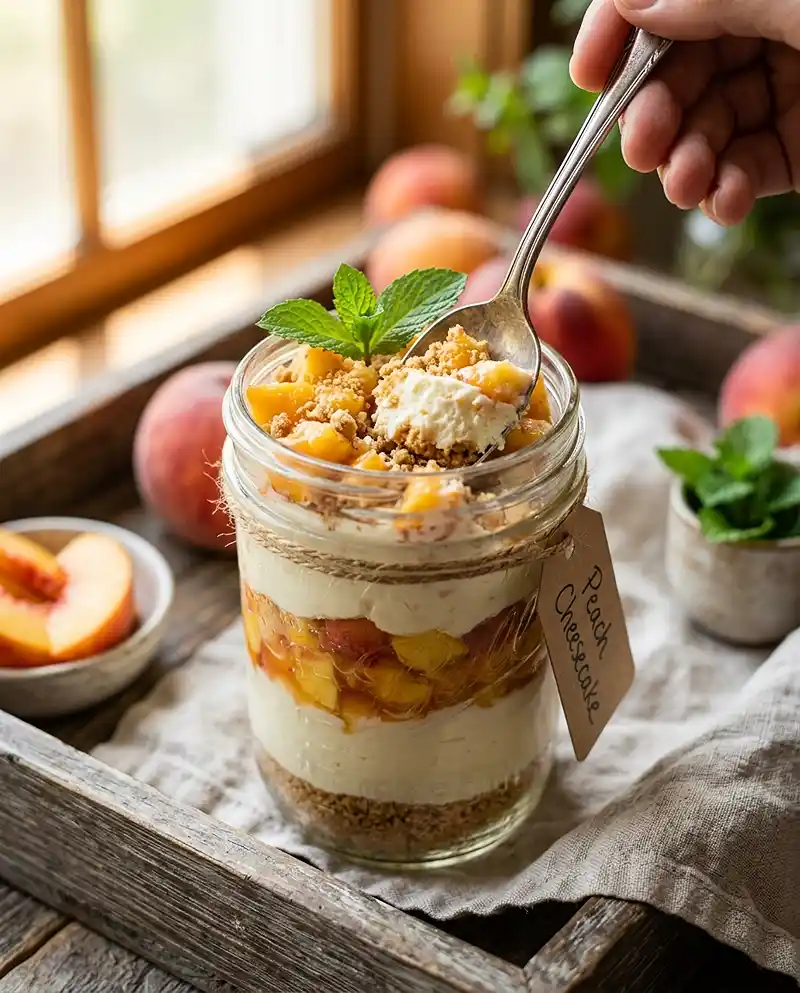
Expert Tips for Perfect No-Bake Peach Cheesecake Jars
Pro Tips for Success
The key to clean, distinct layers is chilling the jars fully before serving. At the 2-hour mark the filling is set but still soft. Overnight is noticeably better — the layers firm up, the crust absorbs just enough moisture to get slightly fudgy at the bottom, and the whole thing tastes more cohesive.
For best results, drain the canned peaches in a fine-mesh strainer for at least 10 minutes before dicing. Excess syrup bleeds into the cream cheese layer and makes the filling look streaky and watery, especially by day two.
The most common mistake with summer no-bake desserts like this is under-beating the cream cheese — instead, beat it for a full 2 minutes on medium speed before adding anything else. It should look light and almost fluffy before the sugar goes in.
No-Bake Peach Cheesecake Jars work best when assembled in order: crust first, filling second, peaches third, then repeat. Reversing the layers makes the crust soggy faster because the peach moisture travels downward.
Here’s the thing about the graham cracker crumble on top: don’t skip it, but don’t add it more than a few hours before serving. It softens quickly once it’s in contact with the filling, and a slightly crunchy top layer is what makes the texture contrast actually work.
Delicious Variations
Quick Version: Skip the layering and stir the diced peaches directly into the cream cheese filling, then spoon into jars and top with crumbs. It’s less visually layered but just as delicious as a peach parfait recipe and takes half the assembly time.
Alternative Ingredients: Swap the canned peaches for fresh peaches when they’re in season — peel, dice, and toss with a teaspoon of sugar first to draw out the juices. You can also substitute other canned stone fruits like apricots or pears for a different easy peach dessert variation throughout the year.
Dairy-Free Version: Use a dairy-free cream cheese alternative and a coconut-based whipped topping in place of Cool Whip. The texture is slightly lighter, but the flavor still works well with the sweet peach layers. Check that your graham crackers are also dairy-free, as some brands contain butter powder.
Troubleshooting Common Problems
Problem: The cream cheese filling has lumps that won’t smooth out.
Solution: The cream cheese wasn’t soft enough before beating. You can try microwaving the filling in 10-second intervals, stirring between each, but the better fix is to let the cream cheese sit at room temperature longer next time — a full 90 minutes is the sweet spot.
Problem: The crust is crumbly and doesn’t hold together at the bottom of the jar.
Solution: The butter ratio may be slightly off, or the crumbs weren’t pressed firmly enough. Add another teaspoon of melted butter to the mixture and press harder with the back of a spoon — the crumbs need real compression to stay together when you dig through the layers.
Problem: The filling is runny and won’t hold its shape in the jar.
Solution: The whipped topping was either too warm when folded in, or the filling didn’t chill long enough. Make sure the Cool Whip is fully thawed but still cold, and give the assembled jars at least 4 hours in the fridge before serving.
How to Store and Reheat No-Bake Peach Cheesecake Jars
| Storage Method | Duration | Best Practice |
|---|---|---|
| Room Temperature | 2 hours maximum | Keep covered; serve cold |
| Refrigerator | Up to 4 days | Cover jars tightly with lids or plastic wrap |
| Freezer | Up to 1 month | Freeze without the crumb topping; add fresh before serving |
These are served cold — no reheating involved. Pull them straight from the fridge and add the mint garnish right before serving. If frozen, thaw overnight in the refrigerator and add a fresh sprinkle of graham cracker crumbs to the top before serving.
The jars hold up well in the fridge for 4 days, though the crust softens progressively. Day two and three are honestly the sweet spot — the crust has absorbed just enough moisture to get slightly fudgy without falling apart, and the layers have fully set.
If you love no-bake jar desserts, our no-bake strawberry cheesecake cups and patriotic berry cheesecake jars use the same base recipe with different fruit layers — they rotate in perfectly for different seasons and occasions.
FAQs About No-Bake Peach Cheesecake Jars
Can I make no-bake peach cheesecake jars the night before?
Yes, and overnight chilling is actually the recommended approach. The filling sets more firmly, the crust softens to just the right texture, and the layers meld together in a way that 2 hours of chilling doesn’t achieve. Assemble them the night before, cover tightly, and they’re ready to serve the next day with no extra work.
Can I use fresh peaches instead of canned?
Yes. Peel and dice fresh peaches and toss them with a teaspoon of granulated sugar first to draw out some of their natural juices. Fresh peaches have more texture and a brighter flavor than canned, but they also release more moisture, so drain off any accumulated liquid before layering. Fresh peaches work best during peak summer season when they’re fully ripe and sweet.
What size jars work best for this recipe?
8-ounce mason jars are the most practical size — they’re wide enough to layer easily and deep enough to fit two full rounds of crust, filling, and peaches. Half-pint wide-mouth jars work especially well. You can also use small drinking glasses, dessert cups, or ramekins if you don’t have mason jars on hand.
Can I freeze these cheesecake jars?
Yes, with one modification: freeze the jars without the graham cracker crumb topping. The crumbs lose their texture completely after freezing and thawing. Freeze for up to one month, thaw overnight in the refrigerator, and add a fresh sprinkle of crumbs just before serving. The filling and peach layers freeze and thaw well without significant texture change.
Can I substitute the whipped topping with homemade whipped cream?
You can, but the jars won’t hold up as long in the fridge. Cool Whip is stabilized and maintains its structure for several days, which is why it works so well in make-ahead no-bake desserts. Homemade whipped cream begins to deflate after 24 hours and can make the filling weep. If you use it, plan to serve the jars within one day of assembling.
Make a Batch This Weekend
Honestly, these are one of those desserts that feel more impressive than the effort involved — and I mean that as the highest possible compliment. Twenty minutes of work, a few hours in the fridge, and you’ve got individual desserts that look like you really tried.
Save this to Pinterest so you’ve got it ready when peach season hits or when you need a no-oven dessert for company. And drop a comment below if you try them — seriously, I want to know if you went fresh or canned peaches.
If you’re building out your no-bake jar dessert collection, our cherry cheesecake fluff and frozen berry cream pie cups are both worth adding to the lineup next.
No-Bake Peach Cheesecake Jars — creamy cheesecake filling, sweet peaches, and a buttery graham cracker crust layered in individual jars. Make-ahead and no oven needed. Save this now!
No-Bake Peach Cheesecake Jars
Equipment
- Medium Mixing Bowl
- Large mixing bowl
- Electric mixer
- 6 to 8 small jars or glasses (8 oz mason jars recommended)
- Fine-mesh strainer
- Spatula
- Piping bag or zip-top bag (optional)
Ingredients
Crust
- 1 ½ cups Graham cracker crumbs Fine crumbs hold together best
- ¼ cup Granulated sugar For the crust layer only
- ⅓ cup Unsalted butter, melted Binds the crumb mixture
Cheesecake Filling
- 8 oz Cream cheese, softened Must be fully softened
- ½ cup Granulated sugar For the filling only
- 1 teaspoon Vanilla extract Pure vanilla preferred
- 8 oz Whipped topping (Cool Whip), thawed Fold in gently, keep cold
Fruit Layer
- 15 oz Canned sliced peaches in light syrup, drained and diced Drain thoroughly before dicing
Garnish
- Fresh mint Optional, add just before serving
Instructions
- Combine the graham cracker crumbs, 1/4 cup granulated sugar, and melted butter in a medium bowl and mix until all crumbs are evenly coated.
- Divide approximately half of the graham cracker mixture among 6 to 8 small jars or glasses, pressing gently but firmly into the bottom to form the crust layer.
- Beat the softened cream cheese, 1/2 cup granulated sugar, and vanilla extract in a large bowl until completely smooth and creamy with no lumps remaining.
- Gently fold in the thawed whipped topping until no white streaks remain, being careful not to deflate the mixture.
- Spoon approximately half of the cream cheese mixture over the graham cracker crust in each jar.
- Add a layer of diced peaches over the cream cheese layer in each jar.
- Add the remaining cream cheese mixture on top of the peach layer in each jar.
- Top with a second layer of diced peaches.
- Sprinkle the remaining graham cracker crumbs evenly over the top of each jar.
- Cover the jars and refrigerate for at least 2 to 4 hours, or preferably overnight, to allow the cheesecake filling to set fully.
- Garnish with fresh mint just before serving, if desired.