Patriotic Berry Cheesecake Jars
Make these Patriotic Berry Cheesecake Jars ahead of time and pull them straight from the fridge when you’re ready — no baking, no stress, no last-minute dessert panic.
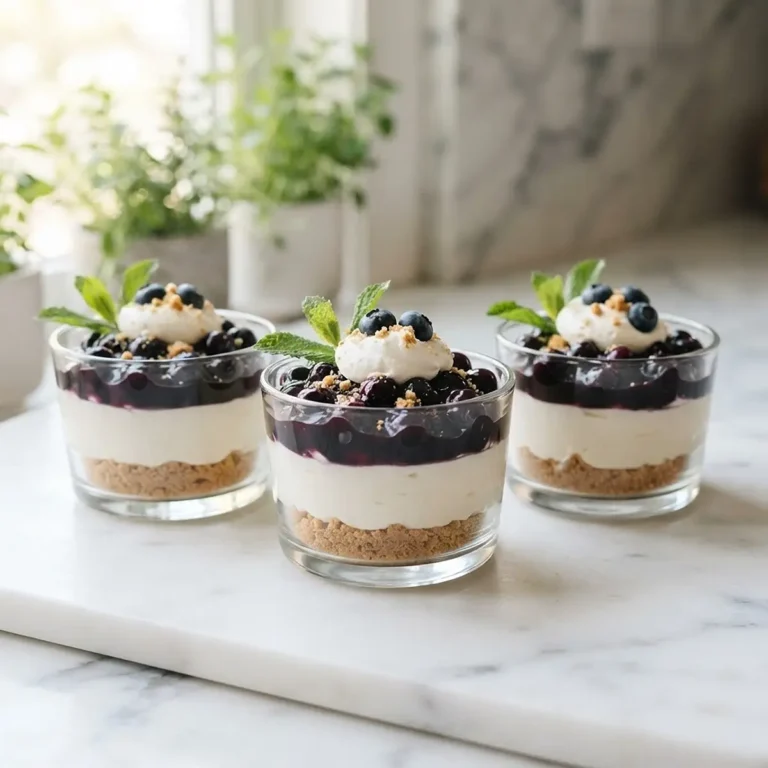
Patriotic Berry Cheesecake Jars are individual no-bake desserts layered with a Golden Oreo almond crust, silky vanilla cheesecake filling, and cooked blueberry and strawberry toppings. This recipe serves 4 to 6, delivers a creamy, tangy, and fruit-forward bite in every spoonful, and is perfect for Fourth of July parties, Memorial Day cookouts, or any summer gathering.
These patriotic berry cheesecake jars are the kind of festive little desserts people remember long after the cookout ends—so if you wait until the last minute, you might miss one of summer’s easiest crowd-pleasers. For more fun, shareable treats, explore these crowd-pleasing no-bake summer desserts.
Table of Contents
Why You’ll Love These Patriotic Berry Cheesecake Jars
Every layer brings something different — the buttery, cinnamon-spiced crust, the cool creamy filling, and the jammy berry toppings make each bite genuinely satisfying.
They’re make-ahead sweets designed for busy hosts. You can assemble them the night before, twist on the lids, and refrigerate until it’s time to serve.
And the individual jars mean zero slicing, zero mess. Just hand them out and watch them disappear.
What Ingredients Do You Need for Berry Cheesecake Jars?

| Ingredient Group | Ingredient | Amount | Notes |
|---|---|---|---|
| Golden Oreo Crust | Golden Oreo cookies, crushed | 8 cookies | Crushed into fine crumbles |
| Slivered almonds | 3 tablespoons | Crushed with cookies | |
| Unsalted butter, melted | 2 tablespoons | ||
| Cinnamon | 1/8 teaspoon | ||
| Salt | 1/8 teaspoon | Just a pinch | |
| Cheesecake Filling | Cream cheese, softened | 8 ounces (1 package) | Must be fully softened |
| Sugar | 1/4 cup | ||
| Heavy cream, chilled | 1/2 cup | Must be cold | |
| Vanilla extract | 2 teaspoons | ||
| Lemon juice | 1 teaspoon | ||
| Blueberry Filling | Blueberries, fresh or frozen | 1 cup | |
| Sugar | 1/2 cup | ||
| Water or lemon juice | 2 teaspoons | ||
| Strawberry Filling | Strawberries, fresh or frozen | 1 cup | |
| Sugar | 1/2 cup | ||
| Water or lemon juice | 2 teaspoons |
The slivered almonds in the crust are a quiet secret weapon — they add a nutty crunch that plain cookie crumbs can’t match. Don’t skip them.
For the cheesecake filling, cold heavy cream and fully softened cream cheese are both non-negotiable. Cold cream whips into the filling and gives it that light, silky texture. Softened cream cheese means no lumps. Neither one is negotiable here.
If you love easy dessert cups and warm weather treats, you’ll also want to bookmark these hot honey halloumi bites for a savory party pairing that balances the sweet perfectly.
How to Make Berry Cheesecake Jars Step by Step
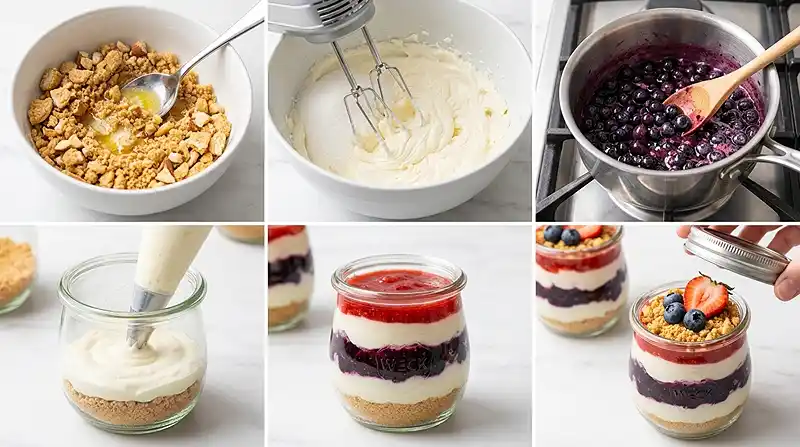
Make the Golden Oreo Crust
- Crush the Golden Oreo cookies and slivered almonds together into fine crumbles using a plastic bag and rolling pin, or a food processor.
- Pour the melted butter, cinnamon, and salt over the crumbles.
- Mix well to combine — the texture should resemble crumbly wet sand.
Pro Tip: The crust works best when the crumbles are uniform and fine. Large uneven chunks won’t press down cleanly into the jars.
Make the Cheesecake Filling
- In a mixing bowl, beat the softened cream cheese and sugar together until completely smooth.
- Add the chilled heavy cream, vanilla extract, and lemon juice.
- Beat until the mixture is smooth and creamy throughout.
Pro Tip: For best results, beat the filling until it holds a soft, pipeable consistency — not runny, but not stiff. This makes layering much easier and cleaner.
Make the Berry Fillings
- Make each berry filling separately in its own small saucepan.
- Add the berries, sugar, and water (or lemon juice) to the saucepan and cook over medium heat.
- As the mixture heats, mash the berries to break down the fruit and release the juices, stirring frequently.
- Once the mixture begins to bubble, reduce heat to low and simmer until it reduces by half.
- Stir frequently to prevent sticking or burning at the bottom.
- Remove from heat and cool completely to room temperature before assembling.
Pro Tip: The most common mistake is rushing the cooling step. Warm berry filling will melt the cheesecake layer and cause the whole jar to collapse into a blended mess. Let both fillings cool fully — even a quick 20 minutes in the fridge helps.
Assemble the Cheesecake Jars
- Line up all jars and add cookie crust crumbles to the bottom of each jar.
- Press the crumb mixture down firmly with the back of a spoon to form a compact crust base.
- Fill a Ziploc sandwich bag with cheesecake filling and cut a small corner off one end.
- Pipe a layer of cheesecake filling on top of the cookie crust.
- Spoon a layer of blueberry filling approximately 1/4-inch thick over the cheesecake layer.
- Add another layer of cheesecake filling on top of the blueberries.
- Add a layer of strawberry filling approximately 1/4-inch thick.
- Leave a 1/4-inch gap between the strawberry filling and the top of the jar to allow room for garnish.
- Sprinkle cookie crust crumbles on top.
- Garnish each jar with 2 fresh blueberries and a strawberry slice.
- Twist on the lids and refrigerate until ready to serve.
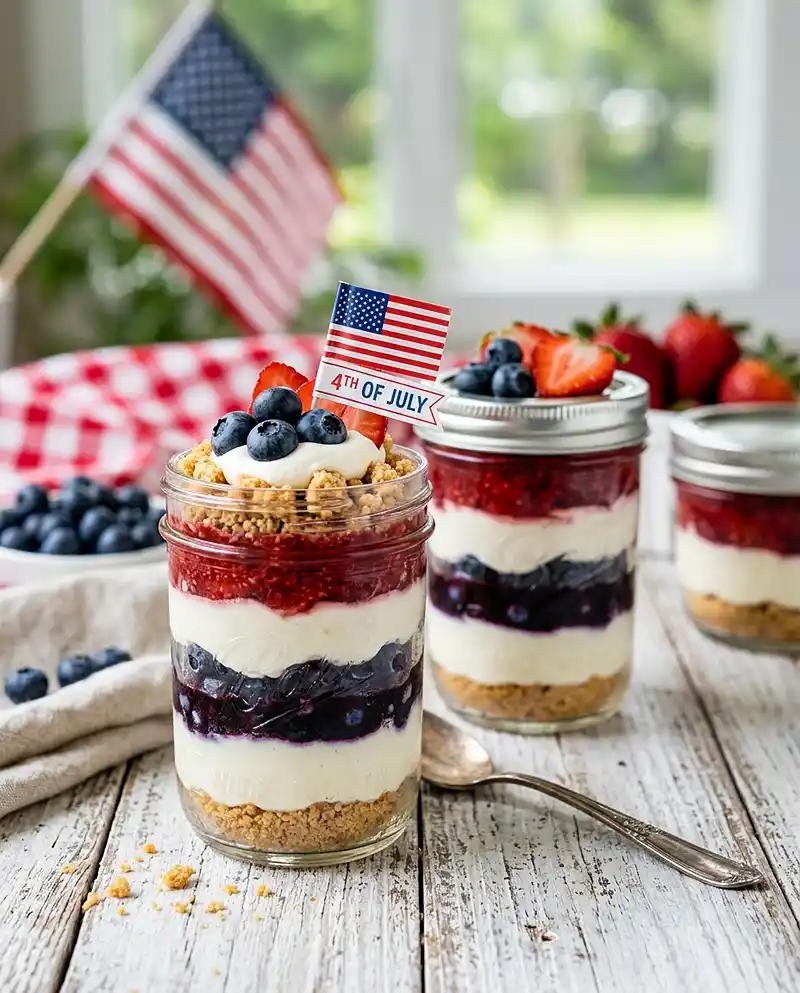
Expert Tips for Perfect Patriotic Berry Cheesecake Jars
Pro Tips for Success
The key to clean, distinct layers is temperature control at every stage. The crust should be at room temperature, the cheesecake filling should be chilled and firm enough to pipe, and the berry fillings must be fully cooled.
For best results, use a small cut on the piping bag corner. A larger cut makes the filling rush out too fast and you’ll overfill one jar before you realize it. Small cut, slow squeeze, better control.
The most common mistake is not pressing the crust down firmly enough. A loosely packed crumb base crumbles the moment you spoon berry filling on top of it. Press it down with real pressure — the back of a spoon works well.
These cheesecake jars work best when made at least 2 hours ahead. The resting time in the fridge allows all layers to set and the flavors to meld into something more cohesive than freshly assembled jars.
Real talk — I’ve made these 4 times and the version where I chilled the assembled jars overnight was noticeably better than the one I served after just an hour. If you can plan ahead, do it.
Delicious Variations
Vegan Version: Swap the cream cheese for a softened vegan cream cheese alternative and replace the heavy cream with full-fat chilled coconut cream. The berry fillings and crust are already naturally dairy-free with a simple butter swap.
Gluten-Free Version: Use gluten-free sandwich cookies in place of the Golden Oreos. The rest of the recipe requires no changes and the texture stays virtually identical.
Low-Carb Version: Replace the cookie crust with a mixture of finely ground almonds, a small amount of coconut flour, melted butter, and a pinch of cinnamon. Reduce sugar in both berry fillings and substitute a low-glycemic sweetener in the cheesecake filling.
Troubleshooting Common Problems
Problem: The cheesecake filling is runny and won’t hold its shape when piped.
Solution: The heavy cream wasn’t cold enough when beaten, or the cream cheese was too warm. Refrigerate the assembled filling for 15 minutes before piping.
Problem: The berry layers are bleeding into the cheesecake filling and muddying the layers.
Solution: The berry fillings weren’t cooled fully. Always cool both to room temperature — or briefly chill them — before assembling.
Problem: The crust crumbles when you add the first cheesecake layer.
Solution: Press the crust harder with the spoon before adding anything on top. A firmly packed base holds up; a loosely scattered one won’t.
How to Store and Reheat Patriotic Berry Cheesecake Jars
| Storage Method | Duration | Best Practice |
|---|---|---|
| Room Temperature | Up to 2 hours | Keep lids on; do not leave out longer due to cream cheese |
| Refrigerator | Up to 4 days | Store with lids on in airtight jars; add fresh garnish before serving |
| Freezer | Not recommended | Cream cheese filling and fresh berry fillings don’t freeze well |
These are a no-reheat dessert — serve them cold, straight from the fridge. The cheesecake filling is meant to be cool and creamy, not warmed.
If the garnish has settled or looks flat after a day in the fridge, just add a couple of fresh blueberries and a new strawberry slice before serving. Takes 30 seconds and makes them look freshly made.
Leftover filling — if you happen to have any — makes a surprisingly good spread on toast or alongside these hot honey halloumi bites as a sweet contrast at a party spread. Or spoon it over fresh berries for a lazy but genuinely good impromptu dessert.
FAQs About Patriotic Berry Cheesecake Jars
Can I make Patriotic Berry Cheesecake Jars the night before?
Yes — and they’re actually better that way. Assembling the jars the night before gives the layers time to set and the flavors time to develop. Keep the lids on and refrigerate overnight. Add fresh garnish right before serving.
Can I use frozen berries instead of fresh?
Frozen berries work perfectly for the cooked fillings. Since you’re cooking the berries down into a sauce anyway, fresh vs. frozen makes almost no difference in the final texture or flavor. Use what you have. For the fresh garnish on top, stick to fresh berries since frozen ones will turn mushy as they thaw.
What size jars work best for this recipe?
Half-pint mason jars (8 oz) are ideal. They’re the right depth for all the layers without making the dessert too large to finish comfortably. Smaller 4 oz jars work for bite-sized party desserts, but you’ll get more jars out of the same batch and each layer will be thinner.
Can I substitute the Golden Oreos with regular Oreos or graham crackers?
Regular Oreos will work but give the crust a darker, more chocolatey flavor that competes with the berry fillings. Graham crackers are a cleaner substitute — same texture, more neutral flavor. Either way, keep the butter and cinnamon ratios the same and you’ll be fine.
Is this recipe gluten-free?
Not as written, since Golden Oreos contain wheat. To make it gluten-free, swap the Golden Oreos for certified gluten-free sandwich cookies. Everything else in the recipe — the cheesecake filling, berry fillings, and garnish — is naturally gluten-free.
Make These Your Go-To Party Dessert This Summer
Honestly, once you make these once, you’ll make them every summer. They’re that reliable — and they always get comments.
Save this to your summer desserts board on Pinterest so it’s easy to find when you need a make-ahead sweet that travels well and looks impressive without any real effort.
If you try them, leave a comment below — I seriously want to know if you stuck with the classic layers or tried a variation. Either way, I mean it: these are a keeper.
Looking for more party-ready recipes? These spinach artichoke chicken casserole and harissa chickpea chicken bowls are both crowd-pleasing mains that pair beautifully with a dessert this fresh and light.
Patriotic Berry Cheesecake Jars — Golden Oreo almond crust, silky no-bake cheesecake filling, jammy blueberry and strawberry layers. The ultimate make-ahead summer dessert. Save this recipe now.
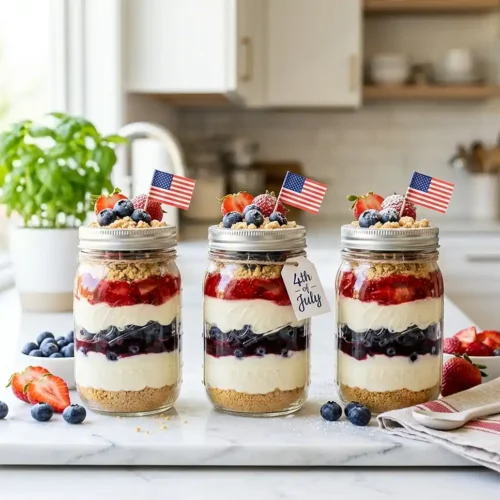
Patriotic Berry Cheesecake Jars
Equipment
- Mixing bowl
- Electric hand mixer or stand mixer
- Small saucepan
- Rolling pin or food processor
- Plastic zip bag or piping bag
- Half-pint mason jars with lids (8 oz)
- Spoon or spatula
Ingredients
Golden Oreo Crust
- 8 Golden Oreo cookies, crushed into fine crumbles
- 3 tablespoons Slivered almonds Crushed with cookies
- 2 tablespoons Unsalted butter, melted
- ⅛ teaspoon Cinnamon
- ⅛ teaspoon Salt Just a pinch
Cheesecake Filling
- 8 ounces Cream cheese, softened 1 package, must be fully softened
- ¼ cup Sugar
- ½ cup Heavy cream, chilled Must be cold
- 2 teaspoons Vanilla extract
- 1 teaspoon Lemon juice
Blueberry Filling
- 1 cup Blueberries, fresh or frozen
- ½ cup Sugar
- 2 teaspoons Water or lemon juice
Strawberry Filling
- 1 cup Strawberries, fresh or frozen
- ½ cup Sugar
- 2 teaspoons Water or lemon juice
Instructions
- Crush the Golden Oreo cookies and slivered almonds together into fine crumbles using a plastic bag and rolling pin, or a food processor.
- Pour the melted butter, cinnamon, and salt over the crumbles and mix well to combine. The texture should resemble crumbly wet sand.
- In a mixing bowl, beat the softened cream cheese and sugar together until completely smooth.
- Add the chilled heavy cream, vanilla extract, and lemon juice. Beat until the mixture is smooth and creamy throughout.
- Make each berry filling separately. Add the blueberries, sugar, and water (or lemon juice) to a small saucepan and cook over medium heat.
- As the blueberry mixture heats, mash the berries to break down the fruit and release the juices, stirring frequently.
- Once the blueberry mixture begins to bubble, reduce heat to low and simmer until it reduces by half, stirring frequently to prevent sticking or burning.
- Remove the blueberry filling from heat and cool completely to room temperature. Repeat steps 5 through 7 for the strawberry filling.
- Line up all jars and add cookie crust crumbles to the bottom of each jar. Press the crumb mixture down firmly with the back of a spoon to form a compact crust base.
- Fill a Ziploc sandwich bag with cheesecake filling and cut a small corner off one end. Pipe a layer of cheesecake filling on top of the cookie crust.
- Spoon a layer of blueberry filling approximately 1/4-inch thick over the cheesecake layer.
- Add another layer of cheesecake filling on top of the blueberries. The filling may sink slightly into the blueberry layer — this is normal.
- Add a layer of strawberry filling approximately 1/4-inch thick. Leave a 1/4-inch gap between the strawberry filling and the top of the jar.
- Sprinkle cookie crust crumbles on top and garnish each jar with 2 fresh blueberries and a strawberry slice.
- Twist on the lids and refrigerate until ready to serve, at least 2 hours or overnight for best results.