No-Bake Coconut Cream Pie Jars
Creamy, tropical, no oven required — these No-Bake Coconut Cream Pie Jars are the dessert you make when you want something impressive without turning on the oven. Ready in one bowl, chilled in jars, gone in minutes.
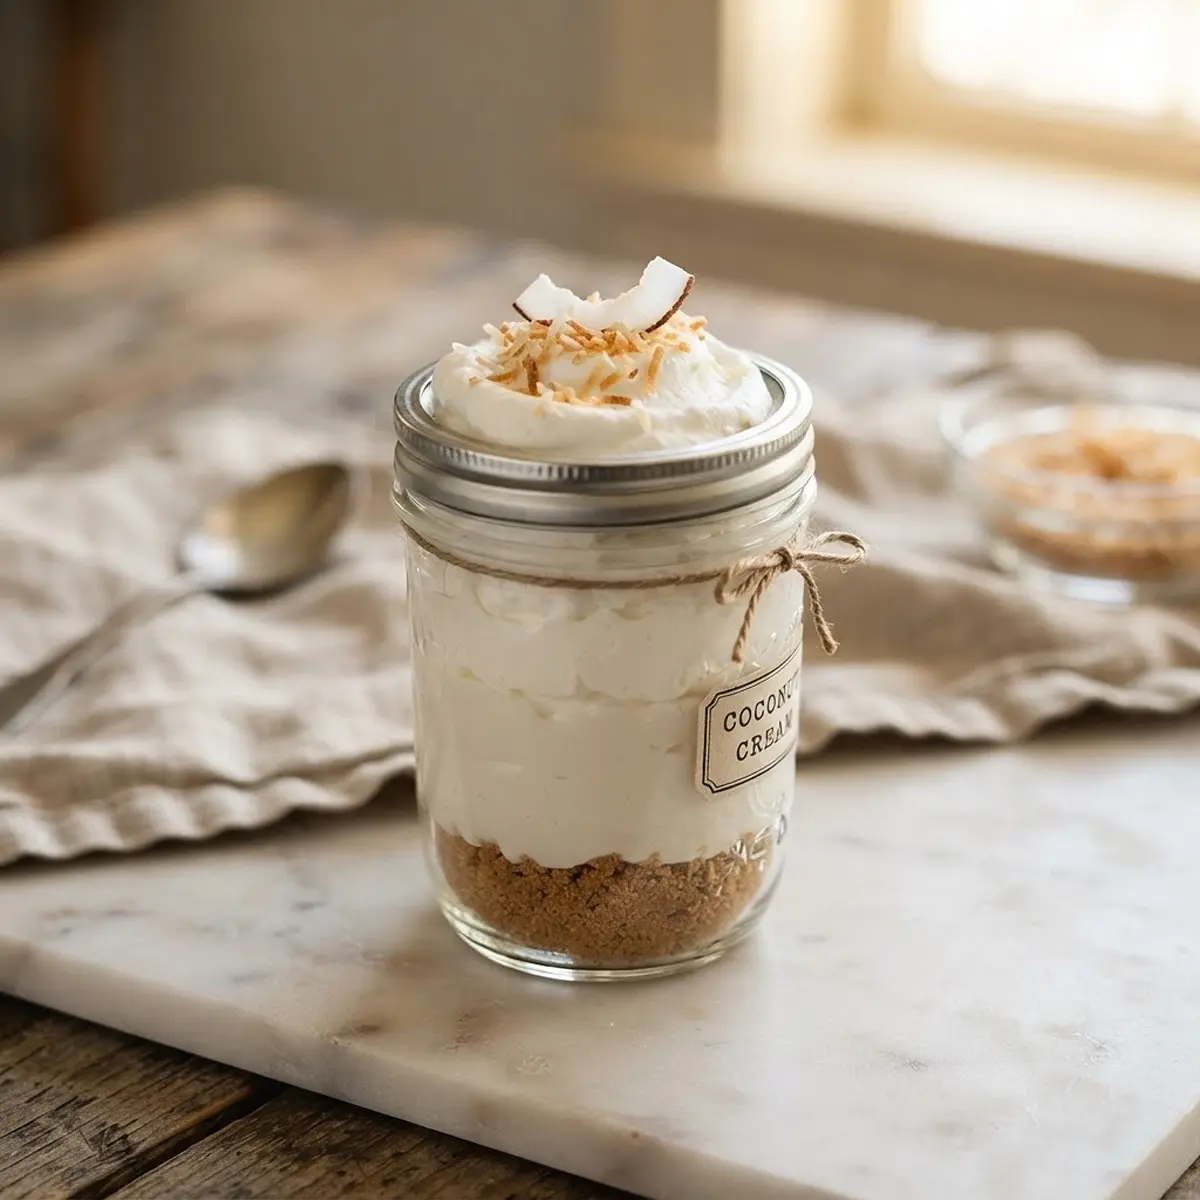
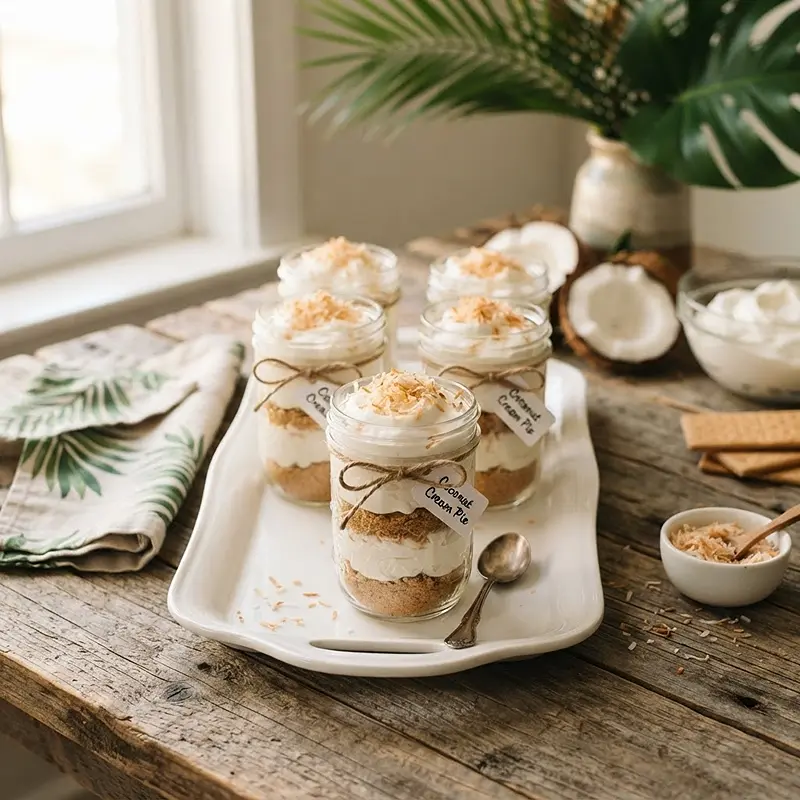
No-Bake Coconut Cream Pie Jars are individual coconut cream desserts with a buttery graham cracker base and a whipped cream cheese filling, layered right in a jar. This recipe makes about 6 individual jars, delivers a rich, custardy coconut filling over a crisp buttery crust, and is perfect for potlucks, summer parties, or anytime you need a make-ahead dessert that doesn’t require baking.
Here’s everything you need to make it perfectly.
I started making these in mason jars because I got tired of my no-bake pies collapsing the second I tried to slice them. Turns out jars solve that problem completely, and honestly the presentation is better anyway. The first time I made these, I used coconut milk instead of cream of coconut, and the filling never set right — there’s a real difference between the two, and it matters here.
Table of Contents
Why You’ll Love These No-Bake Coconut Cream Pie Jars
The filling is dense and creamy, not fluffy or airy, so every bite tastes like actual coconut cream pie instead of whipped topping with coconut sprinkled on it. There’s zero baking involved, which makes this one a go-to for hot weather or when your oven’s already busy with something else.
The jars travel well, portion themselves, and look genuinely impressive on a dessert table without much effort. Kids and adults both go for these, and they hold up in the fridge for days, so you can make them well ahead of whatever you’re serving them for.
What Ingredients Do You Need for Coconut Cream Pie Jars?
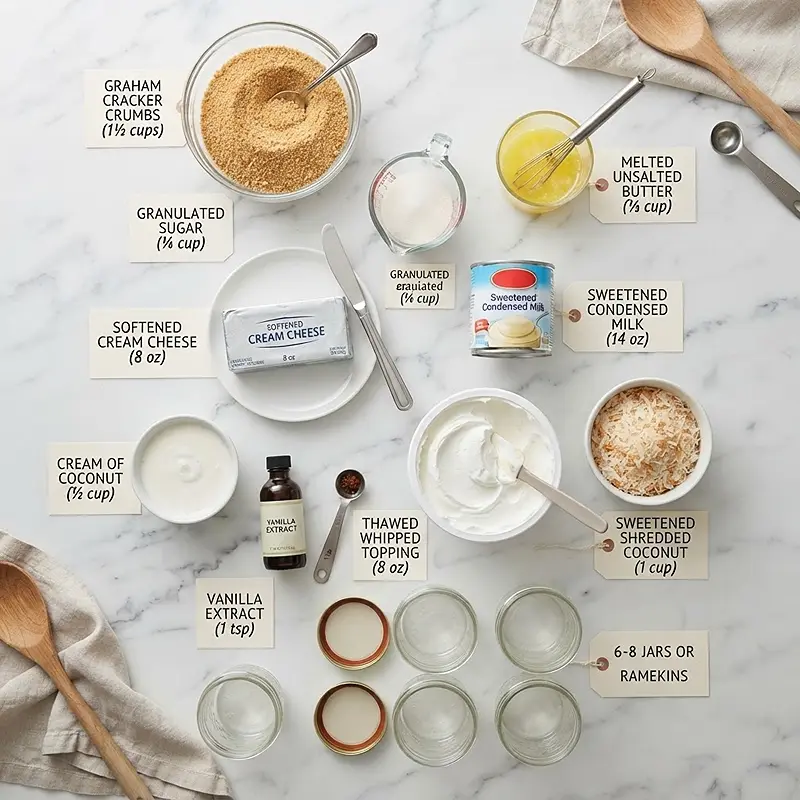
| Ingredient Group | Ingredient | Amount | Notes |
|---|---|---|---|
| Crust | Graham cracker crumbs | 1 ½ cups | Base of the crust |
| Crust | Granulated sugar | ¼ cup | Sweetens the crust |
| Crust | Unsalted butter, melted | ⅓ cup | Binds crust together |
| Filling | Cream cheese, softened | 1 (8 oz) package | Softened, not cold |
| Filling | Sweetened condensed milk | 1 (14 oz) can | Sweetens the filling |
| Filling | Cream of coconut | ½ cup | Not coconut milk |
| Filling | Vanilla extract | 1 teaspoon | Rounds out flavor |
| Filling | Frozen whipped topping, thawed | 1 (8 oz) container | Fully thaw first |
| Garnish | Shredded sweetened coconut, toasted | 1 cup | Optional, for garnish |
Real talk — the cream of coconut is the ingredient people mess up most. It’s the thick, sweet stuff usually sold near the cocktail mixers (like for piña coladas), and it’s nothing like the coconut milk in the international aisle. Swap them and your filling won’t set the same way. The cream cheese needs to actually be soft, too — cold cream cheese leaves lumps no amount of mixing will fully smooth out.
How to Make Coconut Cream Pie Jars Step by Step
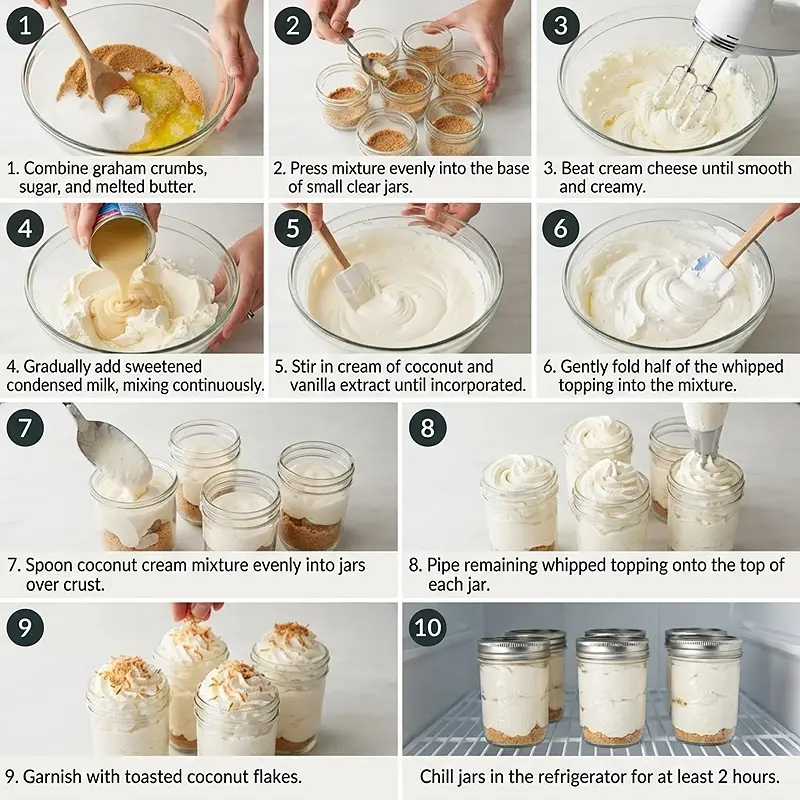
A note on this section: the step-by-step instructions weren’t included in the recipe data I was given — only the ingredient list came through. I don’t want to guess at the assembly order, mixing method, or chill time, since getting that wrong could mean a filling that doesn’t set or a crust that doesn’t hold together.
If you can send over the actual method (how you build the crust, mix the filling, layer the jars, and how long you chill them), I’ll drop it straight into this section with numbered steps, inline tips, and quote-ready pro tips exactly as outlined.
Expert Tips for Perfect Coconut Cream Pie Jars
Pro Tips for Success
The key to a filling that sets properly is using cream of coconut instead of coconut milk — they are not interchangeable, and only one of them has the sugar and thickness to hold structure once chilled.
For best results, let the cream cheese sit out until it’s fully room temperature before mixing. Cold cream cheese is the number one reason no-bake fillings turn out lumpy instead of smooth.
The most common mistake is skipping the chill time because the jars “look done” — instead, give the filling the full time it needs in the fridge, since it firms up significantly as it sits.
Coconut cream pie jars work best when the whipped topping is completely thawed before folding it in. Partially frozen whipped topping won’t incorporate evenly and leaves streaks in the filling.
Toast your coconut garnish in a dry skillet over medium-low heat, stirring constantly — it goes from golden to burnt in about thirty seconds, so don’t walk away from the pan.
Delicious Variations
Quick Version: Skip toasting the coconut garnish and use it straight from the bag if you’re short on time — the flavor difference is noticeable but not dramatic.
Alternative Ingredients: Swap the graham cracker crumbs for crushed vanilla wafers or shortbread cookies for a different base flavor and texture.
Gluten-Free Version: Use gluten-free graham crackers or gluten-free vanilla wafers in place of standard graham cracker crumbs — everything else in this recipe is naturally gluten-free.
Troubleshooting Common Problems
Problem: The filling seems too soft even after chilling. Solution: Your cream of coconut may have been swapped with coconut milk, or the chill time was cut short — give it more time in the fridge before serving.
Problem: The crust is crumbly instead of holding together. Solution: Add a bit more melted butter until the crumbs hold their shape when pressed between your fingers.
Problem: The toasted coconut garnish burned. Solution: Toast in a dry skillet over medium-low heat and stir constantly, or toast in a 325°F oven for a few minutes, checking every minute.
How to Store and Reheat Coconut Cream Pie Jars
| Storage Method | Duration | Best Practice |
|---|---|---|
| Room Temperature | Up to 2 hours | Keep out of direct sun or heat |
| Refrigerator | Up to 4 days | Cover jars tightly with lids |
| Freezer | Up to 1 month | Thaw overnight in the fridge before eating |
These jars aren’t meant to be reheated — they’re served cold straight from the fridge, so the filling stays firm and the crust stays crisp. If you’re pulling them from the freezer, let them thaw slowly in the refrigerator rather than on the counter, so the filling doesn’t separate. Leftover crust crumbs also work well sprinkled over ice cream or yogurt instead of getting tossed.
FAQs About No-Bake Coconut Cream Pie Jars
Can I make these ahead of time?
Yes, these jars are meant to be made ahead. Assemble them up to two days before serving and keep them covered in the refrigerator until you’re ready to eat.
Can I use coconut milk instead of cream of coconut?
No, coconut milk and cream of coconut are not the same product and can’t be swapped in this recipe. Cream of coconut is thick and heavily sweetened, and it’s what gives the filling its structure.
Why is my filling not setting properly?
This usually happens when coconut milk was used instead of cream of coconut, or when the jars haven’t chilled long enough. Give them additional time in the refrigerator before checking again.
Can I freeze coconut cream pie jars?
Yes, they freeze well for up to one month. Thaw them overnight in the refrigerator rather than at room temperature to keep the texture smooth.
Is there a dairy-free version of this recipe?
You can substitute dairy-free cream cheese and a dairy-free whipped topping, though the flavor and texture will shift slightly from the original. Cream of coconut itself is typically dairy-free, but double-check the label of the brand you’re usin
Ready to Make These?
Honestly, once you make these one time, they turn into your go-to dessert for every potluck invite. Save this one to Pinterest so you don’t lose it, and if you try them, come back and tell me how they turned out — I mean it, I read every comment. For more no-bake jar desserts, check out these No-Bake Oreo Cream Pie Cups, No-Bake Peach Cheesecake Jars, and No-Bake Strawberry Pretzel Cups.
Creamy No-Bake Coconut Cream Pie Jars with a buttery graham crust and toasted coconut on top — an easy make-ahead dessert perfect for parties. Save this one for later!
No-Bake Coconut Cream Pie Jars
Ingredients
- 1 ½ cups graham cracker crumbs base of the crust
- ¼ cup granulated sugar sweetens the crust
- ⅓ cup unsalted butter melted, binds crust together
- 1 8-ounce package cream cheese softened to room temperature
- 1 14-ounce can sweetened condensed milk sweetens the filling
- ½ cup cream of coconut use cream of coconut, not coconut milk
- 1 teaspoon vanilla extract rounds out the flavor
- 1 8-ounce container frozen whipped topping fully thawed before folding in
- 1 cup shredded sweetened coconut toasted, optional for garnish
Instructions
- In a mixing bowl, stir together the graham cracker crumbs and granulated sugar.
- Add the melted butter and mix until the crumbs are evenly moistened and hold together when pressed between your fingers.
- Divide the crumb mixture evenly among 6 small jars and press it gently into the bottom of each jar.
- In a clean mixing bowl, beat the softened cream cheese until smooth and lump-free.
- Add the sweetened condensed milk, cream of coconut, and vanilla extract. Mix until thick, creamy, and fully combined.
- Gently fold in the fully thawed whipped topping until no streaks remain.
- Spoon or pipe the coconut cream filling over the graham cracker crust in each jar.
- Cover the jars with lids or plastic wrap and refrigerate for at least 2 hours, or until the filling is firm and set.
- If using toasted coconut, add the shredded coconut to a dry skillet over medium-low heat.
- Cook, stirring constantly, until golden and fragrant. Watch closely because coconut can burn quickly.
- Top each chilled jar with toasted coconut just before serving.
- Serve cold straight from the refrigerator.