Grilled Chicken Caesar Wraps
Craving a lunch that actually keeps you full? These Grilled Chicken Caesar Wraps are the portable, high-protein answer you’ve been looking for — crispy bacon, smoky grilled chicken, crunchy croutons, and creamy Caesar dressing, all rolled tight in a warm flour tortilla.
Grilled Chicken Caesar Wraps are a handheld version of the classic Caesar salad, built around seasoned grilled chicken, crisp romaine, Parmesan, bacon, and crushed croutons wrapped in a large flour tortilla. This recipe serves 2, delivers a satisfying crunch-to-creaminess ratio in every bite, and is perfect for meal prep lunches or a fast weeknight dinner.
Real talk — I’ve made this wrap so many times I can practically roll it blindfolded. The one thing nobody mentions? You have to crush those croutons. Whole croutons make your wrap explode at the seams on bite one. Crushed, they meld into the filling and add texture without the chaos. These wraps are the kind of lunch you’ll want on repeat—don’t miss more weekly lunch prep ideas before you’re stuck with boring lunches again.
Table of Contents
Why You’ll Love This Grilled Chicken Caesar Wrap
The flavor hits every note — savory smoky bacon, tangy Caesar dressing, salty Parmesan, and that char from the grill you just can’t fake. It’s the kind of lunch that makes coworkers genuinely jealous.
These come together in about 30 minutes total, and they travel perfectly. Wrap them in foil and they hold their shape for hours — ideal for portable lunch recipes and meal prep boxes.
The chicken gets pounded thin before grilling, which means it cooks fast and stays juicy. No dry, rubbery chicken situation here.
What Ingredients Do You Need for Grilled Chicken Caesar Wraps?
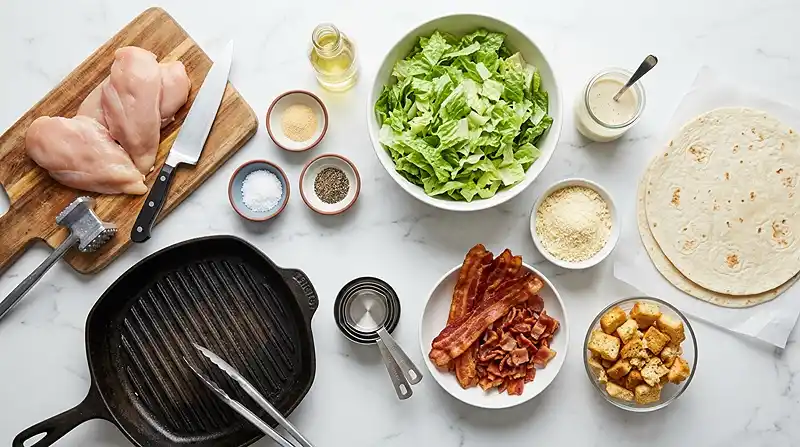
| Ingredient Group | Ingredient | Amount | Notes |
|---|---|---|---|
| Main Protein | Chicken breasts | 3/4 pound | Pounded to 1/2″ thick |
| Seasoning | Garlic powder | 1/2 teaspoon | Coats evenly |
| Seasoning | Kosher salt | As needed | Season generously |
| Seasoning | Freshly ground black pepper | As needed | Fresh-ground preferred |
| Cooking | Vegetable oil | 1 tablespoon | For brushing grates |
| Salad | Shredded romaine lettuce | 4 cups | Loosely packed |
| Salad | Caesar dressing | 1/4 cup | Homemade or store-bought |
| Salad | Freshly grated Parmesan cheese | 1/3 cup | Freshly grated is best |
| Salad | Bacon, cooked and crumbled | 1/2 pound | Cook until crispy |
| Salad | Croutons, gently crushed | 1/2 cup | Homemade or store-bought |
| Wrap | Extra-large flour tortillas, warmed | 2 | Warm before rolling |
Freshly grated Parmesan is worth it here — the pre-shredded kind has anti-caking agents that dull the flavor. And if you’ve got 10 extra minutes, homemade air fryer kale chips make a killer side.
For the Caesar dressing, store-bought is totally fine on a weeknight. But if you’re making these for meal prep lunches and want maximum flavor, a homemade version with anchovy paste and fresh lemon is on a different level.
How to Make Grilled Chicken Caesar Wraps Step by Step
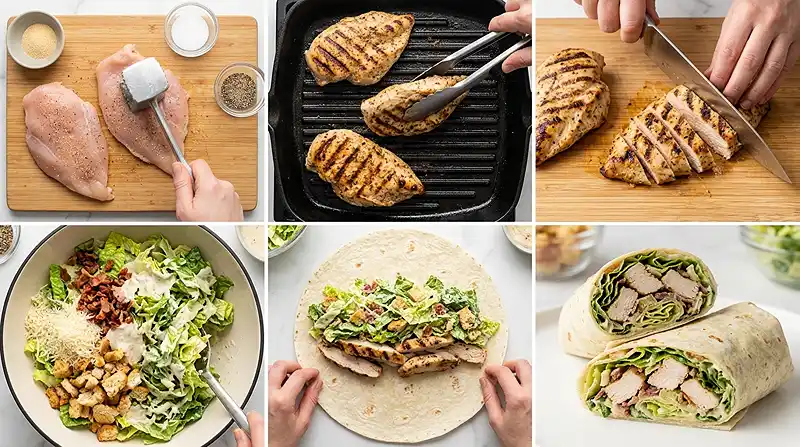
Prep the Chicken
- Using a mallet or rolling pin, gently pound the chicken breasts to 1/2″ thickness.
- Toss the chicken with garlic powder, salt, and pepper until evenly coated on all sides.
Grill the Chicken
- Heat the grill to 450°F (230°C), or a grill pan to medium-high heat.
- Brush the grates with vegetable oil to prevent sticking.
- Add the chicken breasts and grill until grill marks appear on the underside and chicken is halfway cooked, about 3 to 5 minutes.
Pro Tip: The key to juicy grilled chicken is pounding it to even thickness before it hits the heat — uneven pieces cook unevenly, leaving you with dry edges and an undercooked center.
- Flip the chicken and grill until cooked through, about 3 to 5 more minutes.
- Remove from the grill and let the chicken rest for 10 minutes.
Pro Tip: For best results, always let grilled chicken rest before slicing — cutting too early releases all the juices onto your cutting board instead of keeping them in the meat.
- Slice the rested chicken into 1″ strips and set aside.
Build the Caesar Salad
- Add the romaine lettuce to a large mixing bowl.
- Drizzle with Caesar dressing and toss to combine.
- Add the Parmesan, crumbled bacon, and crushed croutons and toss once more.
Assemble and Roll the Wraps
- Place one warmed tortilla on a clean workspace.
- Arrange half the chicken strips in the center of the tortilla.
- Top with half of the Caesar salad mixture.
- Fold the sides of the tortilla up and inward around the filling.
- While holding the sides in, use your thumbs to bring the bottom of the tortilla up and pull it tightly.
- Roll the tortilla forward, squeezing back as you go to keep the filling contained.
Pro Tip: The most common mistake when rolling wraps is overfilling — instead, leave a 2-inch border of bare tortilla on all sides before you fold, so the edges have room to seal properly.
- Cut the wrap in half and serve immediately, or wrap tightly in aluminum foil to save for later.
- Repeat with the remaining ingredients and second tortilla.
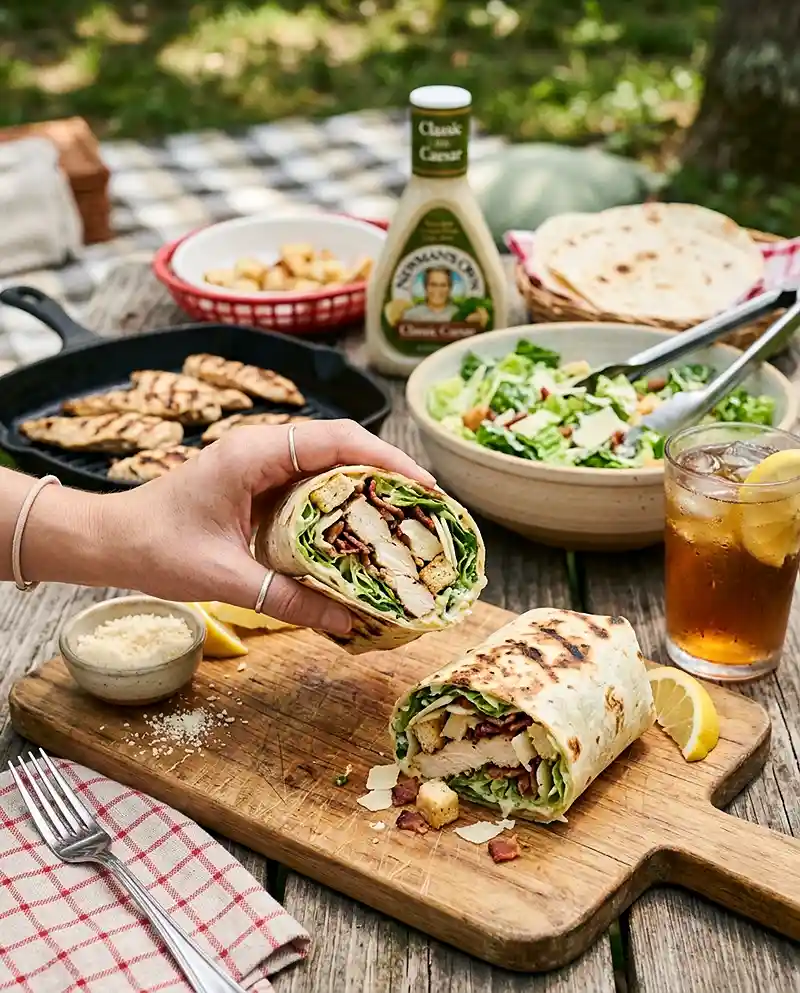
Expert Tips for Perfect Grilled Chicken Caesar Wraps
Pro Tips for Success
The key to a non-soggy wrap is dressing last. Toss the romaine with Caesar right before you assemble. If you’re making easy wraps and boxes for meal prep, keep the dressing separate and toss just before eating.
Warm your tortillas before rolling. A cold tortilla cracks. 20 seconds in the microwave or 30 seconds in a dry skillet makes them pliable and easy to fold without splitting.
Grilled Chicken Caesar Wraps work best when the chicken is sliced across the grain. You get shorter muscle fibers, which means more tender bites and nothing pulling out of the wrap when you eat.
The most common mistake is dressing the salad too early — instead, wait until the chicken is sliced and you’re ready to roll, so the romaine stays crisp and doesn’t wilt under the weight of the dressing.
For best results, cook your bacon until it’s genuinely crispy, not just done. Chewy bacon clumps in the filling. Crispy bacon crumbles and distributes evenly, which is what you want in every single bite.
Delicious Variations
Meal Prep Version: Grill the chicken and cook the bacon up to 3 days ahead. Store separately in the fridge, then assemble wraps the morning of. Pack dressing on the side for portable lunch recipes that don’t get soggy.
Gluten-Free Version: Swap the flour tortillas for large gluten-free wraps or collard green leaves. Use gluten-free croutons or replace with roasted chickpeas for the same crunch without the wheat.
Low-Carb Version: Skip the tortilla and serve everything as a deconstructed Caesar salad bowl. All the flavors, none of the carbs — a solid high-protein lunch option that’s just as satisfying.
Troubleshooting Common Problems
Problem: The wrap keeps falling apart when I cut it.
Solution: Wrap it tightly in aluminum foil first, then cut through the foil. The foil holds the shape while the knife goes through, and it doubles as packaging if you’re taking it to go.
Problem: My chicken is sticking to the grill grates.
Solution: The grates weren’t hot enough or oiled enough before adding the chicken. Let the grill fully preheat and brush oil on the grates right before placing the chicken — not too early or the oil burns off.
Problem: The lettuce is wilting and soggy.
Solution: You dressed it too early. Toss the romaine with Caesar dressing only when you’re moments away from rolling. And make sure the grilled chicken has cooled slightly — warm chicken wilts cold lettuce fast.
How to Store and Reheat Grilled Chicken Caesar Wraps
| Storage Method | Duration | Best Practice |
|---|---|---|
| Room Temperature | Up to 2 hours | Keep wrapped in foil; don’t leave in heat |
| Refrigerator | Up to 2 days (components), same day (assembled) | Store components separately for best texture |
| Freezer | Not recommended (assembled) | Freeze grilled chicken only, up to 2 months |
Assembled wraps are best eaten the same day — the romaine softens and the croutons lose their crunch overnight. If you’re meal prepping, store the grilled chicken, bacon, and Caesar salad components separately, then roll fresh wraps each morning in about 5 minutes.
To reheat the chicken, place slices in a dry skillet over medium heat for 2 to 3 minutes per side until warmed through and slightly caramelized on the edges. You’ll get a better texture than microwaving, which tends to make it rubbery.
Got leftover Caesar salad filling? Toss it over cooked pasta with a squeeze of lemon for a fast weeknight meal, or pile it on top of a toasted baguette and call it a Caesar bruschetta situation. It works.
FAQs About Grilled Chicken Caesar Wraps
Can I make Grilled Chicken Caesar Wraps ahead of time?
Yes — with one condition. Grill the chicken and cook the bacon up to 3 days ahead and refrigerate them separately. Shred the romaine and keep it dry in the fridge. Assemble the wraps the morning you plan to eat them, and pack the Caesar dressing on the side to add right before eating. This keeps everything crisp and makes them genuinely great make-ahead lunches.
What can I use instead of Caesar dressing?
Ranch dressing works well if you want something milder and creamier. A lemon-tahini dressing gives you a nuttier, dairy-free option. Greek yogurt thinned with lemon juice and garlic makes a lighter substitute that still has that tangy punch. Avoid anything too watery — it’ll make the romaine wilt and the tortilla soggy fast.
How do I know when the grilled chicken is fully cooked?
The most reliable method is an instant-read thermometer inserted into the thickest part of the breast — you’re looking for an internal temperature of 165°F (74°C). Without a thermometer, the chicken should feel firm when pressed, the juices should run clear, and there should be no pink in the center when you slice it. At 450°F with pounded breasts, 3 to 5 minutes per side is usually right on.
Can I use a grill pan instead of an outdoor grill?
Absolutely. A cast iron grill pan set to medium-high heat works great and gives you real grill marks. It’ll smoke a bit, so turn on your exhaust fan. The timing stays the same — 3 to 5 minutes per side — because you pounded the chicken to a consistent thickness, which is what actually controls the cook time.
Are Grilled Chicken Caesar Wraps good for meal prep?
They’re one of the better high-protein lunch options for meal prep, with a few caveats. The grilled chicken, crumbled bacon, and grated Parmesan all hold well refrigerated for up to 3 days. The romaine stays crisp if kept dry and unwashed until you need it. Assemble day-of and keep dressing separate — you’ll have a fresh, satisfying portable lunch every day of the week without any real morning effort. Pair them with something crunchy on the side, like these crispy air fryer kale chips.
Make It, Save It, Tell Me What You Think
Honestly, this is the wrap I make when I want something that feels like more than just lunch. It’s got real flavor, real crunch, and it travels well — which is more than most recipes can claim all at once.
If you’re into make-ahead lunches that don’t taste like sad desk food, seriously save this one. Pin it for your next meal prep Sunday.
And if you make it, drop a comment below and tell me — did you go store-bought dressing or homemade? I’m genuinely curious. If you loved this, you might also want to check out these mango salsa chicken tacos or this crowd-pleasing BLT pasta salad for your next portable lunch rotation.
Grilled Chicken Caesar Wraps packed with crispy bacon, smoky grilled chicken, crunchy croutons, and creamy Caesar dressing rolled in a warm tortilla. The ultimate high-protein portable lunch — save this for your next meal prep Sunday!
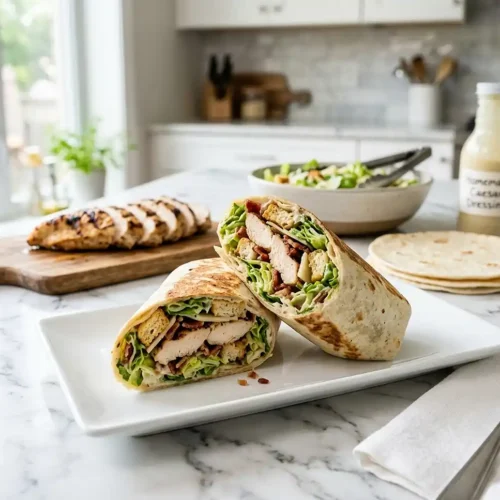
Grilled Chicken Caesar Wraps
Equipment
- Mallet or rolling pin
- Grill or grill pan
- Pastry brush
- Large mixing bowl
- Cutting board
- Chef’s knife
- Aluminum foil
Ingredients
Main Protein
- ¾ pound chicken breasts pounded to 1/2 inch thickness
Seasoning
- ½ teaspoon garlic powder
- kosher salt as needed
- freshly ground black pepper as needed
Cooking
- 1 tablespoon vegetable oil for brushing grates
Caesar Salad
- 4 cups shredded romaine lettuce loosely packed
- ¼ cup Caesar dressing homemade or store-bought
- ⅓ cup freshly grated Parmesan cheese freshly grated preferred
- ½ pound bacon cooked and crumbled into pieces
- ½ cup croutons homemade or store-bought, gently crushed
Wrap
- 2 extra-large flour tortillas warmed before rolling
Instructions
- Using a mallet or rolling pin, gently pound the chicken breasts to 1/2 inch thickness.
- Toss the chicken with garlic powder, salt, and pepper until evenly coated on all sides.
- Heat the grill to 450°F (230°C), or a grill pan to medium-high heat.
- Brush the grates with vegetable oil to prevent sticking.
- Add the chicken breasts and grill until grill marks appear on the underside and the chicken is about halfway cooked, about 3 to 5 minutes.
- Flip the chicken and continue to grill until cooked through, about 3 to 5 more minutes.
- Remove from the grill and let the chicken rest for 10 minutes.
- Slice the rested chicken into 1 inch strips and set aside.
- Add the romaine lettuce to a large mixing bowl.
- Drizzle with Caesar dressing and toss to combine.
- Add the Parmesan, crumbled bacon, and crushed croutons and toss once more.
- Place one warmed tortilla on a clean workspace.
- Arrange half the chicken strips in the center of the tortilla.
- Top with half of the Caesar salad mixture.
- Fold the sides of the tortilla up and inward around the filling.
- While holding the sides in, use your thumbs to bring the bottom of the tortilla up and pull it tightly.
- Roll the tortilla forward, squeezing back as you go to keep the filling contained.
- Cut the wrap in half and serve immediately, or wrap tightly in aluminum foil to save for later.
- Repeat with the remaining ingredients and second tortilla.