Mini Cheeseburger Slider Bake
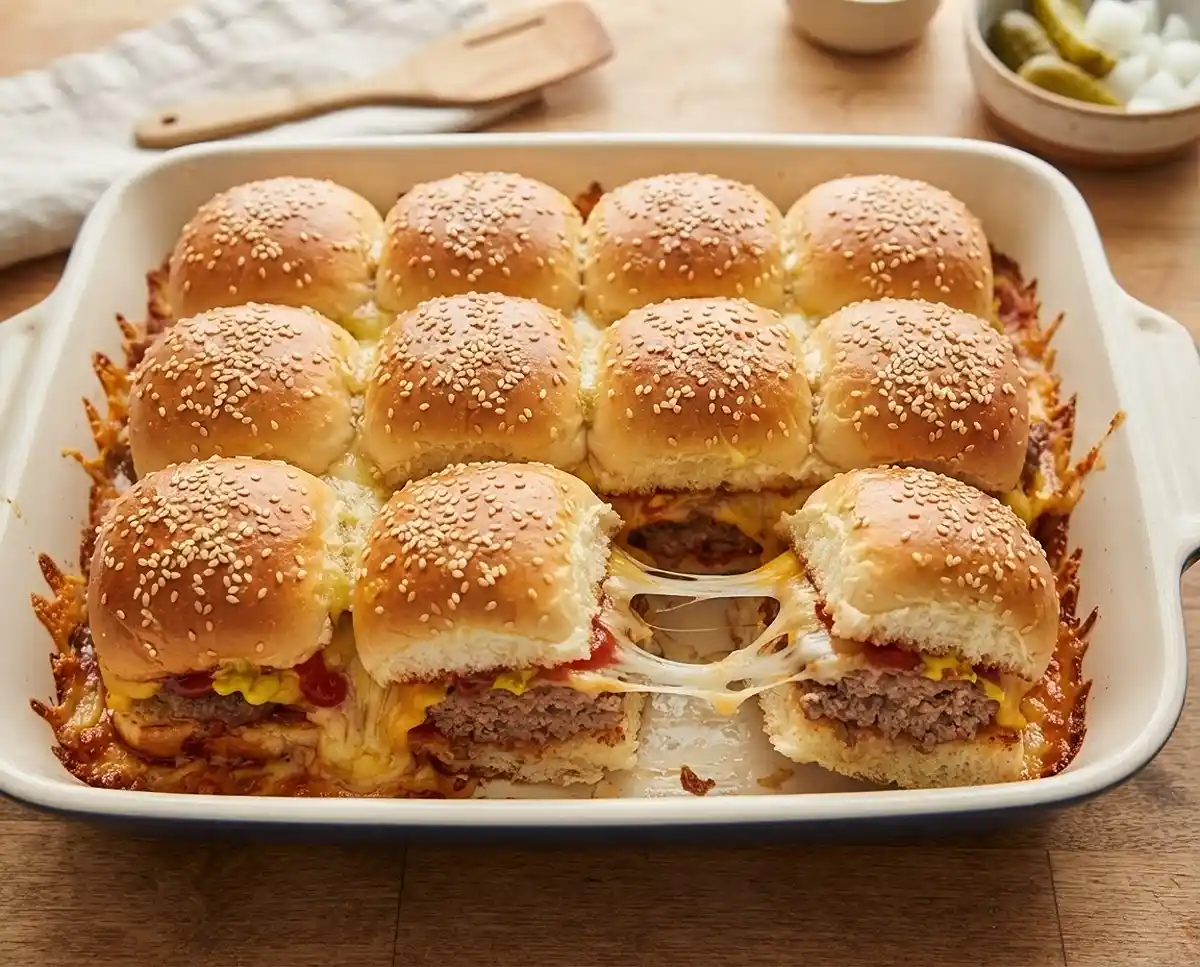
Mini Cheeseburger Slider Bake turns pantry staples into a gooey, cheesy tray of sliders that disappears in about ten minutes at every party I bring it to.
Mini Cheeseburger Slider Bake is a tray of seasoned ground beef and melted American cheese baked between soft slider buns. This recipe serves 6 people, delivers a warm, cheesy, buttery-topped batch of sliders that pull apart clean, and is perfect for game day, potlucks, or a fast weeknight dinner. Here’s everything you need to make it perfectly.
I started making this Mini Cheeseburger Slider Bake after one too many Super Bowl parties where I was still flipping individual burgers while everyone else was already eating. The first time I made it, I didn’t drain the beef well enough and ended up with soggy bottom buns. Learned that lesson fast. Now it’s the first thing I get asked to bring.
Table of Contents
Why You’ll Love This Mini Cheeseburger Slider Bake
You get the entire cheeseburger flavor — beef, cheese, ketchup, mustard — without standing at a grill. The buns get soft and a little crisp on top from the butter, and the cheese melts into every layer instead of just sitting on top. It’s genuinely one of the easiest party food ideas that still looks like you tried. And because it’s a slider bake, everyone just grabs a piece instead of waiting in line for a plate.
What Ingredients Do You Need for Cheeseburger Slider Bake?
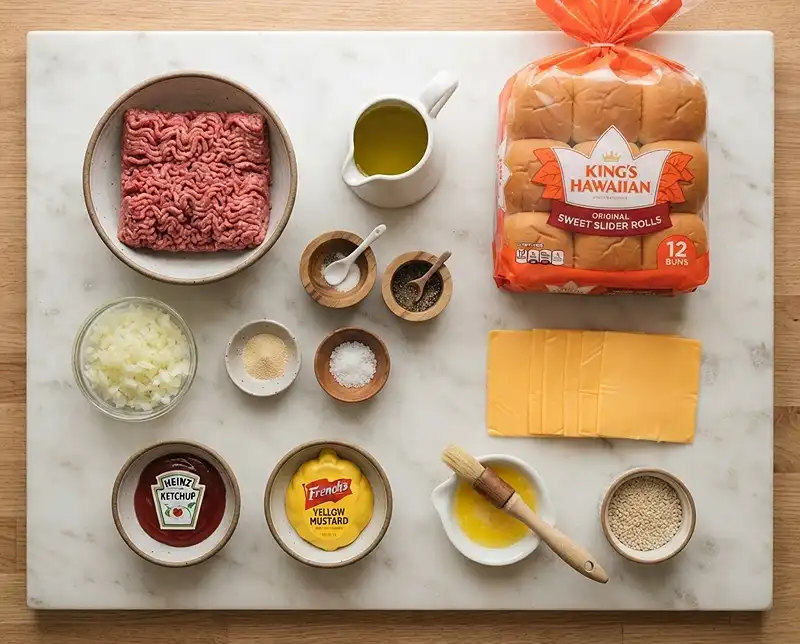
| Ingredient Group | Ingredient | Amount | Notes |
|---|---|---|---|
| Main Ingredients | Olive oil | 1 tablespoon | For the skillet |
| Main Ingredients | Ground beef | 1 pound | |
| Main Ingredients | Onion, finely chopped | 1 medium | |
| Main Ingredients | Garlic powder | 1 teaspoon | |
| Main Ingredients | Salt | 1/2 teaspoon | |
| Main Ingredients | Black pepper | 1/4 teaspoon | |
| Buns & Cheese | Mini slider buns | 12 | Hawaiian rolls work well |
| Buns & Cheese | American cheese slices | 6 slices | Quartered |
| Sauce | Ketchup | 1/4 cup | Or to taste |
| Sauce | Mustard | 1/4 cup | Or to taste |
| Topping | Butter, melted | 2 tablespoons | |
| Topping | Sesame seeds | 1 teaspoon | Optional |
This easy slider bake recipe leans on pantry staples, so there’s a decent chance you already have most of it. American cheese is the move here because it melts into a smooth, creamy layer instead of clumping like sharper cheeses can. Hawaiian rolls give you that soft, slightly sweet bun that plays really well against the salty beef.
How to Make Cheeseburger Slider Bake Step by Step
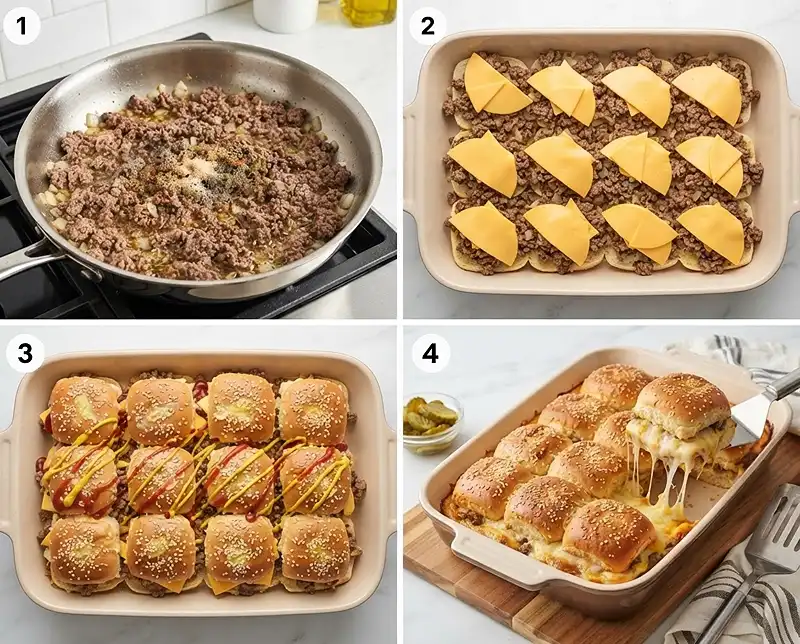
Prep and Cook the Beef
- Preheat your oven to 350°F (175°C) and lightly grease a 9×13 inch baking dish.
- Heat the olive oil in a large skillet over medium heat.
- Add the ground beef and chopped onion to the skillet.
- Cook, breaking up the beef with a spoon, until it’s browned and the onion has softened.
- Drain any excess grease from the skillet.
💡 Don’t skip the draining step — leftover grease is what makes the bottom buns turn soggy instead of holding their shape.
- Stir in the garlic powder, salt, and pepper, mixing until evenly combined.
Pro Tip: Season the beef mixture while it’s still warm in the skillet so the garlic powder and salt distribute evenly instead of clumping.
Assemble the Bake
- Carefully separate the tops and bottoms of the slider buns as one piece.
- Place the bottom halves in a single layer in your prepared baking dish.
- Spread the cooked beef mixture evenly over the bottom buns.
- Arrange the quartered cheese slices over the beef, overlapping slightly for full coverage.
- Drizzle the ketchup and mustard evenly over the cheese layer, adjusting to taste.
- Place the top halves of the buns over the cheese layer.
Butter and Bake
- Melt the butter in a small bowl.
- Brush the melted butter over the tops of the buns.
- Sprinkle with sesame seeds, if using.
💡 The butter is doing more than adding flavor — it’s what gives you that golden, slightly crisp bun top instead of a pale, soft one.
- Bake for 15 to 20 minutes, until the cheese is melted and bubbly and the bun tops are lightly golden brown.
- Let the bake sit for a few minutes before slicing and serving.
Pro Tip: That resting time isn’t optional — the cheese needs a minute to firm back up slightly, or your sliders will fall apart when you cut them.
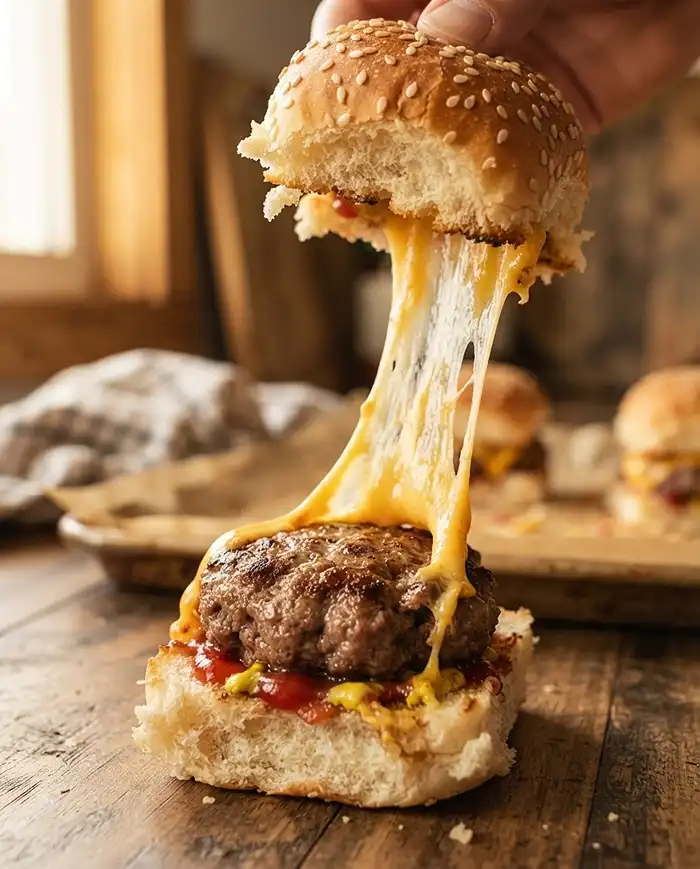
Expert Tips for Perfect Mini Cheeseburger Slider Bake
Pro Tips for Success
The key to clean slices is letting the tray rest for at least five minutes before cutting. If you slice it straight out of the oven, the melted cheese runs everywhere and your sliders lose their shape.
For best results, use lean ground beef around 85/15. Anything fattier means more grease pooling under the buns, even after draining.
The most common mistake is overcrowding the beef layer unevenly — instead, spread it in a thin, uniform layer so every slider gets the same amount in each bite.
Mini Cheeseburger Slider Bake works best when the buns are still connected in their sheet, since separating them into individual sliders makes the whole tray harder to hold together during baking.
If your kitchen runs on the cooler side, give the butter a few extra seconds in the microwave so it brushes on smoothly instead of sitting in clumps on the bun tops.
Delicious Variations
Quick Version: Use a pound of pre-cooked, crumbled beef or leftover taco meat to cut the skillet time down to almost nothing.
Alternative Ingredients: Swap the American cheese for cheddar or pepper jack if you want a sharper bite, though the melt won’t be quite as smooth.
Healthy Version: Use ground turkey instead of beef and swap in whole wheat slider buns for a lighter take on the same cheeseburger flavor.
Troubleshooting Common Problems
Problem: The bottom buns turned soggy. Solution: Drain the beef more thoroughly next time, and blot any extra grease with a paper towel before assembling.
Problem: The cheese didn’t melt evenly. Solution: Quarter the cheese slices as directed instead of leaving them whole — smaller pieces melt and spread more evenly across the beef layer.
Problem: The bun tops came out pale instead of golden. Solution: Brush on a slightly thicker layer of melted butter, or add an extra two to three minutes under the broiler at the end, watching closely.
How to Store and Reheat Mini Cheeseburger Slider Bake
| Storage Method | Duration | Best Practice |
|---|---|---|
| Room Temperature | 2 hours max | Cover with foil to keep buns from drying out |
| Refrigerator | 3 to 4 days | Store in an airtight container |
| Freezer | Up to 2 months | Wrap tightly in foil, then a freezer bag |
Reheat leftovers in a 300°F oven for about 10 minutes, until the cheese goes soft and melty again and the buns warm through without turning tough. The microwave works in a pinch, but the buns end up chewy instead of soft. If you’ve got a few sliders left over, chop them up and toss them into scrambled eggs or a quick fried rice for a no-waste next-day meal.
FAQs About Mini Cheeseburger Slider Bake
Can I make this Mini Cheeseburger Slider Bake ahead of time?
Yes. Assemble the entire dish up to the buttering step, cover it, and refrigerate for up to a day. Add the butter and sesame seeds right before baking so the tops still crisp up properly.
Can I use regular hamburger buns instead of slider buns?
You can, but you’ll need to adjust the bake time slightly since larger buns take a bit longer to heat through. The classic slider format is what makes this ideal party food, so mini buns are worth sticking with if you can.
Why did my slider bake turn out greasy?
This usually happens when the beef isn’t drained well enough after cooking. Tilt the skillet and spoon out the excess grease, or drain the beef in a colander before mixing in the seasonings.
Can I freeze Mini Cheeseburger Slider Bake before baking it?
Yes. Assemble it fully, wrap the unbaked dish tightly, and freeze for up to a month. Thaw it in the refrigerator overnight, then bake as directed, adding a few extra minutes since it’s starting out colder.
How do I know when the sliders are done baking?
Look for melted, bubbly cheese and bun tops that have turned a light golden brown, usually around the 15 to 20 minute mark. If the tops aren’t browning yet, the cheese underneath usually isn’t fully melted either.
Make It Tonight
Honestly, this Mini Cheeseburger Slider Bake is one of those recipes that looks like way more effort than it actually takes. If you try it, save it to your favorite party food board on Pinterest so you can find it again, and drop a comment letting me know how it turned out for you. Seriously, I want to hear if you added your own twist.
If you’re into easy tray bakes like this one, you might also like this cheesy ground beef quesadilla bake, this BBQ bacon cheeseburger tater tot bake, or these loaded burger bowls for another weeknight option.
Gooey Mini Cheeseburger Slider Bake with melty cheese and buttery golden tops — an easy party food idea that’s ready in under 30 minutes. Save this for your next game day spread!
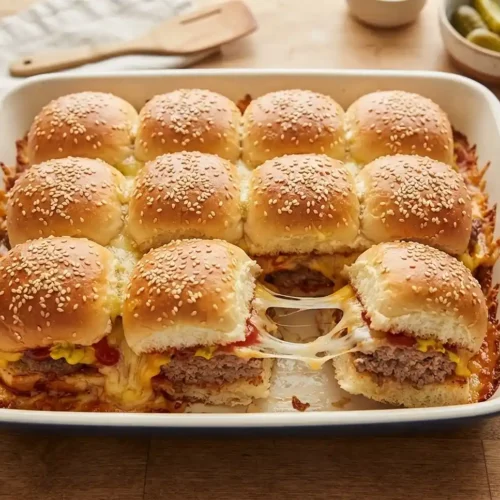
Mini Cheeseburger Slider Bake
Equipment
- 9×13-inch baking dish
- Large skillet
- Small bowl
- Pastry brush
Ingredients
- 1 tablespoon olive oil
- 1 pound ground beef
- 1 medium onion finely chopped
- 1 teaspoon garlic powder
- ½ teaspoon salt
- ¼ teaspoon black pepper
- 12 mini slider buns e.g., Hawaiian rolls
- 6 slices American cheese quartered
- ¼ cup ketchup or to taste
- ¼ cup mustard or to taste
- 2 tablespoons butter melted
- 1 teaspoon sesame seeds optional
Instructions
- Preheat oven to 350°F (175°C). Lightly grease a 9×13 inch baking dish.
- In a large skillet, heat olive oil over medium heat. Add ground beef and chopped onion. Cook, breaking up the beef with a spoon, until browned and the onion is softened. Drain any excess grease.
- Stir in garlic powder, salt, and pepper. Mix well.
- Carefully separate the tops and bottoms of the slider buns. Place the bottom halves in a single layer in the prepared baking dish.
- Spread the cooked ground beef mixture evenly over the bottom buns.
- Arrange the quartered cheese slices over the beef. You can overlap them slightly to ensure good coverage.
- Drizzle ketchup and mustard evenly over the cheese layer. Adjust amounts to your preference.
- Place the top halves of the slider buns over the cheese.
- In a small bowl, melt the butter. Brush the melted butter over the tops of the slider buns.
- Sprinkle with sesame seeds, if desired.
- Bake for 15-20 minutes, or until the cheese is melted and bubbly and the tops of the buns are lightly golden brown.
- Remove from oven and let sit for a few minutes before slicing and serving.