No-Bake Berry Cheesecake Cups
No-Bake Berry Cheesecake Cups are individual chilled desserts made with a creamy whipped cheesecake filling, a graham cracker crumb base, and fresh strawberries and blueberries. This recipe serves six, delivers a light yet indulgent result with silky texture and bright berry flavor, and is perfect for summer gatherings, parties, or any no-fuss make-ahead occasion.
These berry cheesecake cups are the kind of chilled little desserts people make once and suddenly wish they had on hand for every summer gathering—so don’t let this one slip by if you’re still collecting no-bake desserts for summer parties.
Skip that step and you’ll spend twice as long getting stiff peaks. Do it and the whole thing comes together in under 20 minutes.
Table of Contents
Why You’ll Love These No-Bake Berry Cheesecake Cups
These cups hit that rare sweet spot between rich and refreshing. The cheesecake filling is creamy without being heavy, the berries add a natural tartness, and the graham cracker layers give you that satisfying crunch in every bite.
No oven required. No water bath, no cracked tops, no stress. They’re one of the best easy make-ahead sweets you can prep hours in advance and pull straight from the fridge when guests arrive.
What Ingredients Do You Need for Berry Cheesecake Cups?
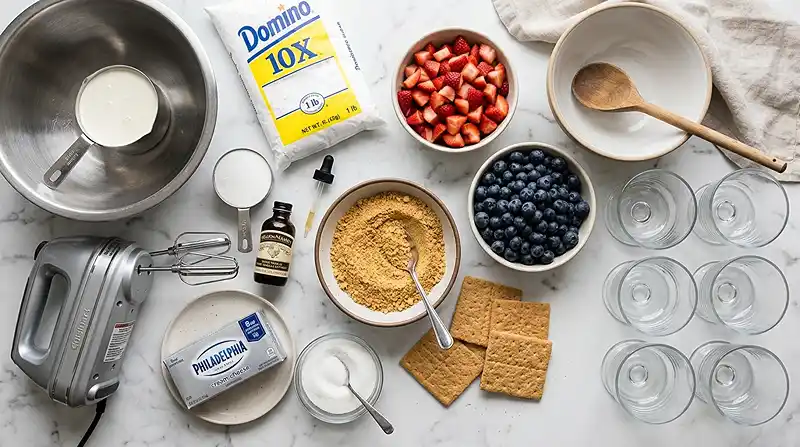
| Ingredient Group | Ingredient | Amount | Notes |
|---|---|---|---|
| Whipped Cream | Heavy whipping cream | 2 cups | Use very cold cream |
| Whipped Cream | Powdered sugar | 1/2 cup | Sifted preferred |
| Whipped Cream | Pure vanilla extract | 1 teaspoon | Pure, not imitation |
| Cheesecake Filling | Cream cheese | 8 oz | Softened, room temp |
| Cheesecake Filling | Granulated sugar | 1/2 cup | Standard white sugar |
| Base | Graham cracker crumbs | 3/4 cup | Pre-crushed or blended |
| Fruit Topping | Diced strawberries | 1-1/2 cups | Fresh, hulled and diced |
| Fruit Topping | Blueberries | 3/4 cup | Fresh, rinsed and dried |
The cream cheese is the backbone of this filling — make sure it’s fully softened before you start or you’ll end up with lumps that no amount of mixing can fix.
For the berries, fresh is genuinely better here. Frozen berries release too much liquid and can make the layers soggy, especially if you’re prepping these chilled dessert cups ahead of time.
If you love easy, crowd-pleasing party food, you’ll also want to save this jalapeno corn salsa dip for your next gathering — it disappears just as fast.
How to Make Berry Cheesecake Cups Step by Step
Step 1: Make the Whipped Cream
- Add the heavy whipping cream, powdered sugar, and vanilla extract to a chilled large mixing bowl.
- Using an electric mixer with chilled beaters, beat on low speed and gradually increase to medium-high.
- Beat for about 4 minutes, or until stiff peaks form.
Pro Tip: The key to stiff, stable whipped cream is starting with cold equipment. Chill your bowl and beaters in the freezer for 10 minutes before you begin.
Step 2: Prepare the Cream Cheese Mixture
- In a second large mixing bowl, add the softened cream cheese and granulated sugar.
- Beat with the electric mixer until completely smooth with no lumps remaining.
Pro Tip: For best results, let the cream cheese sit at room temperature for at least 30 minutes. Cold cream cheese will never beat completely smooth.
Step 3: Combine the Mixtures
- Reserve one heaping cup of whipped cream and set it aside — you’ll use this for the final topping.
- Fold the remaining whipped cream into the cream cheese mixture gently until fully combined.
Pro Tip: The most common mistake here is stirring instead of folding — use a spatula with slow, wide strokes to keep the mixture airy and light.
Step 4: Assemble the Cups
- In six 9-ounce dessert cups, add 1 tablespoon of graham cracker crumbs as the base layer.
- Add a swirl of cheesecake filling over the crumbs.
- Add about 3 tablespoons of the mixed berries on top of the filling.
- Repeat the layers using the remaining graham cracker crumbs, filling, and berries.
- Top each cup with a large swirl of the reserved whipped cream.
- Serve immediately or chill in the refrigerator until ready to serve.
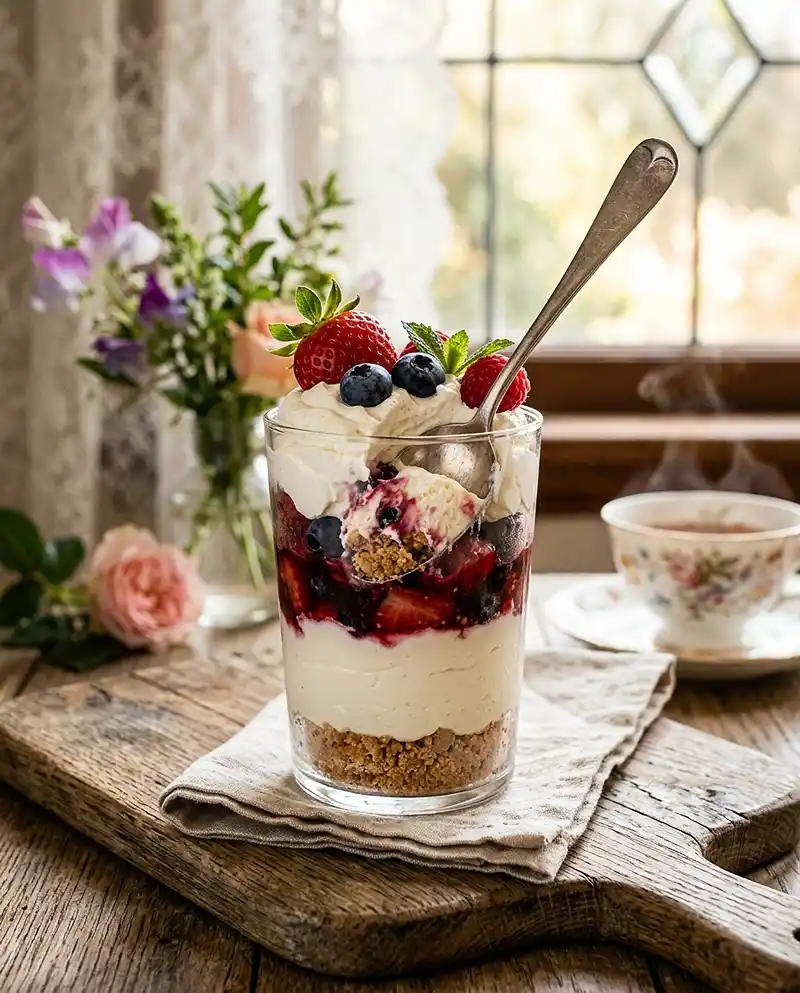
Expert Tips for Perfect No-Bake Berry Cheesecake Cups
Pro Tips for Success
Use room-temperature cream cheese, no exceptions. Cold cream cheese creates a grainy, lumpy filling that won’t smooth out no matter how long you beat it. Pull it from the fridge 30-45 minutes before you start.
The key to clean, beautiful layers is using a piping bag or zip-lock bag with the corner snipped for the cheesecake filling. It gives you that professional swirl and keeps the sides of the cup clean.
For best results with these chilled dessert ideas, assemble the cups no more than 4 hours in advance. The graham cracker crumbs will start to soften after that — still delicious, but you lose the textural contrast.
No-bake desserts work best when everything is measured and prepped before you start. Dice the strawberries, rinse the blueberries, and have your cups lined up and ready. Assembly goes fast and you don’t want to rush it.
Delicious Variations
Quick Version: Skip making whipped cream from scratch and use 2 cups of store-bought whipped topping instead. It cuts prep time significantly and the texture is still smooth and creamy for an even easier warm weather treat.
Gluten-Free Version: Swap the regular graham cracker crumbs for certified gluten-free graham crackers, crushed fine. Everything else in this recipe is naturally gluten-free, so it’s a simple one-ingredient swap.
Alternative Fruit Version: These cups work beautifully with raspberries, blackberries, or diced peaches in place of or alongside the strawberries and blueberries. Any berry that’s ripe and not too watery will work well here.
Troubleshooting Common Problems
Problem: Whipped cream won’t reach stiff peaks.
Solution: Your cream or bowl is too warm. Put the bowl, beaters, and even the cream back in the fridge for 10 minutes, then try again from the beginning.
Problem: Cheesecake filling is lumpy.
Solution: The cream cheese wasn’t soft enough. Unfortunately there’s no fixing it once mixed — for next time, always start with fully room-temperature cream cheese.
Problem: Graham cracker layers turned soggy too fast.
Solution: Assemble closer to serving time, or keep the crumbs and filling separate until the last moment. Moisture from the filling softens the crumbs over time.
How to Store and Reheat No-Bake Berry Cheesecake Cups
| Storage Method | Duration | Best Practice |
|---|---|---|
| Room Temperature | Up to 2 hours | Keep out of direct sun or heat |
| Refrigerator | Up to 3 days | Cover tightly with plastic wrap |
| Freezer | Not recommended | Texture suffers significantly |
These cups don’t reheat — they’re served cold straight from the fridge. After a night in the refrigerator, the filling firms up nicely and the flavors meld together. Many people actually prefer them the next day.
Got leftover filling? It makes an excellent spread for toast or waffles the next morning. You can also layer it with granola and fresh fruit in a glass for a quick breakfast that feels a lot more indulgent than it has any right to.
If you’re building a full party menu around these easy summer desserts, this chopped Italian quinoa salad makes a fresh, satisfying main that balances the sweetness perfectly.
FAQs About No-Bake Berry Cheesecake Cups
Can I make No-Bake Berry Cheesecake Cups ahead of time?
Yes. You can assemble the cups up to 4 hours in advance and store them covered in the refrigerator. For longer make-ahead timing, prepare the whipped cream and cream cheese mixture separately and assemble within a few hours of serving to keep the graham cracker layers from getting too soft.
Can I use frozen berries instead of fresh?
Fresh berries are strongly recommended for this recipe. Frozen berries release significant liquid as they thaw, which can make the layers watery and cause the graham cracker base to become soggy quickly. If fresh berries aren’t available, thaw and thoroughly drain frozen berries on paper towels before using.
What can I substitute for cream cheese?
Full-fat cream cheese gives the best texture and stability for this filling. In a pinch, mascarpone cheese works as a substitute and produces a slightly richer, less tangy result. Reduced-fat cream cheese can be used but may produce a softer filling that doesn’t hold its shape as well.
How do I know when the whipped cream has reached stiff peaks?
Stiff peaks form when you lift the beaters and the cream holds a firm, pointed peak that doesn’t flop over. It should look glossy and hold its shape completely. At this stage, stop beating — over-whipped cream turns grainy and can break into butter if you continue past this point.
Can I make this recipe dairy-free?
This recipe relies heavily on dairy ingredients, but substitutions are possible. Use full-fat canned coconut cream in place of heavy whipping cream, and a dairy-free cream cheese alternative in place of regular cream cheese. Results will vary by brand, but the structure of the dessert can still work well with the right products.
Save This Recipe and Tell Me What You Think
Honestly, these No-Bake Berry Cheesecake Cups are one of those recipes I find myself coming back to every single summer. They look impressive, they taste incredible, and you didn’t even turn on the oven. That’s a win by any measure.
If you make them, I’d seriously love to hear how they turned out. Drop a comment below and let me know — did you stick with strawberries and blueberries, or did you try a different fruit combination?
And if you’re saving recipes for your next gathering, pin this one to your summer desserts board so you can find it when you need it most.
Looking for more easy, crowd-pleasing dishes? Try these freezer spinach feta wraps or this garlic butter chicken and potatoes for a full menu that does not disappoint.
No-Bake Berry Cheesecake Cups — silky cheesecake filling, fresh strawberries and blueberries, and a buttery graham cracker crunch in every spoonful. Save this recipe for your next summer party and make it tonight.
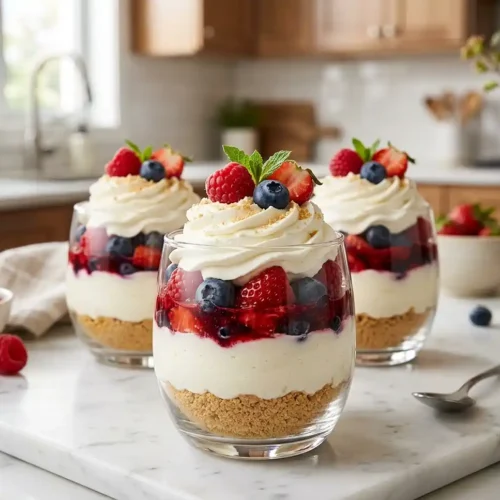
Easy No-Bake Berry Cheesecake Cups
Equipment
- Electric mixer
- Large mixing bowl (x2)
- Spatula
- 9-ounce dessert cups (x6)
- Piping bag or zip-lock bag
Ingredients
Whipped Cream
- 2 cups Heavy whipping cream Use very cold cream
- ½ cup Powdered sugar Sifted preferred
- 1 teaspoon Pure vanilla extract Pure, not imitation
Cheesecake Filling
- 8 oz Cream cheese Softened to room temperature
- ½ cup Granulated sugar Standard white sugar
Base
- ¾ cup Graham cracker crumbs Pre-crushed or blended
Fruit Topping
- 1 ½ cups Diced strawberries Fresh, hulled and diced
- ¾ cup Blueberries Fresh, rinsed and dried
Instructions
- Add the heavy whipping cream, powdered sugar, and vanilla extract to a chilled large mixing bowl.
- Using an electric mixer with chilled beaters, beat on low speed and gradually increase to medium-high. Beat for about 4 minutes, or until stiff peaks form.
- In a second large mixing bowl, add the softened cream cheese and granulated sugar. Beat with the electric mixer until completely smooth with no lumps remaining.
- Reserve one heaping cup of whipped cream and set it aside for the final topping.
- Fold the remaining whipped cream into the cream cheese mixture gently until fully combined.
- In six 9-ounce dessert cups, add 1 tablespoon of graham cracker crumbs as the base layer.
- Add a swirl of cheesecake filling over the crumbs, then top with about 3 tablespoons of the mixed berries.
- Repeat the layers using the remaining graham cracker crumbs, cheesecake filling, and berries.
- Top each cup with a large swirl of the reserved whipped cream. Serve immediately or chill in the refrigerator until ready to serve.