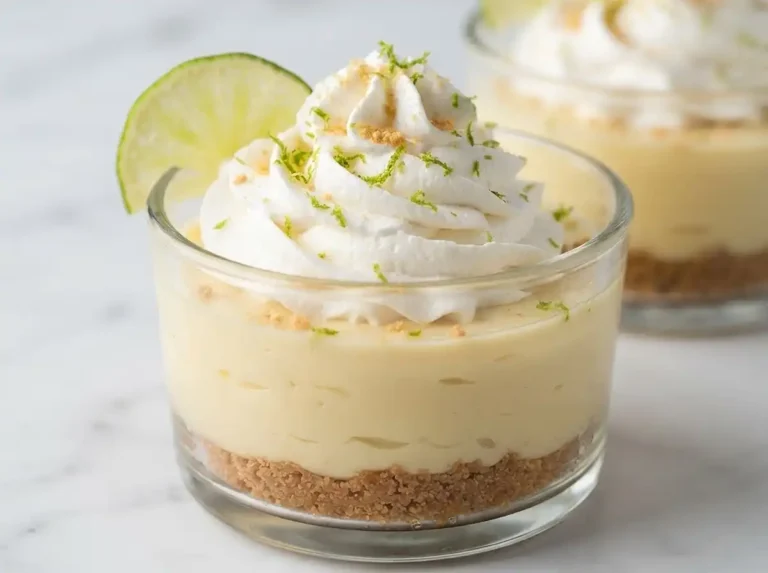
No-Bake Key Lime Bars
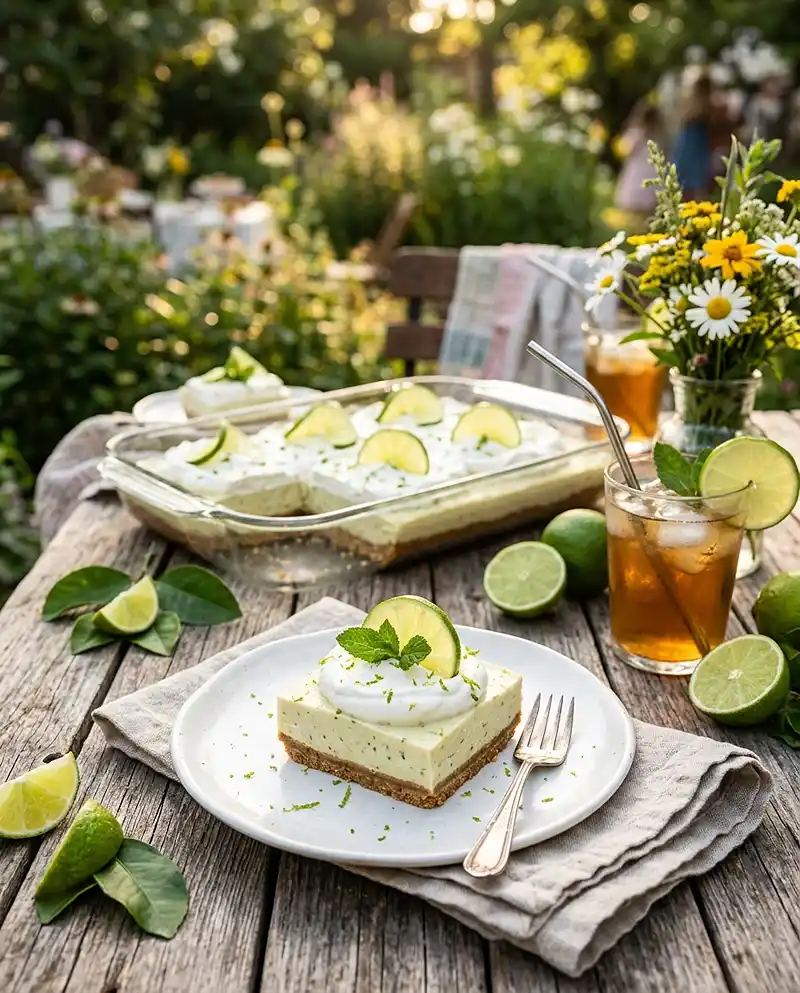
No-bake key lime bars are a chilled, creamy dessert made with a buttery graham cracker crust and a tangy lime filling that sets firm in the fridge — no oven required. This recipe serves 12 to 16 bars, delivers a silky, mousse-like filling with a bold citrus punch, and is perfect for summer gatherings, potlucks, or any time you want a stunning dessert without heating up the kitchen.
Here’s everything you need to make it perfectly.
I’ll be honest — the first time I made no-bake key lime bars, I didn’t fold the whipped cream gently enough and ended up with a dense, flat filling instead of that cloud-like texture. Took me three more batches to figure out the folding is everything. Once I got it right, this became my most-requested summer dessert, hands down.
Tangy, creamy, and dangerously easy to love, these key lime bars are exactly the kind of summer treat people wish they’d saved before the next party invite shows up. If this one’s calling your name, go browse more refreshing no-bake dessert recipes while summer cravings are in full swing.
Table of Contents
Why You’ll Love These No-Bake Key Lime Bars
The filling is light and airy but still slices cleanly — it’s that mousse-meets-cheesecake texture that’s genuinely hard to stop eating. You get a bright, tangy hit from the fresh lime juice balanced by the richness of cream cheese and sweetened condensed milk.
There’s no baking involved at all, which makes these a go-to for hot summer days or busy weeknights. The crust comes together in minutes, the filling takes about ten, and then the fridge does all the real work. And they feed a crowd — a 9×13 pan gives you plenty to share.
What Ingredients Do You Need for No-Bake Key Lime Bars?
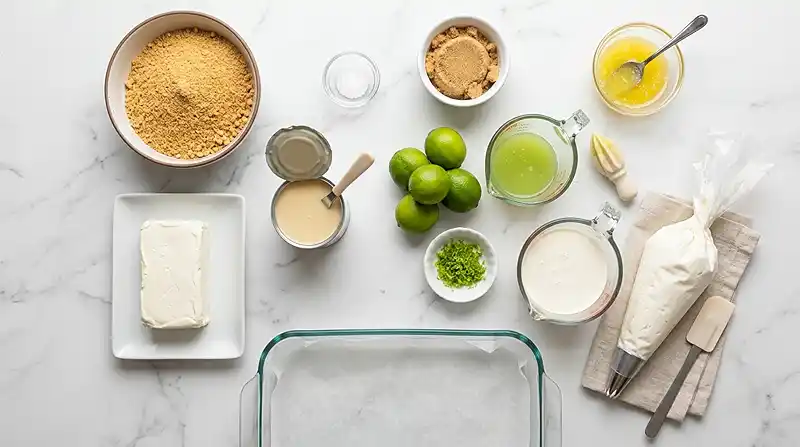
| Ingredient Group | Ingredient | Amount | Notes |
|---|---|---|---|
| Crust | Graham cracker crumbs | 2 cups (285g) | Fine crumbs pack best |
| Crust | Pinch of salt | Pinch | Balances sweetness |
| Crust | Brown sugar, packed | 1/4 cup (50g) | Light or dark both work |
| Crust | Unsalted butter, melted | 6 tbsp (85g) | Slightly cooled |
| Filling | Cream cheese | 8 oz (225g) | Room temperature only |
| Filling | Sweetened condensed milk | 14 oz can (400g) | Full-fat recommended |
| Filling | Fresh lime juice | 1/2 cup (125ml) | Freshly squeezed only |
| Filling | Lime zest | 1 tablespoon | Zest before juicing |
| Filling | Heavy whipping cream | 1 cup (250ml) | Cold for best peaks |
| Topping | Sweetened whipped cream | As desired | For serving |
| Topping | Lime slices | As desired | For garnish |
Fresh lime juice is genuinely non-negotiable here. Bottled juice doesn’t have the same brightness and will make the filling taste flat. Zest your limes before you juice them — it’s way easier and you’ll lose less zest.
The cream cheese absolutely must be at room temperature. Cold cream cheese won’t beat smooth; you’ll end up with lumps in your filling no matter how long you mix it. Pull it out of the fridge at least an hour before you start. This is one of those things I wish someone had told me upfront.
How to Make No-Bake Key Lime Bars Step by Step
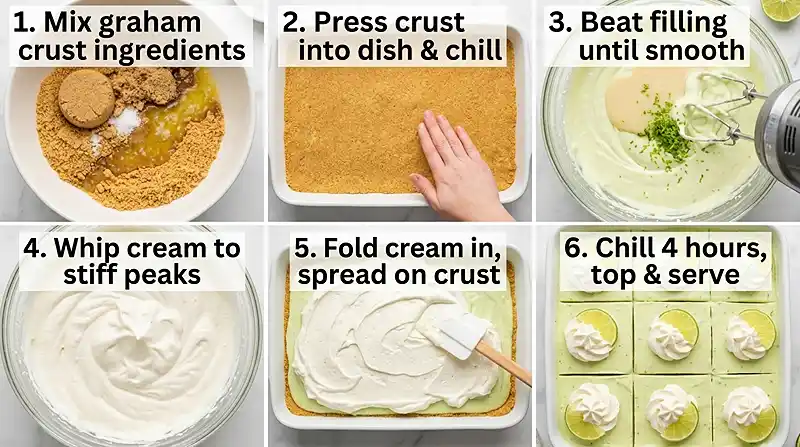
Make the Crust
- Combine the graham cracker crumbs, salt, brown sugar, and melted butter in a bowl and stir until the mixture looks like wet sand.
- Press the mixture firmly and evenly into a 9×13-inch baking dish. Use the bottom of a measuring cup to compact it well.
- Chill the crust in the fridge while you prepare the filling.
Pro Tip: The key to a crust that holds its shape is pressing it firmly into every corner. A loose crust will crumble when you slice the bars.
Make the Filling
- In a large bowl, beat the room-temperature cream cheese with a hand mixer until completely smooth, about 2 minutes.
- Add the sweetened condensed milk, fresh lime juice, and lime zest and mix on medium speed until smooth and fully combined.
- In a separate bowl, beat the cold heavy whipping cream until stiff peaks form.
- Gently fold the whipped cream into the cream cheese mixture in 2 additions, mixing until just combined — stop as soon as you don’t see white streaks.
Pro Tip: For best results, fold the whipped cream slowly with a rubber spatula using a sweeping motion from the bottom of the bowl. Overmixing at this stage deflates the cream and kills the light, airy texture you’re after.
Assemble and Chill
- Spread the filling evenly over the chilled graham cracker crust, smoothing the top with a spatula.
- Chill in the fridge for a minimum of 4 hours, or overnight for the best results.
- Before serving, top with sweetened whipped cream and lime slices, then slice and serve cold.
Pro Tip: The most common mistake is slicing these bars before they’re fully set — the filling needs the full 4 hours to firm up. Overnight chilling gives you the cleanest, most defined cuts.
Expert Tips for Perfect No-Bake Key Lime Bars
Pro Tips for Success
Room temperature cream cheese is the real secret. Cold cream cheese won’t beat smooth no matter how hard you try, and tiny lumps ruin the silky texture of the finished filling. Give it a full hour at room temperature before you start — or speed it up by cutting it into small cubes.
For best results, use freshly squeezed lime juice. The acid in fresh lime juice also helps the filling set properly. Bottled lime juice contains preservatives and lacks the volatile oils that give the bars their punch. Squeeze your limes the day you make these.
The key to a mousse-like filling is cold heavy cream. Warm cream won’t whip properly. Keep it refrigerated until the very moment you need it, and consider chilling your bowl and beaters too if your kitchen runs warm.
No-bake key lime bars work best when they chill overnight. Four hours is the minimum, but overnight chilling gives you a firmer set, cleaner slices, and a more developed flavor. This also makes them ideal for making ahead before a party.
Line your baking dish with parchment paper. Leave an overhang on two sides, and you can lift the entire slab out of the pan before slicing — much easier than cutting in the dish and way cleaner presentation. This tip changed everything for me.
Delicious Variations
Make-Ahead Version: These bars are perfect for prepping a day or two ahead. Make the full recipe, cover tightly with plastic wrap, and refrigerate. Hold off on the whipped cream topping until right before serving so it stays fresh and doesn’t weep.
Gluten-Free Version: Swap regular graham cracker crumbs for a certified gluten-free graham cracker alternative. The filling is already naturally gluten-free, so this single swap makes the whole recipe safe for guests with gluten sensitivities. The texture of the crust stays nearly identical.
Lemon Variation: Replace the lime juice and lime zest with the same amounts of freshly squeezed lemon juice and lemon zest. You get a bright, tangy lemon bar with the same creamy no-bake filling — a great option when limes are expensive or out of season.
Troubleshooting Common Problems
Problem: The filling isn’t setting firm enough after chilling.
Solution: It likely needs more time. Make sure you chilled for the full 4 hours minimum. If it’s still soft, the whipped cream may have been underwhipped — it needs to reach stiff (not soft) peaks before folding in.
Problem: The cream cheese filling has lumps.
Solution: The cream cheese wasn’t at room temperature before beating. Unfortunately you can’t fix this after the fact — press it through a fine mesh sieve if the lumps are small, or start the filling again with properly softened cream cheese.
Problem: The crust crumbles when slicing.
Solution: It wasn’t pressed firmly enough before chilling, or the butter ratio was off. Next time press harder and use the flat bottom of a glass or measuring cup. Chilling the crust for 15-20 minutes before adding the filling also helps it bind properly.
How to Store and Reheat No-Bake Key Lime Bars
| Storage Method | Duration | Best Practice |
|---|---|---|
| Room Temperature | Up to 2 hours | Keep out of direct sunlight; return to fridge after serving |
| Refrigerator | Up to 5 days | Cover tightly with plastic wrap to prevent the filling from absorbing fridge odors |
| Freezer | Up to 2 months | Freeze without whipped cream topping; wrap individual bars in plastic, then foil |
These bars are served cold and don’t need reheating — just pull them from the fridge about 5 minutes before serving. The filling softens just slightly at room temperature, which makes the texture even creamier on the palate.
Frozen bars thaw beautifully overnight in the fridge. The texture stays remarkably close to fresh. Add the whipped cream topping and lime slices after thawing, right before you serve them.
Got leftover bars? Crumble them over vanilla ice cream for an easy dessert situation that honestly might be better than the original. You can also blend them into a milkshake with a scoop of vanilla ice cream for a key lime pie shake that’s completely over the top in the best way.
FAQs About No-Bake Key Lime Bars
Can I make no-bake key lime bars the night before?
Yes — and honestly, you should. Making these bars the night before gives the filling extra time to set completely, resulting in cleaner slices and a more developed lime flavor. Cover the pan tightly with plastic wrap and refrigerate overnight. Add the whipped cream topping and lime slice garnish right before serving for the best presentation.
Can I use bottled lime juice instead of fresh?
Fresh lime juice is strongly recommended and makes a noticeable difference. Bottled juice lacks the bright, volatile citrus oils that make these bars taste fresh and tangy. It can also affect how the filling sets. If you absolutely must use bottled juice in a pinch, use the same quantity, but the flavor won’t be as sharp or clean.
How do I know when the bars are set and ready to cut?
The bars are ready when the filling is firm to the touch and doesn’t jiggle when you gently shake the pan. That usually takes a minimum of 4 hours in the fridge. For the cleanest cuts, run a sharp knife under hot water, wipe it dry, and slice in one smooth downward motion — repeating between each cut.
Can I freeze no-bake key lime bars?
Yes, these bars freeze well for up to 2 months. Freeze them without the whipped cream topping. Cut into individual bars first, wrap each piece in plastic wrap, then place in a zip-top freezer bag or airtight container. Thaw overnight in the refrigerator. Add fresh whipped cream and lime slices just before serving.
What can I substitute for the graham cracker crust?
Digestive biscuits work as a 1:1 swap and give a slightly less sweet, more buttery crust. Vanilla wafer crumbs are another solid option with a lighter flavor. For a gluten-free version, certified gluten-free graham crackers or almond flour mixed with butter and a little sugar will both work well without changing the filling at all.
Ready to Make the Best Summer Dessert of Your Life?
Seriously, these no-bake key lime bars are one of those recipes that looks way more impressive than the effort it actually takes. I make them on repeat all summer long, and they disappear every single time — no leftovers, no complaints, just people asking for the recipe.
If you make these, save this post to Pinterest so you can find it again when your friends inevitably ask you for it. And honestly, drop a comment below and let me know how they turned out — I love hearing when these recipes work out for you. Tell me if you tried any variations too!
Looking for more recipes to round out your summer spread? Try this street corn pasta salad — it pairs perfectly with these bars at a cookout. Or check out these loaded turkey taco sweet potato bowls for a hearty main course that keeps the no-fuss theme going strong.
No-bake key lime bars with a buttery graham cracker crust and silky lime cream cheese filling — chilled, creamy, tangy, and ready with zero oven time. Save this for your next summer gathering and thank yourself later.
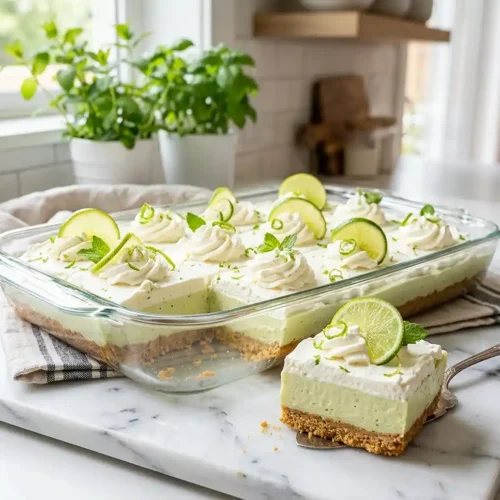
Easy No-Bake Key Lime Bars with Graham Cracker Crust
Equipment
- 9×13-inch baking dish
- Hand mixer or stand mixer
- Large mixing bowl
- Medium Mixing Bowl
- Rubber spatula
- Citrus juicer
- Zester or Microplane
- Measuring cups and spoons
Ingredients
Crust
- 2 cups Graham cracker crumbs 285g; fine crumbs pack best
- 1 pinch Salt
- ¼ cup Brown sugar, packed 50g; light or dark both work
- 6 tbsp Unsalted butter, melted 85g; slightly cooled
Filling
- 8 oz Cream cheese 225g; room temperature
- 14 oz Sweetened condensed milk 400g; one full can
- ½ cup Fresh lime juice 125ml; freshly squeezed only
- 1 tbsp Lime zest Zest before juicing
- 1 cup Heavy whipping cream 250ml; keep cold
Topping
- Sweetened whipped cream For topping; add before serving
- Lime slices For garnish
Instructions
- Combine the graham cracker crumbs, salt, brown sugar, and melted butter in a bowl and stir until the mixture resembles wet sand.
- Press the mixture firmly and evenly into a 9×13-inch baking dish, using the flat bottom of a measuring cup to compact it into every corner.
- Chill the crust in the fridge while you prepare the filling.
- In a large bowl, beat the room-temperature cream cheese with a hand-held mixer (or stand mixer with paddle attachment) until completely smooth, about 2 minutes.
- Add the sweetened condensed milk, fresh lime juice, and lime zest and mix on medium speed until smooth and fully combined.
- In a separate bowl, beat the cold heavy whipping cream until stiff peaks form.
- Gently fold the whipped cream into the cream cheese mixture in 2 additions, mixing until just combined — stop as soon as no white streaks remain.
- Spread the filling evenly over the chilled graham cracker crust, smoothing the top with a spatula.
- Chill in the fridge for a minimum of 4 hours, or overnight for the best set and cleanest slices.
- Top with sweetened whipped cream and lime slices, then slice and serve cold.