No-Bake Peach Cheesecake Cups
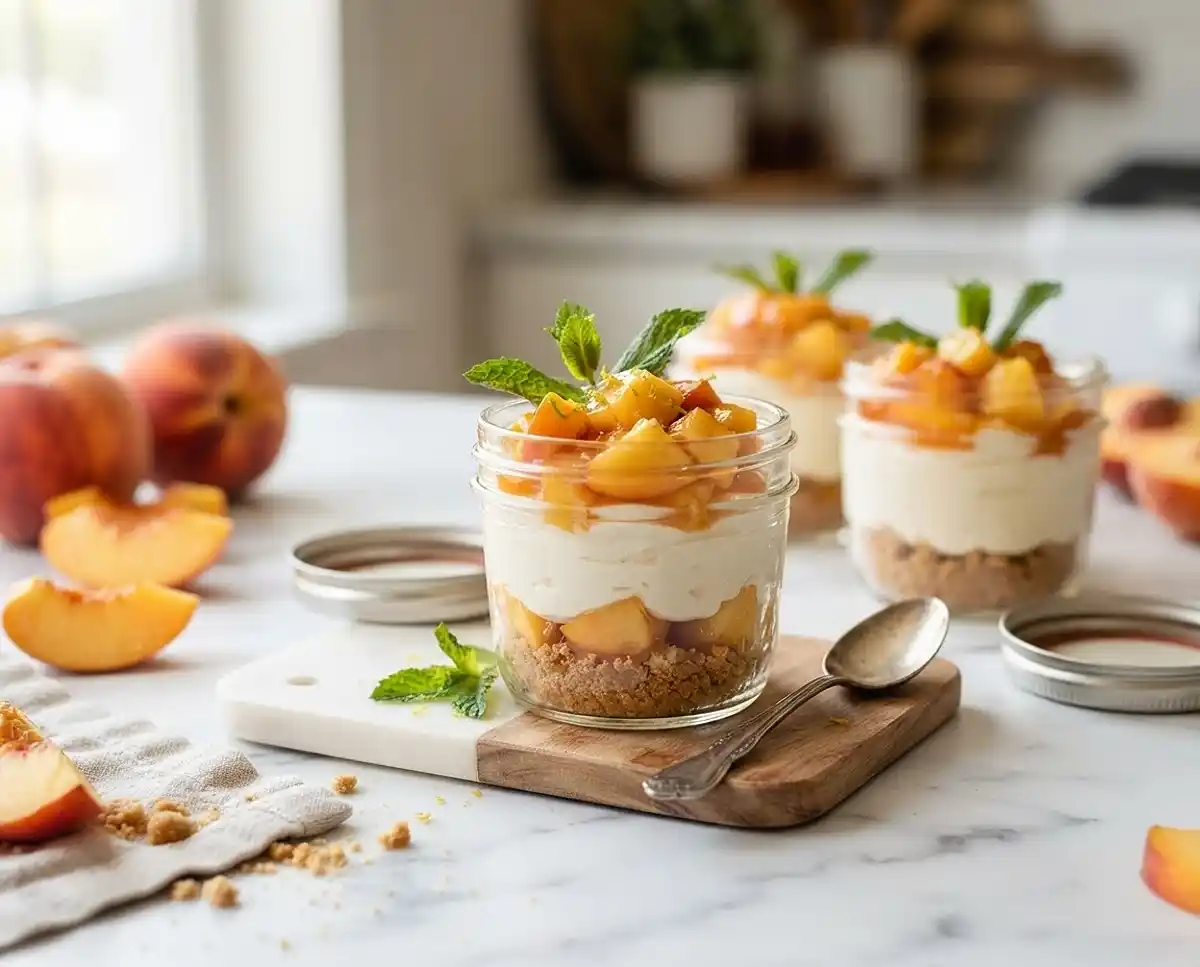
These No-Bake Peach Cheesecake Cups are creamy, fresh, and ready in minutes — no oven needed. Perfect for hot summer days when peaches are at their best.
No-Bake Peach Cheesecake Cups are individual jars of creamy cheesecake filling layered over a buttery graham cracker crust and topped with fresh cooked peaches. This recipe serves 6 to 8, delivers a cool, silky dessert with a crisp crumb base and a juicy peach topping, and is perfect for summer cookouts, potlucks, or a make-ahead treat when you don’t want to touch the oven.
Here’s everything you need to make it perfectly.
I started making these No-Bake Peach Cheesecake Cups the summer my oven broke right before a family cookout, and honestly, they turned out better than the baked version I used to bring. The peaches go soft and jammy on the stove in under ten minutes, and the cheesecake layer sets up thick and cold in the fridge overnight. Nobody at that cookout knew my oven was broken — they just kept asking for the recipe.
Table of Contents
Why You’ll Love These No-Bake Peach Cheesecake Cups
The filling is rich and a little tangy from the cream cheese, but folding in whipped cream keeps it light instead of heavy. You get a buttery graham cracker base, a smooth cheesecake middle, and a sweet-tart peach topping in every bite. There’s no baking, no water bath, and no cracked cheesecake top to stress over — just mix, layer, and chill. These individual peach cheesecakes look fancy but come together fast, which makes them great for kids’ parties, potlucks, or a weeknight treat.
What Ingredients Do You Need for No-Bake Peach Cheesecake Cups?
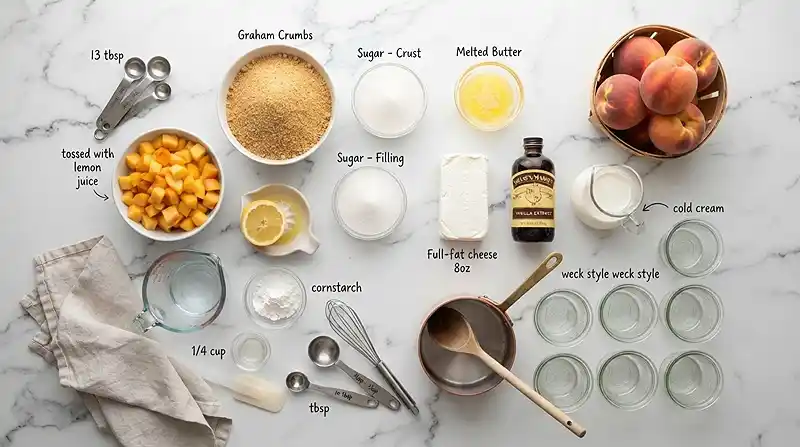
| Ingredient Group | Ingredient | Amount | Notes |
|---|---|---|---|
| Crust | Graham cracker crumbs | 1 ½ cups | Fine crumbs work best |
| Crust | Granulated sugar | ¼ cup | |
| Crust | Unsalted butter, melted | 6 tablespoons | |
| Cheesecake Filling | Cream cheese, softened | 8 ounces | Room temperature |
| Cheesecake Filling | Granulated sugar | ½ cup | |
| Cheesecake Filling | Vanilla extract | 1 teaspoon | |
| Cheesecake Filling | Heavy cream, cold | 1 cup | Straight from the fridge |
| Peach Topping | Fresh peaches, diced | 1 ½ cups | About 2 medium peaches |
| Peach Topping | Lemon juice | 1 tablespoon | |
| Peach Topping | Cornstarch | 1 tablespoon | Optional, for a thicker topping |
| Peach Topping | Water | 2 tablespoons | Optional, mixed with cornstarch |
Fresh peaches make all the difference here — this is one of those summer peach recipes where ripe, in-season fruit really matters. If your peaches aren’t quite ripe enough, the cornstarch helps the topping thicken into more of a compote. And don’t skip cold heavy cream; it whips up faster and holds its shape better once it’s folded into the filling.
How to Make No-Bake Peach Cheesecake Cups Step by Step
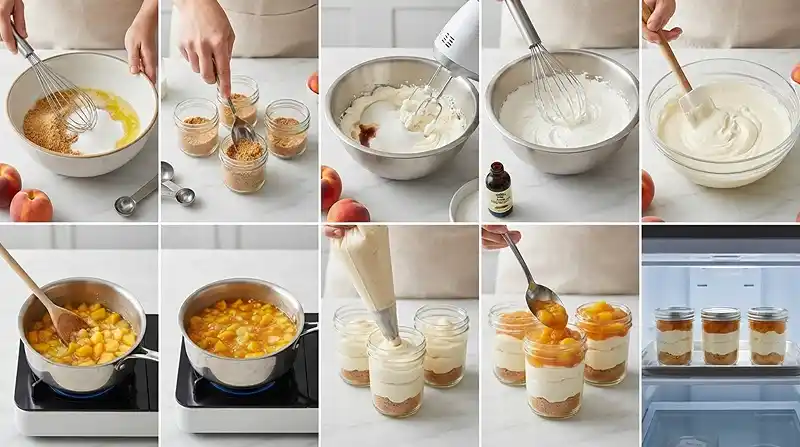
Make the Crust
- Combine the graham cracker crumbs, ¼ cup sugar, and melted butter in a medium bowl. Mix until well combined.
- Divide the crumb mixture evenly among 6 to 8 small jars or dessert cups, about 2 tablespoons per cup.
- Press the crumbs firmly into the bottom of each cup, then chill in the fridge while you make the filling.
💡 A flat-bottomed glass or measuring cup makes pressing the crust down way easier than a spoon.
Make the Cheesecake Filling
- Beat the softened cream cheese, ½ cup sugar, and vanilla extract with an electric mixer until smooth and creamy, about 2 to 3 minutes.
- In a separate bowl, whip the cold heavy cream until soft peaks form.
- Gently fold the whipped cream into the cream cheese mixture until just combined.
Pro Tip: Fold gently and stop as soon as the streaks disappear — overmixing knocks the air out and makes the filling dense instead of light.
Make the Peach Topping
- Combine the diced peaches, lemon juice, and an optional ¼ cup sugar in a small saucepan over medium heat.
- If using cornstarch, whisk it with the water in a small bowl first, then stir it into the peach mixture.
- Cook, stirring occasionally, until the peaches are slightly softened and the sauce has thickened, about 5 to 7 minutes. Let cool completely.
Pro Tip: Let the peach topping cool all the way before spooning it over the cheesecake layer, or it’ll melt the filling into a soupy mess.
Assemble and Chill
- Remove the chilled crusts from the refrigerator.
- Spoon or pipe the cheesecake filling over the crusts, filling each cup about two-thirds full.
- Top each cup with the cooled peach topping.
- Refrigerate for at least 4 hours, or preferably overnight, before serving.
💡 Overnight really is worth the wait — the layers hold their shape so much better when you slice or scoop in.
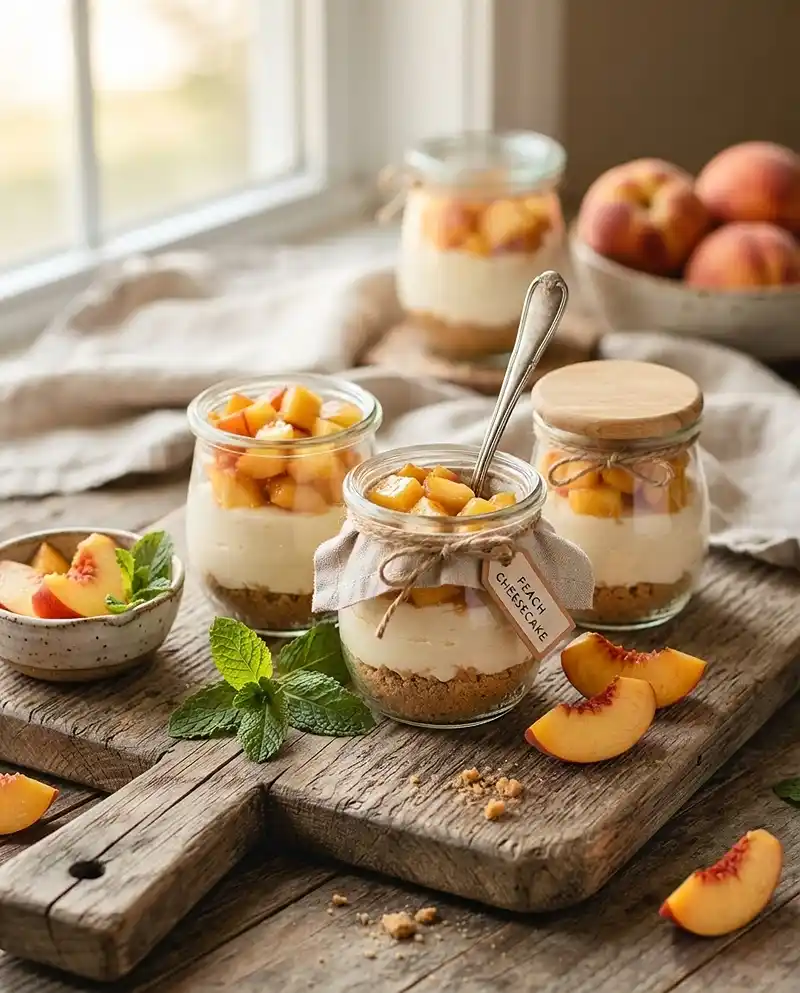
Expert Tips for Perfect No-Bake Peach Cheesecake Cups
Pro Tips for Success
The key to a smooth filling is starting with fully softened cream cheese — cold lumps never fully blend in, no matter how long you beat them. For best results, whip the heavy cream just to soft peaks; stiff peaks make the filling harder to fold and can turn grainy. The most common mistake is skipping the chill time — instead, give these individual peach cheesecakes the full 4 hours so they actually hold together when you eat them.
No-bake cheesecake jars work best when every layer is cold before you stack the next one. I learned that one the hard way after spooning warm peach topping onto a filling that had only chilled for an hour. Use clear glass jars if you want the layers to show — it makes these look a lot more impressive than the effort they actually take.
Delicious Variations
Quick Version: Skip the stovetop peach topping and use a good store-bought peach preserve warmed slightly and thinned with a splash of lemon juice.
Gluten-Free Version: Swap the graham cracker crumbs for a gluten-free graham cracker or vanilla wafer alternative, using the same amount.
Alternative Ingredients: No fresh peaches on hand? Frozen peaches work too — just thaw and drain them well before cooking so the topping doesn’t turn watery.
Troubleshooting Common Problems
Problem: The cheesecake filling is runny instead of thick. Solution: Your heavy cream probably wasn’t whipped to soft peaks, or the cream cheese was too warm. Chill the bowl and beaters for 10 minutes and try again.
Problem: The peach topping is too thin. Solution: Use the cornstarch slurry option and cook it a couple minutes longer, stirring so it doesn’t stick or scorch.
Problem: The crust won’t hold together when you scoop into it. Solution: Press it down harder and more evenly next time — a measuring cup works better than a spoon for this.
How to Store and Reheat No-Bake Peach Cheesecake Cups
| Storage Method | Duration | Best Practice |
|---|---|---|
| Room Temperature | Up to 2 hours | Keep covered and out of direct sun |
| Refrigerator | Up to 4 days | Cover tightly with lids or plastic wrap |
| Freezer | Up to 1 month | Freeze without the peach topping, add fresh when serving |
These aren’t a reheat situation — they’re meant to be eaten cold, straight from the fridge, with the peach topping still glossy and the filling firm but creamy. If you’re freezing them, let the cups thaw in the fridge overnight before adding fresh peach topping on top. Leftover peach topping is great spooned over vanilla ice cream or stirred into <a href=”https://tastewithpurpose.com/peach-blueberry-crisp-bars/” target=”_blank” rel=”noopener”>peach blueberry crisp bars</a> the next day.
FAQs About No-Bake Peach Cheesecake Cups
Can I make these ahead of time?
Yes, and honestly, you should. These No-Bake Peach Cheesecake Cups actually taste better after chilling overnight, and they hold up well in the fridge for up to 4 days once assembled.
Can I use canned or frozen peaches instead of fresh?
Frozen peaches work well if you thaw and drain them thoroughly before cooking. Canned peaches in juice can work too, but drain them well and reduce the added sugar since canned peaches are often already sweetened.
Why did my cheesecake filling turn out grainy?
Grainy filling almost always means the cream cheese wasn’t fully softened before mixing, or the heavy cream was overwhipped past soft peaks. Let the cream cheese sit at room temperature for a full 30 minutes before you start.
How do I know the peach topping is done cooking?
The peaches should look slightly softened and the liquid around them should coat the back of a spoon, which takes about 5 to 7 minutes over medium heat. It’ll thicken more as it cools, so don’t wait for it to look fully set on the stove.
Can I make this recipe dairy-free?
You can swap in dairy-free cream cheese and a coconut-based whipping cream, though the texture will be slightly softer than the traditional version. The graham cracker crust and peach topping are already naturally dairy-free as written.
Give These a Try
Seriously, if you’ve got ripe peaches sitting on your counter, this is the recipe to use them in. They’re the kind of dessert that looks like way more work than it is, and I mean it when I say nobody will guess you didn’t turn on the oven. Save this one to Pinterest for your next cookout, and drop a comment below if you try it — I want to know how yours turned out.
Creamy no-bake cheesecake jars layered with a buttery graham crust and fresh cooked peaches — no oven, no fuss, just chill and serve. Save this easy peach dessert for your next summer gathering.
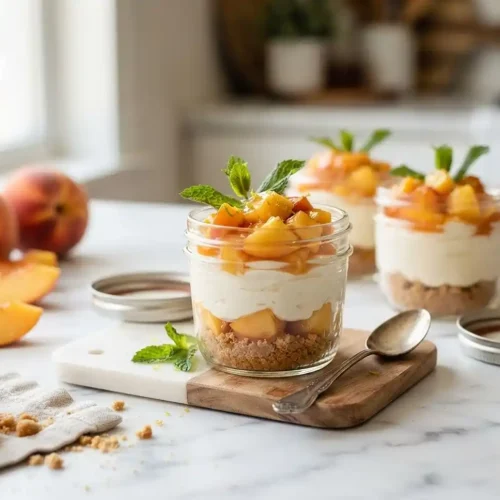
Silky No-Bake Peach Cheesecake Cups
Equipment
- Small jars or dessert cups
- Medium Mixing Bowl
- Electric mixer
- Small saucepan
Ingredients
Crust
- 1 ½ cups Graham cracker crumbs Fine crumbs work best
- ¼ cup Granulated sugar
- 6 tablespoons Unsalted butter, melted
Cheesecake Filling
- 8 ounces Cream cheese, softened Room temperature
- ½ cup Granulated sugar
- 1 teaspoon Vanilla extract
- 1 cup Heavy cream, cold Straight from the fridge
Peach Topping
- 1 ½ cups Fresh peaches, diced About 2 medium peaches
- 1 tablespoon Lemon juice
- 1 tablespoon Cornstarch Optional, for a thicker topping
- 2 tablespoons Water Optional, mixed with cornstarch
Instructions
- Combine the graham cracker crumbs, ¼ cup sugar, and melted butter in a medium bowl. Mix until well combined.
- Divide the crumb mixture evenly among 6 to 8 small jars or dessert cups, about 2 tablespoons per cup.
- Press the crumbs firmly into the bottom of each cup, then chill in the fridge while you make the filling.
- Beat the softened cream cheese, ½ cup sugar, and vanilla extract with an electric mixer until smooth and creamy, about 2 to 3 minutes.
- In a separate bowl, whip the cold heavy cream until soft peaks form.
- Gently fold the whipped cream into the cream cheese mixture until just combined.
- Combine the diced peaches, lemon juice, and an optional ¼ cup sugar in a small saucepan over medium heat.
- If using cornstarch, whisk it with the water in a small bowl first, then stir it into the peach mixture.
- Cook, stirring occasionally, until the peaches are slightly softened and the sauce has thickened, about 5 to 7 minutes. Let cool completely.
- Remove the chilled crusts from the refrigerator.
- Spoon or pipe the cheesecake filling over the crusts, filling each cup about two-thirds full.
- Top each cup with the cooled peach topping.
- Refrigerate for at least 4 hours, or preferably overnight, before serving.