No-Bake Peanut Butter Pie Cups
No-bake peanut butter pie cups are a creamy, crowd-pleasing dessert made with a whipped peanut butter cheesecake filling, chopped peanut butter cups, and a store-bought chocolate crust — with zero oven time required. This recipe serves 8, delivers a rich, silky filling with crunchy candy pieces in every bite, and is perfect for summer parties, make-ahead entertaining, and warm weather treats.
I’ve made these no-bake peanut butter pie cups more times than I can count, and the one thing that surprised me every single time is how much the texture improves after a full 4 hours in the fridge versus the minimum 2. Don’t rush it. The filling goes from soft and loose to properly set and sliceable — completely different experience.
For more treats that keep the oven off, check out these cool no-bake summer sweets.
Table of Contents
Why You’ll Love These No-Bake Peanut Butter Pie Cups
There’s no baking, no water bath, and no stress. The filling comes together in about 10 minutes with an electric mixer and a spatula.
The texture is genuinely remarkable — creamy from the cream cheese and Cool Whip, with little chunks of peanut butter cup throughout that give you something to bite into. It travels well, holds up in the fridge for days, and works just as well for a Tuesday night as it does for a holiday spread.
What Ingredients Do You Need for Peanut Butter Pie Cups?
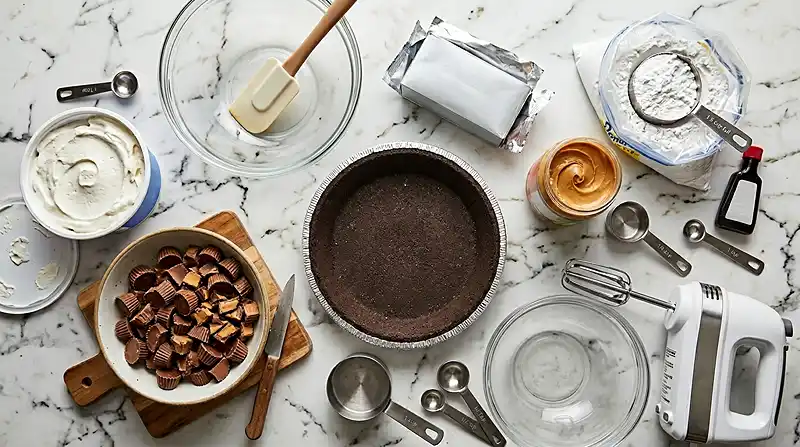
| Ingredient Group | Ingredient | Amount | Notes |
|---|---|---|---|
| Filling | Cream cheese, softened | 8 oz (1 package) | Must be fully room temperature |
| Filling | Peanut butter | 1/2 cup | Creamy works best here |
| Filling | Vanilla extract | 1 teaspoon | Pure, not imitation |
| Filling | Powdered sugar | 1 1/2 cups | Sift if lumpy |
| Filling | Cool Whip, thawed | 8 oz (1 container) | Fold gently, don’t beat |
| Mix-ins & Topping | Chopped peanut butter cups | 2 cups total | 1 1/2 cups in, 1/2 cup on top |
| Crust | Oreo or chocolate graham cracker crust | 1 store-bought crust | Standard 9-inch size |
The cream cheese is the backbone of this filling — it has to be fully softened or you’ll get lumps that no amount of beating will fix. Pull it out of the fridge at least an hour before you start.
For the peanut butter cups, both mini and regular sizes work fine. Mini cups are easier to fold in without breaking up too much, but regular cups chopped into quarters give you bigger pockets of chocolate in each slice. Either way works for these easy dessert cups.
How to Make Peanut Butter Pie Cups Step by Step
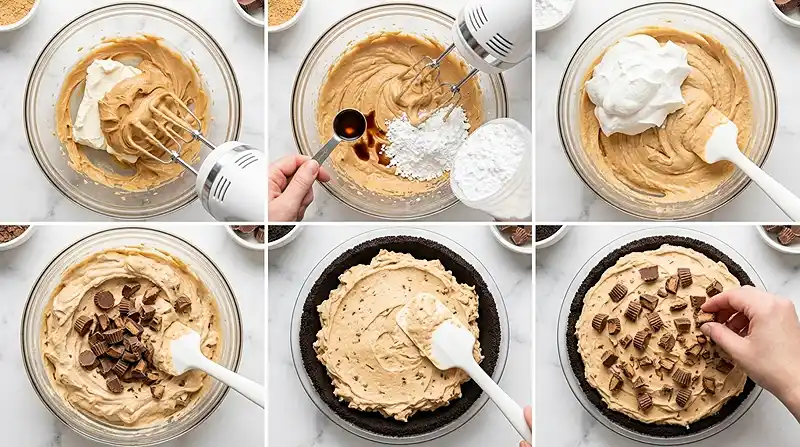
- Beat the softened cream cheese and peanut butter together with an electric mixer on medium speed until completely smooth with no lumps.
- Add the vanilla extract and mix until incorporated.
- Beat in the powdered sugar on low speed first, then medium, until the mixture is smooth and thick.
- Add the thawed Cool Whip and fold it in gently with a spatula until just blended — don’t use the mixer here.
- Add 1 1/2 cups of the chopped peanut butter cups and fold them into the filling.
- Spread the filling evenly into the store-bought crust.
- Sprinkle the remaining 1/2 cup of chopped peanut butter cups over the top.
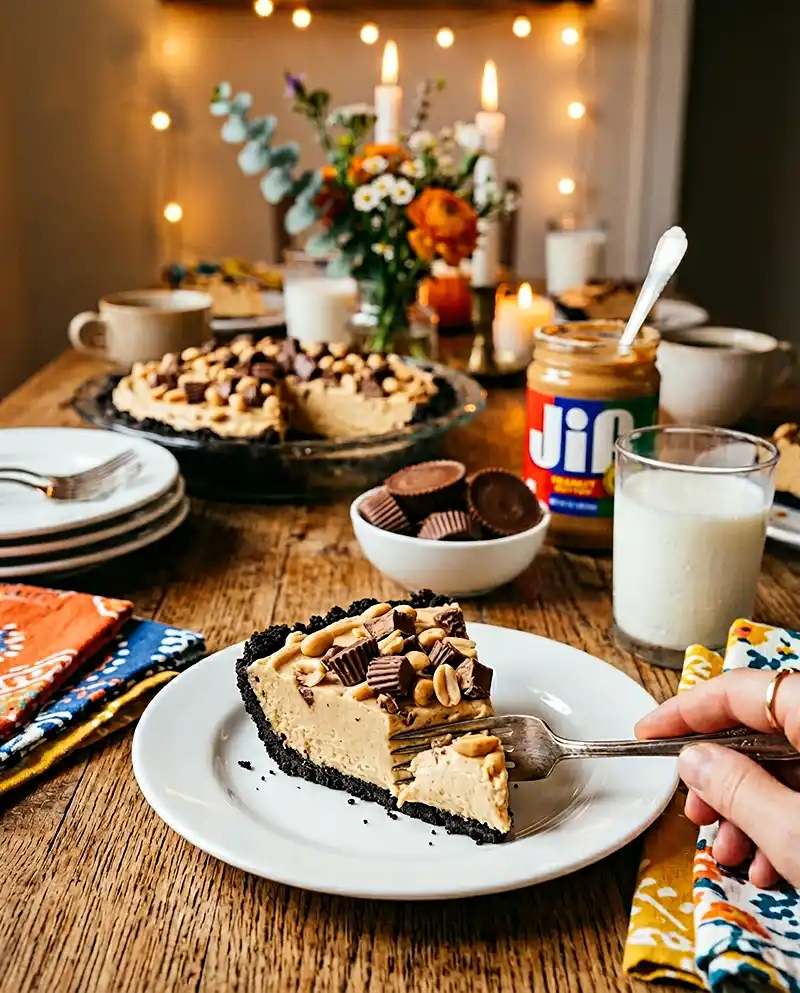
- Refrigerate for 2 to 4 hours before slicing and serving.
Pro Tip: Folding the Cool Whip by hand instead of beating it preserves the airy texture that makes this filling light rather than dense. Over-mixing deflates it completely.
Pro Tip: For best results, chill the pie for the full 4 hours. The filling sets more firmly and slices cleanly rather than sagging when you cut into it.
Expert Tips for Perfect No-Bake Peanut Butter Pie Cups
Pro Tips for Success
The key to a lump-free filling is fully softened cream cheese. Cold cream cheese won’t blend smoothly with the peanut butter no matter how long you beat it. Give it a full hour at room temperature before you start.
The most common mistake is adding the powdered sugar all at once on high speed — instead, start on low to keep it from flying everywhere, then increase to medium once it’s incorporated. Your kitchen will thank you.
No-bake peanut butter pie cups work best when the Cool Whip is properly thawed in the refrigerator overnight rather than on the counter. Counter-thawed Cool Whip can get watery and runny, which affects the final texture of the filling.
For best results with clean slices, run your knife under hot water and wipe it dry between cuts. Cold filling tends to drag and smear — the warm blade glides right through.
“The real test of a properly set no-bake pie is that it holds its shape for at least 30 seconds after slicing. If it slumps immediately, it needs more time in the fridge.”
Delicious Variations
Mini Cup Version: Divide the filling into individual serving cups instead of one large crust. Press a few Oreo crumbs into the bottom of each cup, add the filling, and top with peanut butter cup pieces. These are perfect make-ahead sweets for parties since each guest gets their own portion.
Dairy-Free Version: Use dairy-free cream cheese and a coconut whipped topping in place of the standard ingredients. The texture is slightly softer but the flavor is still rich and satisfying — a solid option for guests with dairy restrictions at summer gatherings.
Dark Chocolate Upgrade: Swap the standard peanut butter cups for dark chocolate peanut butter cups and use a dark chocolate Oreo crust. The bittersweet chocolate offsets the sweetness of the filling and gives the whole dessert a more grown-up edge.
Troubleshooting Common Problems
Problem: Filling is lumpy after mixing.
Solution: The cream cheese wasn’t soft enough. Next time, leave it out longer. If you’re mid-recipe, keep beating on medium — some lumps will smooth out with more time, though very cold cream cheese may not fully resolve.
Problem: Filling won’t set firm after 2 hours.
Solution: Refrigerate for the full 4 hours. If it’s still soft, the Cool Whip may have been over-mixed or too warm when folded in. It will still taste great — just serve in smaller scoops rather than slices.
Problem: Crust crumbles when slicing.
Solution: Let the pie sit at room temperature for 5 minutes before cutting. A slightly warmed filling puts less pressure on the crust during slicing.
How to Store and Reheat No-Bake Peanut Butter Pie Cups
| Storage Method | Duration | Best Practice |
|---|---|---|
| Room Temperature | Up to 2 hours | Keep covered; don’t leave out longer in warm weather |
| Refrigerator | 4-5 days | Cover tightly with plastic wrap or store in airtight container |
| Freezer | Up to 2 months | Freeze whole or in slices; thaw overnight in refrigerator |
This dessert is served cold — no reheating needed. Pull it straight from the fridge and let it sit for about 5 minutes before slicing for the cleanest cuts. The filling softens just slightly at the edges and the flavors come through better when it’s not ice cold.
Got leftovers? Crumble a slice over vanilla ice cream for a fast no-bake dessert situation that honestly tastes intentional. You can also chop leftover pieces and fold them into whipped cream as a quick mousse-style dessert for the next day.
FAQs About No-Bake Peanut Butter Pie Cups
Can I make no-bake peanut butter pie cups ahead of time?
Yes, and they’re actually better made a day ahead. The filling sets more firmly overnight and the flavors meld together. Make it up to 24 hours before serving and keep it covered in the refrigerator. Add the peanut butter cup topping right before serving if you want them to look their freshest.
Can I use natural peanut butter instead of regular?
It’s not recommended. Natural peanut butter has more oil separation and a looser consistency that can make the filling soft and unstable. Standard creamy peanut butter — like Jif or Skippy — gives you the thick, stable texture this filling needs to set properly.
Can I freeze the whole pie?
Yes. Wrap it tightly in plastic wrap, then in foil, and freeze for up to 2 months. Thaw it overnight in the refrigerator before serving. Don’t thaw at room temperature — the filling can get too soft and watery. Frozen slices also work well as a semi-frozen treat on hot days.
What can I use instead of Cool Whip?
You can use homemade stabilized whipped cream as a substitute. Beat 1 cup heavy cream with 2 tablespoons powdered sugar to stiff peaks, then fold it in the same way. The texture will be slightly denser but the flavor is excellent. Avoid using regular unstabilized whipped cream — it deflates quickly.
How do I know when the pie is set and ready to serve?
The filling should be firm to the touch in the center and hold its shape cleanly when you run a knife through it. If it’s still jiggly or the center sinks when you press lightly, it needs more time. The minimum is 2 hours, but 4 hours is the reliable target for a sliceable, fully set pie.
Go Make This Tonight
Seriously, this is one of those desserts that looks like you spent way more time on it than you did. Ten minutes of mixing, a few hours in the fridge, done.
Save this to your dessert Pinterest board before you forget — it’s the kind of recipe you’ll want to find fast when someone asks you to bring something to a party. And if you make it, I want to hear about it in the comments. Did you go mini cups or the full pie? Did you manage to wait the full 4 hours?
For more no-bake ideas, check out these no-bake key lime cheesecake cups — same easy approach, totally different flavor. And if you’re building out a full summer spread, these pair beautifully alongside a fresh caprese pasta salad for a meal that covers every base.
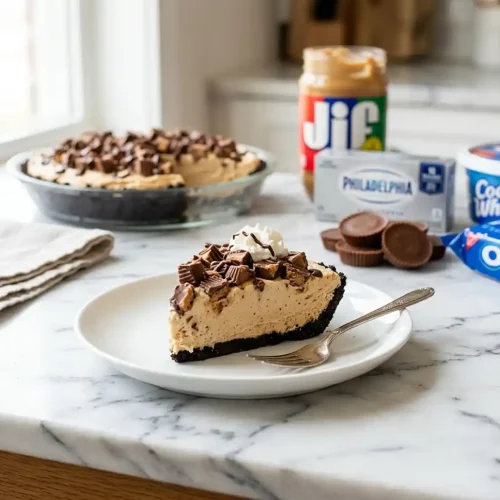
No-bake peanut butter pie cups — creamy peanut butter filling, chunks of chocolate peanut butter cups, and a chocolate crust with zero oven time. The ultimate make-ahead summer dessert. Save this recipe now!
No-Bake Peanut Butter Pie Cups
Equipment
- Electric mixer
- Large mixing bowl
- Rubber spatula
- Measuring Cups
- Knife and cutting board
Ingredients
Filling
- 8 oz cream cheese, softened Must be fully room temperature
- ½ cup peanut butter Creamy style recommended
- 1 teaspoon vanilla extract Pure, not imitation
- 1 ½ cups powdered sugar Sift if lumpy
- 8 oz Cool Whip, thawed Thaw in fridge overnight
Mix-ins & Topping
- 2 cups peanut butter cups, chopped Mini or regular; 1.5 cups in filling, 0.5 cup on top
Crust
- 1 store-bought Oreo or chocolate graham cracker crust Standard 9-inch size
Instructions
- Beat the softened cream cheese and peanut butter together with an electric mixer on medium speed until completely smooth with no lumps.
- Add the vanilla extract and mix until incorporated.
- Beat in the powdered sugar on low speed first, then increase to medium, until the mixture is smooth and thick.
- Add the thawed Cool Whip and fold it in gently with a spatula until just blended — do not use the mixer for this step.
- Add 1 1/2 cups of the chopped peanut butter cups and fold them into the filling.
- Spread the filling evenly into the store-bought crust.
- Sprinkle the remaining 1/2 cup of chopped peanut butter cups over the top.
- Refrigerate for 2 to 4 hours before slicing and serving.