Mukimame Recipe
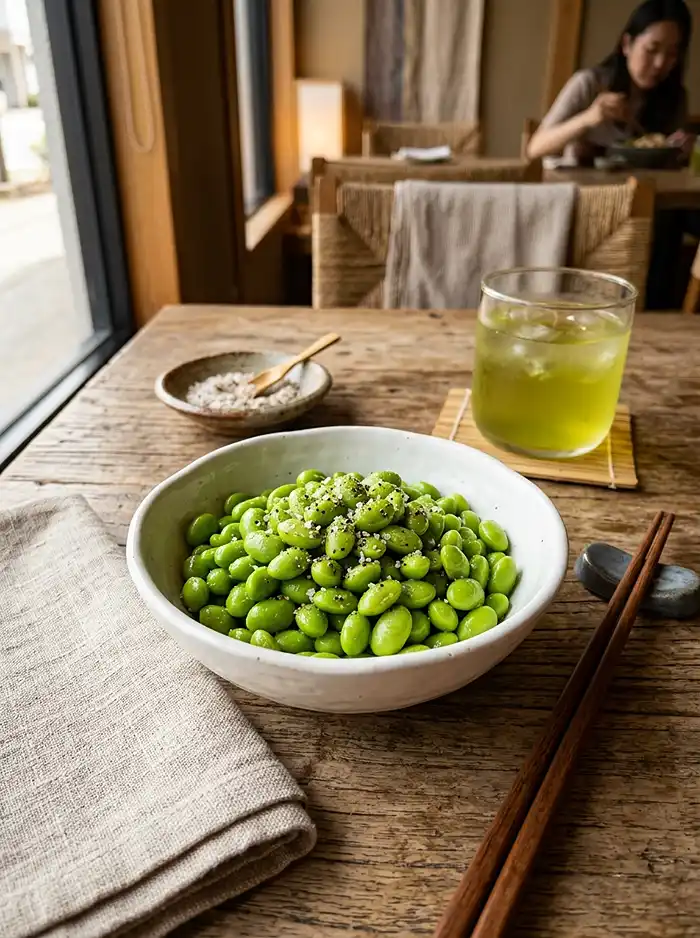
A quick, foolproof mukimame recipe that takes just 10 minutes from bag to bowl. Lightly salted, tender shelled soybeans with a seasoned finish — simple, satisfying, and genuinely good.
Mukimame is shelled edamame — the same young soybean, just without the pod. This recipe serves 2 to 3 people, delivers tender, lightly salted soybeans with a savory seasoned finish, and is perfect for a quick snack or easy weeknight side dish.
Here’s everything you need to make it perfectly.
I made this mukimame recipe more times than I can count before I realized the single thing that matters most: don’t skip draining well. Watery beans kill the seasoning. That one detail took me embarrassingly long to figure out.
Table of Contents
Why You’ll Love This Mukimame Recipe
It’s done in 10 minutes flat — boil, drain, season, done. No oven, no mess, no complicated steps.
The texture is spot-on: tender but not mushy, with just enough bite. And because it’s shelled, you get all the flavor of edamame with zero wrestling with pods.
It works as a snack, a side, a salad topper, or a protein-packed addition to grain bowls. One recipe, a dozen uses.

Easy Mukimame Recipe
Equipment
- Saucepan
- Colander
- Mixing bowl
Ingredients
Main
- 10 oz Organic Mukimame Shelled Soybeans Frozen works great
Cooking Liquid
- 3 cups Water For boiling
Seasoning
- ½ tsp Salt Added to boiling water
Finish
- 1 tbsp Homemade seasoned salt Tossed on after draining
Instructions
- Bring 3 cups of water to a full boil in a medium saucepan over high heat.
- Add 1/2 tsp salt to the boiling water, then add the shelled mukimame.
- Boil the mukimame for 5 minutes until tender but still slightly firm.
- Drain the beans thoroughly in a colander and shake well to remove excess water.
- Toss immediately with seasoned salt while the beans are still hot so the flavor sticks well.
- Serve warm or store in the refrigerator and reheat before serving if desired.
Notes
What Ingredients Do You Need for Mukimame?

| Ingredient Group | Ingredient | Amount | Notes |
|---|---|---|---|
| Main | Organic Mukimame Shelled Soybeans | 10 oz | Frozen works great |
| Cooking Liquid | Water | 3 cups | For boiling |
| Seasoning | Salt | 1/2 tsp | Added to boiling water |
| Finish | Seasoning (homemade seasoned salt) | 1 tbsp | Tossed on after draining |
The star here is organic mukimame — shelled soybeans that cook faster than in-pod edamame and absorb seasoning more evenly.
Salting the boiling water first seasons the beans from the inside out. And a good homemade seasoned salt at the end? That’s what makes these taste like something you’d actually crave.
How to Make Mukimame Step by Step

Boil
- Pour 3 cups of water into a medium saucepan and bring to a full boil over high heat.
- Add 1/2 tsp salt to the boiling water.
- Add the 10 oz of shelled mukimame to the salted boiling water.
- Boil for 5 minutes.
Pro Tip: The key to well-seasoned mukimame is salting the water before adding the beans — it pulls flavor into the soybean, not just onto the surface.
Season and Serve
- Drain the cooked mukimame well in a colander — shake out all excess water.
- Transfer to a bowl and toss immediately with 1 tbsp homemade seasoned salt while the beans are still hot.
- Serve right away, or store in the refrigerator until ready to eat.
Pro Tip: For best results, toss the seasoning onto the beans while they’re hot — that’s when they grip the salt and spices best. Cold beans won’t absorb it the same way.
Expert Tips for Perfect Mukimame
Pro Tips for Success
Drain thoroughly before seasoning. This is the step most people rush. If the beans are wet, the seasoning slides right off. A good 30-second shake in the colander makes a real difference.
The most common mistake is over-boiling — instead, stick to exactly 5 minutes. Mukimame beans are small and cook fast. Go past 5 minutes and they turn soft and lose that satisfying bite that makes them worth eating.
Mukimame works best when it’s served hot. Cold mukimame is fine for snacking, but right out of the pot is when the texture and flavor are at their peak. Don’t let them sit in the colander.
For best results, use organic shelled soybeans — the flavor is noticeably cleaner and the texture holds up better during boiling than conventional bagged options.
Delicious Variations
Quick Spicy Version
Toss the drained mukimame with a pinch of red pepper flakes and a tiny drizzle of sesame oil instead of seasoned salt. It takes about 30 extra seconds and tastes completely different — in a good way.
Low-Carb Protein Bowl Add-In
Skip serving these solo and add them straight into a cauliflower rice bowl with grilled chicken or shrimp. Mukimame nutrition is genuinely impressive — high protein, high fiber, low carb — so they pull real weight in a macro-friendly meal.
Vegan Garlic Version
After draining, toss with 1/2 tsp garlic powder, a squeeze of lemon, and flaky sea salt. Fully plant-based, satisfying, and works great as a side dish alongside dishes like this Mexican street corn pasta salad.
Troubleshooting Common Problems
Problem: Beans taste bland even after seasoning.
Solution: You likely didn’t salt the boiling water, or you seasoned the beans after they cooled. Always salt the water first and toss seasoning on immediately after draining while beans are still hot.
Problem: Beans came out mushy.
Solution: They boiled too long. Five minutes is the ceiling. Set a timer — don’t guess.
Problem: Seasoning won’t stick.
Solution: Too much surface moisture. Drain and shake more aggressively before tossing. A paper towel pat also works in a pinch.
How to Store and Reheat Mukimame
| Storage Method | Duration | Best Practice |
|---|---|---|
| Room Temperature | Up to 2 hours | Cover loosely; serve within 2 hours for food safety |
| Refrigerator | Up to 4 days | Store in an airtight container; season fresh if needed |
| Freezer | Up to 3 months | Freeze unseasoned in a zip bag; season after reheating |
To reheat, microwave refrigerated mukimame for 60 to 90 seconds — they come back warm and tender without going rubbery. You can also toss them straight into a hot skillet for 2 minutes if you want a slightly toasted exterior.
Leftover mukimame beans are great cold over salads, mixed into grain bowls, or stirred into a quick fried rice. Try pairing them with something bright and fresh, like these tomato peach burrata bites for a full spread.
FAQs About Mukimame
Is mukimame the same as edamame?
Mukimame and edamame are the same bean — young green soybeans — but prepared differently. Edamame is typically sold and served in the pod. Mukimame refers specifically to shelled soybeans with the pods already removed. The flavor is identical; mukimame just skips the step of popping beans out of the pod yourself.
What is mukimame exactly?
Mukimame is a Japanese term for shelled edamame — young soybeans harvested before they fully mature and removed from their pods. You’ll usually find them frozen in bags at most grocery stores. They cook faster than in-pod edamame and are easier to season evenly, which makes them great for quick weeknight cooking.
What are the nutrition benefits of mukimame?
Mukimame nutrition is one of the reasons it’s become a go-to healthy snack. A typical serving delivers around 8 to 10 grams of plant-based protein, significant dietary fiber, and key micronutrients including iron, calcium, and folate. It’s naturally gluten-free, dairy-free, and fits low-carb and vegetarian eating patterns well.
Can I make this mukimame recipe ahead of time?
Yes. Boil, drain, and season the mukimame up to 4 days ahead and refrigerate in an airtight container. The seasoning holds well. Just give them a quick reheat before serving, or eat them cold straight from the fridge — both work. If you’re meal prepping, you might want to hold the seasoning and add it fresh before serving.
Can I use fresh soybeans instead of frozen?
Fresh shelled soybeans work fine with the same method — boil in salted water for 5 minutes, drain, season. Fresh beans can be slightly harder to find depending on the season. Frozen organic mukimame is consistently available and delivers the same taste and texture, so it’s the more practical choice for most home cooks.
Make This Recipe Tonight
Honestly, this is the kind of recipe I keep coming back to because it’s just so fast and genuinely satisfying. Ten minutes, four ingredients, and you’ve got something that holds its own as a snack or a side.
If you make it, I seriously want to know how it turned out — drop a comment below and tell me what seasoning you used. And save this to Pinterest so you’ve got it when a snack craving hits.
Looking for something a little sweeter to round out your meal? These no-bake berry cheesecake cups are a perfect, easy finish.
Easy mukimame recipe with tender shelled soybeans boiled in salted water and tossed with savory seasoned salt — ready in 10 minutes. Save this for your next quick snack or weeknight side dish.