Lemon Lush Dessert Bars
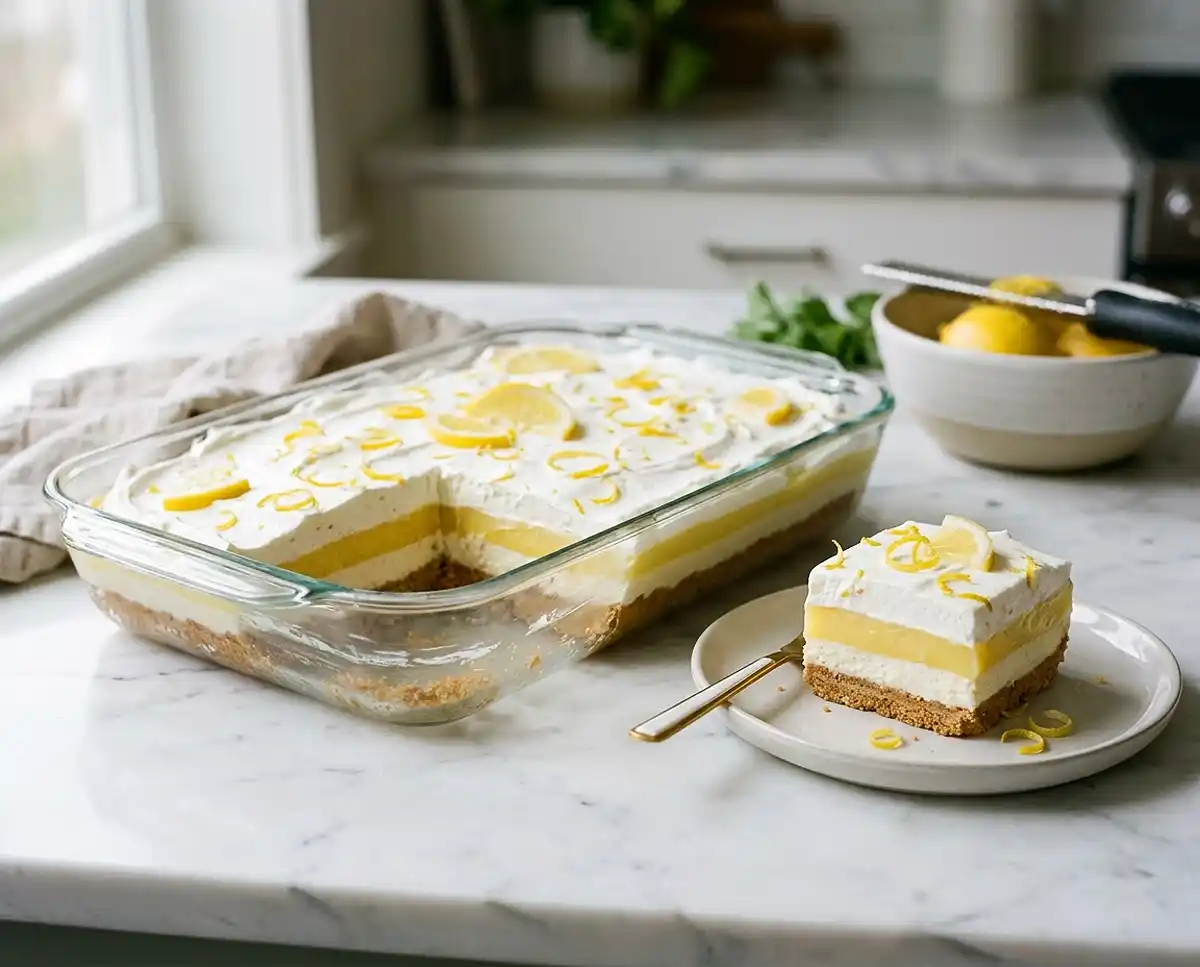
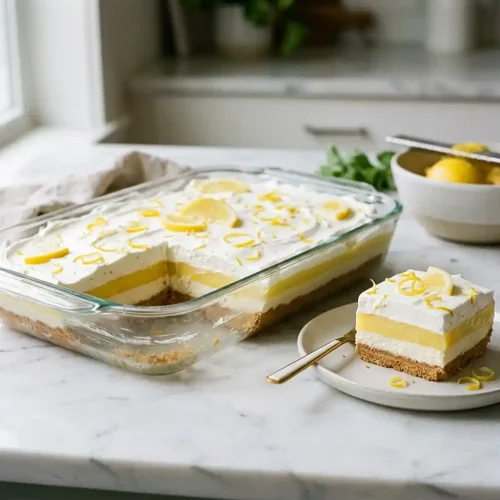
Lemon Lush Dessert Bars are a creamy, layered no-bake dessert made with a buttery graham cracker crust, fluffy cream cheese filling, tangy lemon pudding, and a cloud of whipped topping. This recipe serves 12 to 16 and is perfect for potlucks, summer gatherings, or when you need a crowd-pleasing cold dessert with almost no effort.
I’ve made these lemon lush dessert bars more times than I can count, and the one thing I wish someone had told me earlier: chill the crust before adding any layers. It makes a real difference in how cleanly everything sets.
These bars have that chilled, creamy, straight-from-grandma’s-table kind of appeal that somehow never goes out of style. If this one’s calling your name, don’t miss more retro summer dessert ideas.
Table of Contents
Why You’ll Love These Lemon Lush Dessert Bars
These bars are creamy, tangy, and cold — the kind of dessert you can’t stop eating. The texture contrast between the crunchy crust and silky layers is genuinely satisfying.
They’re a no-bake lemon dessert, which means no oven, no stress. You can prep them the night before and forget about them until it’s time to serve.
They feed a crowd and look impressive without requiring any special skills. Even first-timers get great results on the first try.
What Ingredients Do You Need for Lemon Lush Dessert Bars?
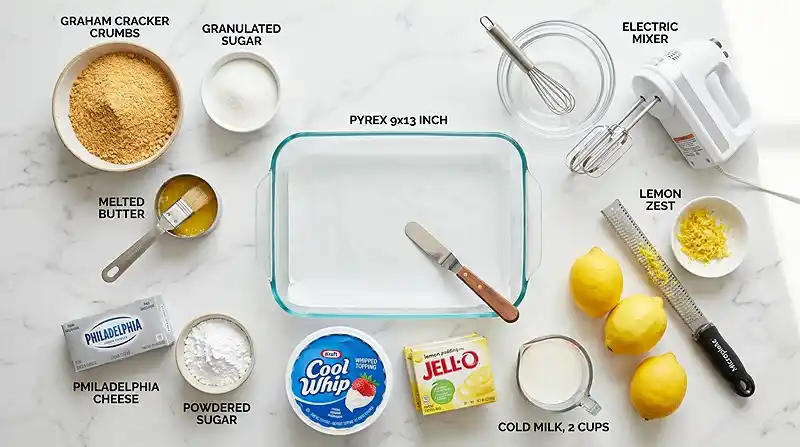
| Ingredient Group | Ingredient | Amount | Notes |
|---|---|---|---|
| Crust | Graham cracker crumbs | 1 1/2 cups | Fine crumbs work best |
| Crust | Unsalted butter, melted | 1/2 cup | Unsalted for balance |
| Crust | Granulated sugar | 1/4 cup | Adds light sweetness |
| Cream Cheese Layer | Cream cheese, softened | 8 oz (1 package) | Must be fully softened |
| Cream Cheese Layer | Powdered sugar | 1 cup | Sift to avoid lumps |
| Cream Cheese Layer | Whipped topping (Cool Whip), thawed | 8 oz (1 container) | Fold in gently |
| Lemon Pudding Layer | Instant lemon pudding mix | 2 packages (3.4 oz each) | Instant, not cook-and-serve |
| Lemon Pudding Layer | Cold milk | 3 cups | Must be cold for thickening |
| Topping | Whipped topping (Cool Whip), thawed | 8 oz (1 container) | Spread or swirl on top |
| Garnish | Lemon zest | To taste | Optional, adds color |
The cream cheese is the backbone of the easy lemon dessert — make sure it’s fully softened or you’ll get lumps that won’t blend out. Room temperature for at least an hour is ideal.
Instant pudding mix is non-negotiable here. Cook-and-serve won’t set the same way in this no-bake lemon bars format, and the texture will be off. Stick with instant.
How to Make Lemon Lush Dessert Bars Step by Step
Make the Crust
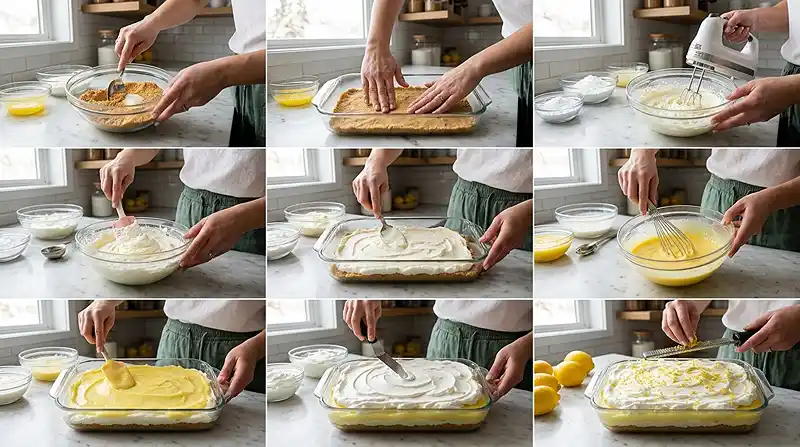
- Combine 1 1/2 cups graham cracker crumbs, 1/2 cup melted butter, and 1/4 cup granulated sugar in a medium bowl. Mix until all crumbs are coated.
- Press the mixture firmly and evenly into the bottom of a 9×13 inch baking dish.
- Refrigerate the crust for at least 30 minutes to firm up before adding any layers.
Pro Tip: Use the flat bottom of a measuring cup to press the crust. It compacts more evenly than your fingers and prevents crumbly squares later.
Build the Cream Cheese Layer
- Beat the softened cream cheese and 1 cup powdered sugar with an electric mixer until completely smooth and creamy.
- Gently fold in one 8 oz container of thawed whipped topping until no white streaks remain.
- Spread this mixture evenly over the chilled crust using a spatula.
Pro Tip: The key to a smooth cream cheese layer is making sure there are zero lumps before you fold in the whipped topping. Beat it longer than you think you need to.
Add the Lemon Pudding Layer
- Whisk together both packages of instant lemon pudding mix and 3 cups cold milk in a separate bowl for 2 to 3 minutes, until the mixture thickens.
- Carefully spread the lemon pudding over the cream cheese layer, working gently to avoid mixing the layers.
Finish and Chill
- Spread the second 8 oz container of thawed whipped topping over the lemon pudding layer. Use an offset spatula for a smooth finish, or create swirls for a decorative look.
- Cover the dish and refrigerate for at least 4 hours, or overnight, to let all layers set completely.
- Just before serving, garnish with lemon zest if desired. Cut into squares and serve cold.
Pro Tip: For the cleanest cuts, run a sharp knife under hot water and wipe it dry between each slice. The layers stay neat and your squares look bakery-perfect.
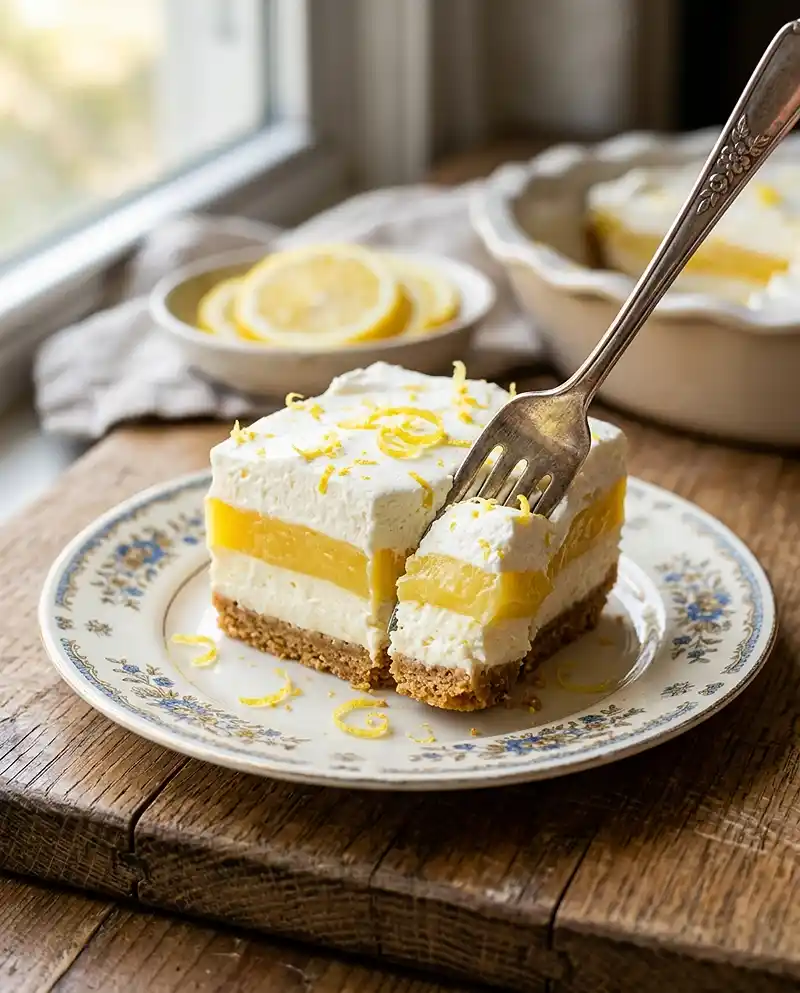
Expert Tips for Perfect Lemon Lush Dessert Bars
Pro Tips for Success
The most common mistake is skipping the crust chill time. Thirty minutes is the minimum — instead, try chilling it while you prep the other layers. It firms up beautifully and holds everything together.
For best results, spread each layer slowly and patiently. Rushing causes the layers to drag into each other, and you lose those distinct creamy lemon squares that make this dessert so visual.
Lemon lush dessert bars work best when the cream cheese is genuinely room temperature, not just slightly less cold. Cold cream cheese creates lumps that don’t smooth out, no matter how long you beat it.
The key to a bright, tangy flavor is using cold milk with the pudding mix. Warm milk slows the thickening and dulls the lemon taste. Pull the milk straight from the fridge right before mixing.
Real talk: overnight chilling is always better than 4 hours. The layers meld together and the texture goes from good to genuinely impressive. If you can make this the night before, do it.
Delicious Variations
No-Bake Lemon Bars, Lighter Version: Swap regular cream cheese for reduced-fat cream cheese and use a light whipped topping. The texture is slightly less rich but still creamy and satisfying.
Gluten-Free Version: Replace graham cracker crumbs with certified gluten-free graham-style crumbs or crushed gluten-free vanilla cookies. Every other ingredient in this recipe is naturally gluten-free.
Alternative Citrus Version: Swap the instant lemon pudding for lime pudding to make a creamy lime layered dessert. You can also try a mix of lemon and vanilla pudding for a mellower flavor. Check out our no-bake key lime pie jars for more citrus inspiration.
Troubleshooting Common Problems
Problem: The cream cheese layer has visible lumps.
Solution: The cream cheese wasn’t soft enough. Let it sit at room temperature for at least an hour next time. If lumps appear, keep beating — they sometimes smooth out with extra mixing time.
Problem: The layers are blending together when you spread them.
Solution: Each layer needs to be set before you add the next. Make sure the crust is fully chilled and the cream cheese layer is firm before spooning on the pudding.
Problem: The pudding layer isn’t thickening.
Solution: This happens when the milk isn’t cold enough. Use milk straight from the refrigerator and whisk for the full 2 to 3 minutes without stopping.
How to Store and Reheat Lemon Lush Dessert Bars
| Storage Method | Duration | Best Practice |
|---|---|---|
| Room Temperature | 2 hours maximum | Keep covered; don’t leave out longer |
| Refrigerator | Up to 4 days | Cover tightly with plastic wrap |
| Freezer | Up to 1 month | Wrap individual squares in plastic, then foil |
These bars don’t need reheating — they’re meant to be served cold. Straight from the fridge, the layers are firm, the whipped topping is fluffy, and the lemon flavor is crisp and bright.
If you freeze them, thaw individual squares in the refrigerator overnight. The texture stays intact as long as you thaw slowly. Avoid thawing at room temperature or the whipped topping gets watery.
Leftover bars can be crumbled over vanilla ice cream for a quick lemon crumble sundae. They also work as a topping for plain yogurt — the graham cracker bits add great crunch.
FAQs About Lemon Lush Dessert Bars
Can I make lemon lush dessert bars the night before?
Yes, and honestly, you should. Overnight chilling gives all four layers time to fully set and meld together. The texture the next day is noticeably better than at the 4-hour mark. Just cover the dish tightly with plastic wrap before refrigerating.
Can I use homemade whipped cream instead of Cool Whip?
You can, but the results are less stable. Cool Whip holds its structure longer in the refrigerator, which keeps the layers distinct. Homemade whipped cream tends to deflate after a day. If you use it, plan to serve the bars within 24 hours for best texture.
What size pan do I need for this recipe?
This recipe is sized for a standard 9×13 inch baking dish. That size fits all the layers comfortably and makes 12 to 16 squares depending on how you cut them. An 8×8 pan is too small and will cause overflow between layers.
Can I freeze lemon lush dessert bars?
Yes. Wrap individual squares in plastic wrap, then in foil, and freeze for up to one month. Thaw overnight in the refrigerator before serving. Freezing slightly changes the texture of the whipped topping, but the flavor stays bright and lemony.
Why did my pudding layer turn out runny?
The most likely cause is warm milk. Instant lemon pudding needs cold milk to activate the thickening agents properly. Use milk straight from the refrigerator and whisk continuously for the full 2 to 3 minutes. If it’s still thin, let it sit for 5 minutes before spreading.
Make These Lemon Lush Dessert Bars This Weekend
Seriously, this is one of those recipes that sounds fancier than it is. Four layers, no oven, and a result that looks like you actually tried. I mean it.
Save this to your Pinterest boards so you can find it when you need a cold, no-stress dessert. If you try it, drop a comment below and let me know how it turned out.
Love layered lemon desserts? Try our no-bake lemon lush cups for individual-sized portions. Or check out our cherry cheesecake fluff if you’re in the mood for something fruity and creamy. And for another citrusy no-bake option, our no-bake key lime cheesecake cups are a total hit.
Lemon lush dessert bars: creamy, tangy, cold layers on a buttery graham cracker crust. No-bake and make-ahead friendly. Save this recipe for your next potluck or summer gathering!
Lemon Lush Dessert Bars
Equipment
- 9×13-inch baking dish
- Electric mixer
- Large mixing bowl
- Medium Mixing Bowl
- Whisk
- Offset Spatula
- Plastic wrap
Ingredients
Crust
- 1 ½ cups Graham cracker crumbs Fine crumbs work best
- ½ cup Unsalted butter, melted
- ¼ cup Granulated sugar
Cream Cheese Layer
- 8 oz Cream cheese, softened Must be fully softened
- 1 cup Powdered sugar Sift to avoid lumps
- 8 oz Whipped topping (Cool Whip), thawed 1 container, fold in gently
Lemon Pudding Layer
- 2 packages (3.4 oz each) Instant lemon pudding mix Must be instant, not cook-and-serve
- 3 cups Cold milk Must be cold for proper thickening
Topping
- 8 oz Whipped topping (Cool Whip), thawed 1 container
Garnish
- Lemon zest Optional
Instructions
- In a medium bowl, combine 1 1/2 cups graham cracker crumbs, 1/2 cup melted butter, and 1/4 cup granulated sugar. Mix until all crumbs are evenly coated.
- Press the mixture firmly and evenly into the bottom of a 9×13 inch baking dish. Use the flat bottom of a measuring cup for an even, compact layer.
- Refrigerate the crust for at least 30 minutes to firm up before adding any layers.
- Beat the softened cream cheese and 1 cup powdered sugar with an electric mixer until completely smooth and creamy, with no lumps remaining.
- Gently fold in one 8 oz container of thawed whipped topping until no white streaks remain.
- Spread the cream cheese mixture evenly over the chilled crust using a spatula.
- In a separate bowl, whisk together both packages of instant lemon pudding mix and 3 cups cold milk for 2 to 3 minutes, until the mixture thickens.
- Carefully spread the lemon pudding over the cream cheese layer, working gently to avoid mixing the two layers together.
- Spread the second 8 oz container of thawed whipped topping over the lemon pudding layer. Use an offset spatula for a smooth finish or create decorative swirls.
- Cover the dish tightly with plastic wrap and refrigerate for at least 4 hours, or preferably overnight, to allow all layers to set completely.
- Before serving, garnish with fresh lemon zest if desired. Cut into squares with a sharp knife and serve cold.