No-Bake Key Lime Pie Jars
These no-bake key lime pie jars are the kind of dessert that gets requested every single summer. Creamy, tangy, and chilled — no oven, no fuss, just pure lime-forward bliss in a little jar.
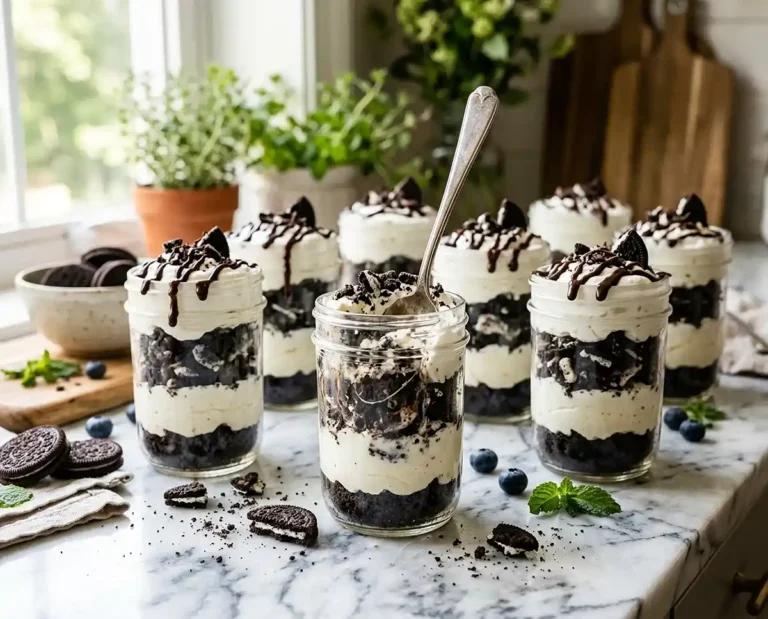
No-bake key lime pie jars are a layered chilled dessert made with a cream cheese and sweetened condensed milk filling, fresh key lime juice and zest, and a graham cracker crust — all built right inside individual serving jars. This recipe serves 8, delivers a silky, tangy filling with a buttery crunch in every bite, and is perfect for summer parties, cookouts, or any warm-weather occasion when you’d rather be outside than standing at the oven.
These key lime pie jars have that bright, creamy, straight-from-the-fridge magic people always wish they’d made sooner for summer weekends. If this one’s already tempting you, don’t miss more no-bake dessert ideas for summer before your next gathering sneaks up on you.
Table of Contents
Why You’ll Love These No-Bake Key Lime Pie Jars
The filling is rich and creamy with a bright, tangy punch from real key lime juice — not the fake stuff. The graham cracker layer adds a satisfying crunch that holds up surprisingly well even after a day in the fridge.
There’s zero baking involved, and each jar is already portioned and ready to grab. They work beautifully as a make-ahead dessert for parties, and the gluten-free graham cracker option means almost anyone can enjoy them.
What Ingredients Do You Need for Key Lime Pie Jars?
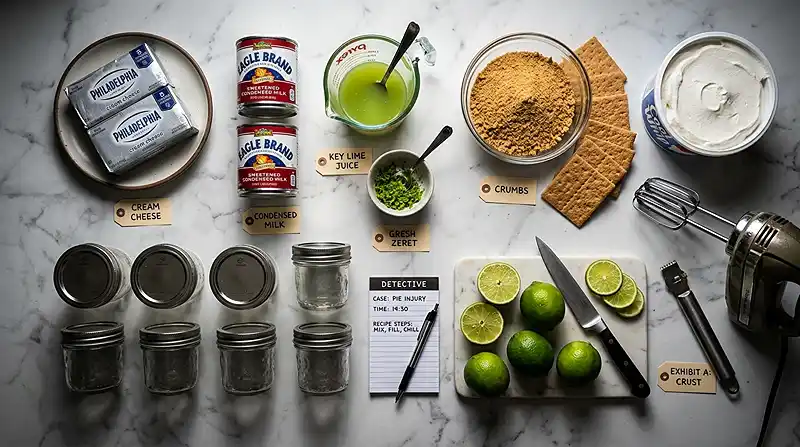
| Ingredient Group | Ingredient | Amount | Notes |
|---|---|---|---|
| Main Filling | Cream cheese, softened | 2 (8 oz) packages | Must be fully softened |
| Main Filling | Sweetened condensed milk | 2 (14 oz) cans | Do not substitute |
| Main Filling | Key lime juice | 3/4 cup | About 7 key limes |
| Main Filling | Lime zest | 2 tablespoons | From your juiced limes |
| Crust Layer | Graham cracker crumbs | About 2 cups | Gluten-free works great |
| Garnish | Whipped topping | As needed | For serving |
| Garnish | Lime slices | 2–3 limes | For topping each jar |
Real key lime juice is what makes these jars taste like the real thing. Persian limes work in a pinch, but key limes have a floral, slightly more complex tartness that you’ll notice immediately.
For the graham cracker crumbs, you can pulse whole crackers in a food processor or just buy the pre-crushed crumbs — both work. We use gluten-free graham crackers every time, and honestly nobody ever notices the difference.
How to Make Key Lime Pie Jars Step by Step
Prep Your Jars
- Clean your 8 jars and set them out on the counter, ready to fill.
Make the Filling
- In a large mixing bowl, beat the softened cream cheese with an electric mixer until completely smooth.
- Beat in both cans of sweetened condensed milk until fully combined.
- Add the key lime juice and zest, then beat until smooth and well incorporated.
Pro Tip: The key to a lump-free filling is fully softened cream cheese — cold cream cheese will leave visible lumps that no amount of mixing will fix.
Layer the Jars
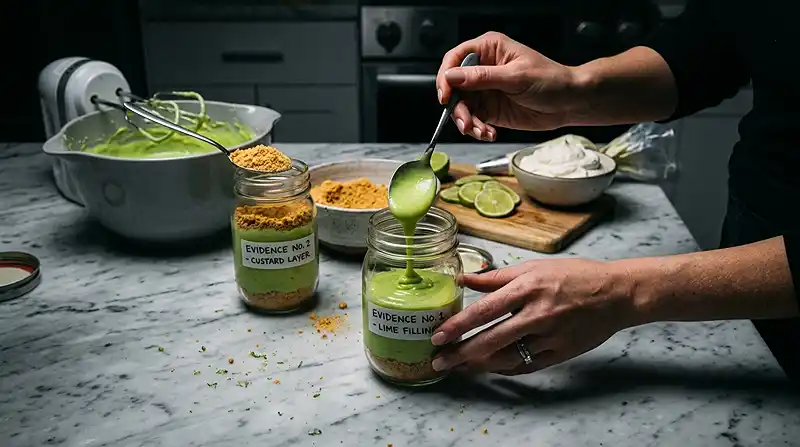
- Pour a layer of the key lime filling into the bottom of each jar.
- Add a layer of graham cracker crumbs on top of the filling.
- Repeat both layers — filling first, then crumbs — one more time.
Pro Tip: For best results, divide the filling evenly across all 8 jars before layering so each person gets the same ratio of filling to crust.
Chill and Serve
- If not serving immediately, screw the lids back on each jar and refrigerate until ready.
- When ready to serve, add a dollop of whipped topping and a lime slice to each jar, then serve cold.
Pro Tip: These jars taste noticeably better after at least 2 hours of chilling — the filling firms up and the graham cracker layer softens just slightly into the cream, making every bite more cohesive.
Expert Tips for Perfect No-Bake Key Lime Pie Jars
Pro Tips for Success
The key to maximum tang is using fresh key lime juice, not bottled. Bottled juice works in a real pinch, but fresh juice has a brightness that bottled versions just can’t match. It took me squeezing about 7 key limes to hit that 3/4 cup — small fruit, so plan for more than you think you need.
The most common mistake is rushing the cream cheese softening step. Pull it from the fridge at least an hour before you start. Cold cream cheese beats into a grainy filling that stays grainy no matter how long you mix.
For the best texture contrast, add your whipped topping and lime garnish right before serving — not ahead of time. The whipped topping holds its shape much better that way.
These no-bake desserts are excellent for meal prep. Make the jars up to 24 hours ahead and keep them lidded in the fridge. The filling actually sets up firmer and tastier overnight. A true make-ahead win.
The most common question I get: can you skip the zest? Technically yes, but you’ll lose about half the lime flavor. Zest carries the aromatic oils that make these taste like a real key lime pie, not just a lime-flavored cheesecake.
Delicious Variations
Gluten-Free Version: Swap regular graham crackers for gluten-free graham crackers — this is actually what we do every time. The texture is nearly identical and nobody at the table will ever know.
Healthy Version: Use light cream cheese and light sweetened condensed milk. The filling will be slightly less rich but still tangy and satisfying, and it cuts the calorie count noticeably for a lighter summer dessert.
Tropical Variation: Add 2 tablespoons of coconut cream to the filling and top with toasted coconut flakes alongside the whipped topping. It leans into that warm-weather vibe and makes these feel a little more special for a backyard party.
Troubleshooting Common Problems
Problem: Filling is lumpy and won’t smooth out.
Solution: The cream cheese wasn’t soft enough before mixing. There’s no way to fix a lumpy filling once it’s made — next time, leave the cream cheese out for a full hour at room temperature before starting.
Problem: Graham cracker layer got too soggy overnight.
Solution: This can happen if the jars are stored for more than 24 hours. The crumbs are meant to soften slightly, but for a crunchier layer, add the graham cracker crumbs right before serving instead of layering ahead of time.
Problem: Filling isn’t setting up firm enough.
Solution: Give the jars more chill time — a minimum of 2 hours, ideally overnight. The filling firms up significantly as it chills and the lime juice reacts with the dairy proteins.
How to Store and Reheat No-Bake Key Lime Pie Jars
| Storage Method | Duration | Best Practice |
|---|---|---|
| Room Temperature | Up to 2 hours | Keep lids on; serve before filling softens |
| Refrigerator | Up to 3 days | Store with lids on; add toppings at serving time |
| Freezer | Up to 1 month | Use freezer-safe jars; thaw overnight in fridge |
These jars don’t get reheated — they’re served cold straight from the fridge. After refrigerating, just pull them out, add the whipped topping and lime garnish, and serve immediately. The filling will be firm, cold, and silky.
For leftovers without the garnish already added, simply re-lid and return to the fridge. They keep their texture well for up to 3 days. Beyond that, the graham cracker layer gets noticeably softer, which isn’t a dealbreaker but the texture is best within the first day or two.
If you’ve got extra filling but no more jar space, it works beautifully spread over a slice of pound cake or spooned over fresh strawberries as a quick chilled dessert idea that takes about 30 seconds to assemble. Don’t let any of that lime filling go to waste.
FAQs About No-Bake Key Lime Pie Jars
Can I make no-bake key lime pie jars ahead of time?
Yes — these are one of the best easy make-ahead sweets around. You can fully assemble the jars (filling and graham cracker layers) up to 24 hours in advance. Store them lidded in the refrigerator and add the whipped topping and lime garnish right before serving.
Making them ahead actually improves the texture — the filling firms up overnight and the flavors deepen. It’s genuinely better the next day.
Can I use regular limes instead of key limes?
You can. Regular (Persian) limes will give you a similar tart flavor, but key limes have a slightly more floral, complex tang that’s the signature of an authentic key lime pie. If you can find key limes, use them. If not, Persian lime juice is a perfectly reasonable substitute — just use the same 3/4 cup measurement.
Do I need mason jars specifically, or can I use other containers?
Any individual serving container works — small glass cups, ramekins, plastic cups, even disposable party cups. Mason jars are popular because the lid makes them easy to store and transport, which is helpful for parties and cookouts. But there’s nothing magic about the jar itself.
Can these be frozen?
Yes, these work as frozen key lime pie cups. Use freezer-safe jars and leave about half an inch of headspace since the filling expands slightly when frozen. To serve, thaw overnight in the refrigerator. Add fresh whipped topping and lime garnish after thawing, not before freezing.
Why is my filling not thick enough?
If the filling seems too loose, it usually needs more chill time. The lime juice reacts with the dairy proteins as the jars chill, which is what firms the filling up. Give them at least 2 hours in the refrigerator — ideally longer. The filling won’t set the same way at room temperature, so don’t try to serve them freshly made.
Ready to Make These This Weekend?
Seriously, these are the easiest thing I make all summer. No oven, no timing stress, and every single jar comes out looking like you put in way more effort than you did.
Save this to your Pinterest boards so you can find it again when the weather heats up — you’ll want it. And if you make a batch, drop a comment below and tell me how it went. I read every single one.
Looking for more no-bake desserts and warm weather treats? Try these no-bake berry cheesecake cups for another easy chilled dessert, or these protein popsicles when you want something frozen and refreshing. And if you need a savory option to round out a summer spread, this slow cooker lemon herb chicken and rice pairs beautifully.
No-bake key lime pie jars — creamy, tangy, perfectly chilled, and endlessly make-ahead friendly. Save this recipe now and make it before summer ends. You won’t regret it.
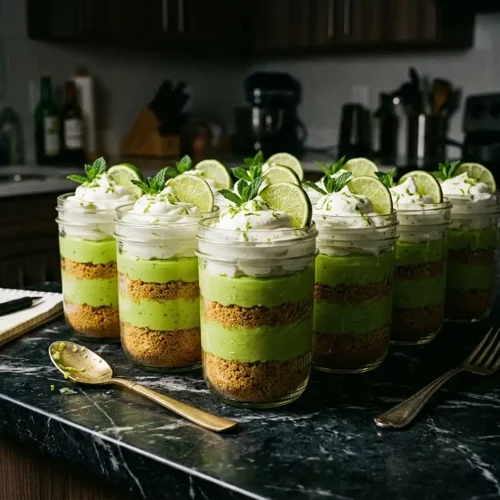
No-Bake Key Lime Pie Jars
Equipment
- Electric mixer
- Large mixing bowl
- 8 mason jars with lids
- Citrus juicer
- Zester or Microplane
Ingredients
Main Filling
- 2 8 oz packages Cream cheese, softened Must be fully room temperature
- 2 14 oz cans Sweetened condensed milk Do not substitute
- ¾ cup Key lime juice About 7 key limes
- 2 tablespoons Lime zest From your juiced limes
Crust Layer
- 2 cups Graham cracker crumbs Gluten-free works great
Garnish
- Whipped topping To taste, for serving
- 2-3 Limes, sliced For topping each jar
Instructions
- Clean your 8 jars and set them out on the counter, ready to fill.
- In a large mixing bowl, beat the softened cream cheese with an electric mixer until completely smooth.
- Beat in both cans of sweetened condensed milk until fully combined.
- Add the key lime juice and zest, then beat until smooth and well incorporated.
- Pour a layer of the key lime filling into the bottom of each jar.
- Add a layer of graham cracker crumbs on top of the filling.
- Repeat both layers — filling first, then crumbs — one more time.
- If not serving immediately, screw the lids back on each jar and refrigerate for at least 2 hours, or until ready to serve.
- When ready to serve, add a dollop of whipped topping and a lime slice to each jar, then serve cold.